주요 콘텐츠로 건너뛰기

Sony Xperia Z2 Logic Board Replacement

필요한 것

동영상 개요

  1. Sony Xperia Z2 Logic Board Replacement, Rear / Battery Cover: 1 단계, 이미지 1/3 Sony Xperia Z2 Logic Board Replacement, Rear / Battery Cover: 1 단계, 이미지 2/3 Sony Xperia Z2 Logic Board Replacement, Rear / Battery Cover: 1 단계, 이미지 3/3
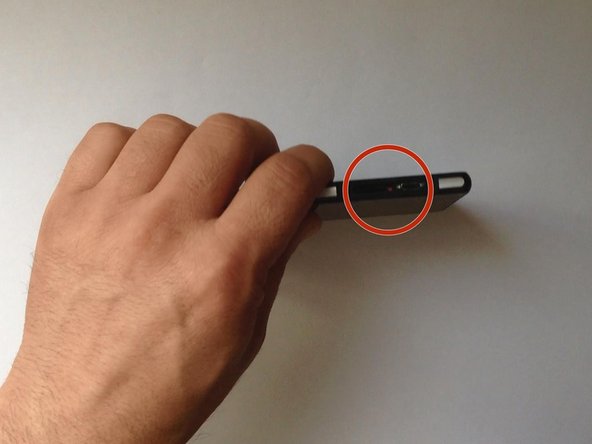
    • Switch off the phone.

    • If you can't switch it off, you can use the OFF button near to the SIM card Tray.

    • Warm the Back Cover. You can use a hairdryer.

    • Be careful, the Back Cover is plastic.

  2. Sony Xperia Z2 Logic Board Replacement: 2 단계, 이미지 1/3 Sony Xperia Z2 Logic Board Replacement: 2 단계, 이미지 2/3 Sony Xperia Z2 Logic Board Replacement: 2 단계, 이미지 3/3
    • Use a small suction cup and plastic tools for separating the Rear panel.

    • There is Adhesive tape on the edges of the phone and some between the Battery and the Back Cover, as well. I found a small tab to pull just inside the top of the cover that removed the adhesive and released the back panel from the battery. Its that same style adhesive strip as used in the Iphone 5/5c/5s.

  3. Sony Xperia Z2 Logic Board Replacement: 3 단계, 이미지 1/2 Sony Xperia Z2 Logic Board Replacement: 3 단계, 이미지 2/2
    • Before installing the new cover, you must clean the phone from the old adhesive tape and install a new one (if your spare part has come without double sided adhesive tape).

  4. Sony Xperia Z2 Logic Board Replacement, Battery: 4 단계, 이미지 1/3 Sony Xperia Z2 Logic Board Replacement, Battery: 4 단계, 이미지 2/3 Sony Xperia Z2 Logic Board Replacement, Battery: 4 단계, 이미지 3/3
  5. Sony Xperia Z2 Logic Board Replacement, Wi-Fi Antenna: 5 단계, 이미지 1/3 Sony Xperia Z2 Logic Board Replacement, Wi-Fi Antenna: 5 단계, 이미지 2/3 Sony Xperia Z2 Logic Board Replacement, Wi-Fi Antenna: 5 단계, 이미지 3/3
    • Unscrew the screw and remove the Wi-Fi Antenna.

  6. Sony Xperia Z2 Logic Board Replacement, Logic Board: 6 단계, 이미지 1/2 Sony Xperia Z2 Logic Board Replacement, Logic Board: 6 단계, 이미지 2/2
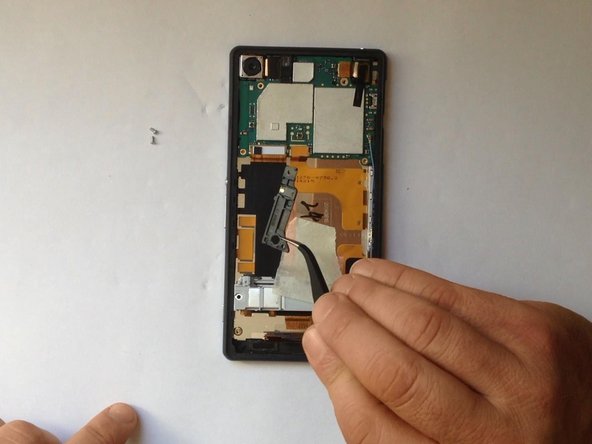
    • Disconnect one by one:

    • Magnetic Charging Dock Flex Cable

    • Volume / Power Button and Microphone Flex Cable

    • Main Camera

    • Audio Jack and Light Sensor Flex cable

    • Coaxial Antenna Cable

  7. Sony Xperia Z2 Logic Board Replacement: 7 단계, 이미지 1/3 Sony Xperia Z2 Logic Board Replacement: 7 단계, 이미지 2/3 Sony Xperia Z2 Logic Board Replacement: 7 단계, 이미지 3/3
결론

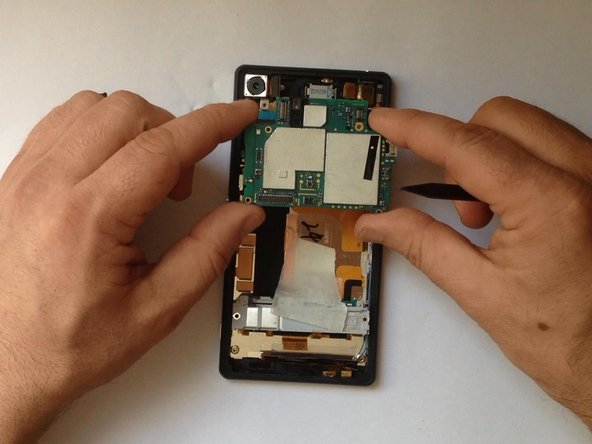
To reassemble your device, follow these instructions in reverse order.

다른 19명이 해당 안내서를 완성하였습니다.

ZFix

회원 가입일: 12/09/13

191,182 평판

안내서 330개 작성하였습니다

Master Techs Master Techs 회원

Community

322 회원들

안내서 2,519개 작성하였습니다

댓글 3개

Hi

Do anyone knows where I can buy a logic board for Xperia Z2?

Johannes Stockinger - 답글

https://www.ebay.com/sch/i.html?_from=R4...

or I bought there

https://ru.aliexpress.com/wholesale?catI...

be careful to find cheaper price and for your model D6503 or D6563…

Alexander -

Are you sure Phillips #00 is the correct size of screwdriver? I had difficulty getting one of the screws to turn (the screwdriver kept slipping), so I tried the other sizes in my iOpener Kit and found that the PH#000 seemed to fit them better, and that screw came straight out with it.

Edward Millen - 답글

댓글 쓰기

조회 통계:

24 시간 전: 1

7일 전: 5

30일 전: 16

전체 시간: 18,522