주요 콘텐츠로 건너뛰기

Sony Handycam HDR­-CX220 Display Screen Replacement

필요한 것

  1. Sony Handycam HDR­-CX220 Display Screen Replacement, Battery: 1 단계, 이미지 1/1
    • Push in the battery indicator.

  2. Sony Handycam HDR­-CX220 Display Screen Replacement: 2 단계, 이미지 1/1
    • Slide the battery out of the slot.

    • To put the battery back in, line up the battery's metal part with the camera's and slide it in.

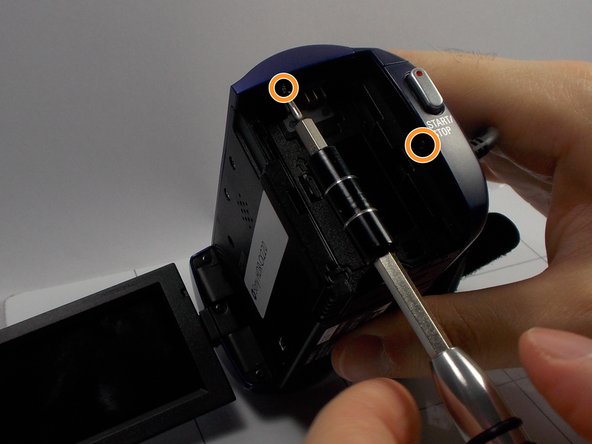
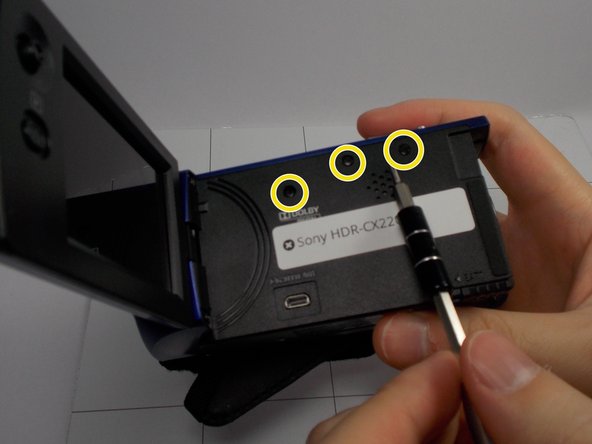
  3. Sony Handycam HDR­-CX220 Display Screen Replacement, Camera's Body: 3 단계, 이미지 1/3 Sony Handycam HDR­-CX220 Display Screen Replacement, Camera's Body: 3 단계, 이미지 2/3 Sony Handycam HDR­-CX220 Display Screen Replacement, Camera's Body: 3 단계, 이미지 3/3
    • Use the Phillips #0 screwdriver to remove the two 5mm screws.

    • Use the Phillips #0 screwdriver to remove the two 5mm screws.

    • Use the Phillips #0 screwdriver to remove the three 5mm screws.

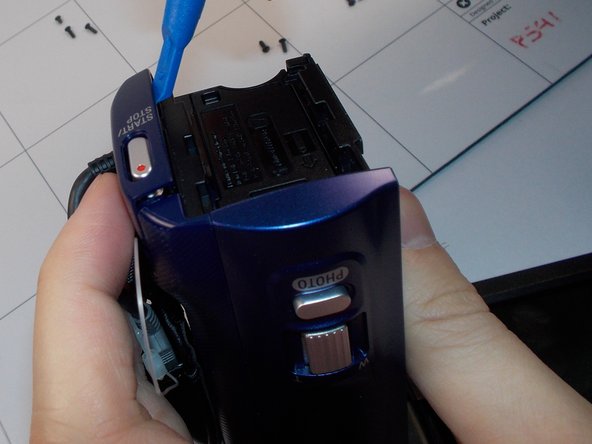
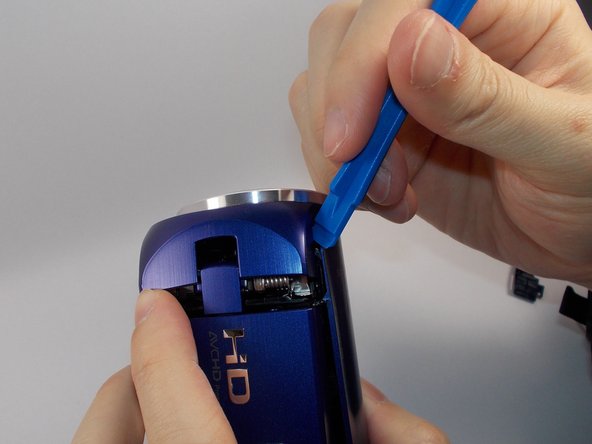
  4. Sony Handycam HDR­-CX220 Display Screen Replacement: 4 단계, 이미지 1/3 Sony Handycam HDR­-CX220 Display Screen Replacement: 4 단계, 이미지 2/3 Sony Handycam HDR­-CX220 Display Screen Replacement: 4 단계, 이미지 3/3
    • Use the plastic opening tool to loosen the plastic case of the camcorder.

  5. Sony Handycam HDR­-CX220 Display Screen Replacement: 5 단계, 이미지 1/1
    • Use your hands to remove the plastic case.

    • Gently pull on the case not to damage anything internally.

  6. Sony Handycam HDR­-CX220 Display Screen Replacement, Display Screen: 6 단계, 이미지 1/2 Sony Handycam HDR­-CX220 Display Screen Replacement, Display Screen: 6 단계, 이미지 2/2
    • Use the Phillips #0 screwdriver to remover the two (5mm) screws on the outer part and one (3mm) in the middle.

    • In the second image, there is a second screw on the opposite side of the screen hinge. This screw is not shown, but must also be removed.

  7. Sony Handycam HDR­-CX220 Display Screen Replacement: 7 단계, 이미지 1/1
    • Use the plastic opening tool to remove the plastic case protecting the screen

    • Pull it gently not to damage anything under the case

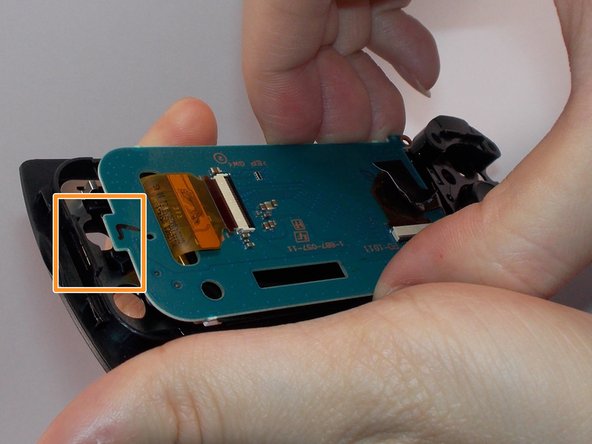
  8. Sony Handycam HDR­-CX220 Display Screen Replacement: 8 단계, 이미지 1/2 Sony Handycam HDR­-CX220 Display Screen Replacement: 8 단계, 이미지 2/2
    • Use the Phillips #0 screwdriver to remove the 2 screws shown

    • Use your hands to carefully unhook the screen from the highlighted hook

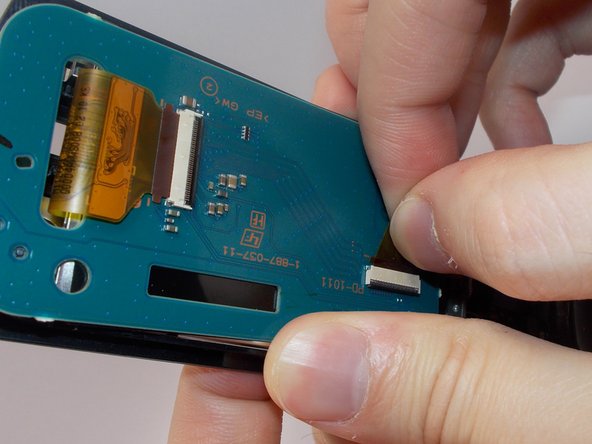
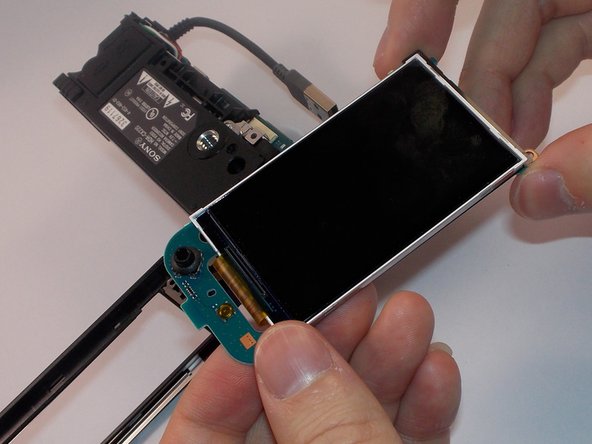
  9. Sony Handycam HDR­-CX220 Display Screen Replacement: 9 단계, 이미지 1/3 Sony Handycam HDR­-CX220 Display Screen Replacement: 9 단계, 이미지 2/3 Sony Handycam HDR­-CX220 Display Screen Replacement: 9 단계, 이미지 3/3
    • Use your hands to carefully remove the tape

    • After removing the tape, pull on the wire disconnecting it from the screen.

결론

To reassemble your device, follow these instructions in reverse order.

다른 4명이 해당 안내서를 완성하였습니다.

Keven

회원 가입일: 03/11/16

811 평판

안내서 6개 작성하였습니다

UMass Dartmouth, Team 8-5, Botvin Spring 2016 UMass Dartmouth, Team 8-5, Botvin Spring 2016 회원

UMASSD-BOTVIN-S16S8G5

3 회원들

안내서 12개 작성하였습니다

댓글 3개

How do you mount hdr cx220 lcd cable flat? can you help me?

Rafael Oliveira - 답글

gjhgvnvyh n hygfv

ANM WORLD - 답글

We have a camera 220. Whose dipstick display strip has deteriorated again. Where can I find this strip? Video is good information so that's why

ANM WORLD - 답글

댓글 쓰기

조회 통계:

24 시간 전: 2

7일 전: 4

30일 전: 22

전체 시간: 2,476