소개
수리 애호가에게 마모된 나사들은 악몽과도 같습니다. 아무리 노력해도 어떤 나사는 절대 풀 수 없을 것만 같이 전혀 꿈쩍도 하지 않습니다. 이때, 좌절감이 들고 어느 순간에 나사의 "+" 모양이 "O" 모양으로 바뀝니다. 절대로 두려워하지 마세요; 우리가 돕겠습니다. 이 안내서는 마모된 나사 머리에 작은 틈을 만들어서 일자 스크루드라이버로 푸는 것이 가능하게 하는 방법을 안내합니다.
기술:
회전 도구를 사용할 때 파편이나 불꽃으로 인한 부상을 방지하기 위해서 보안경을 항상 착용하세요.
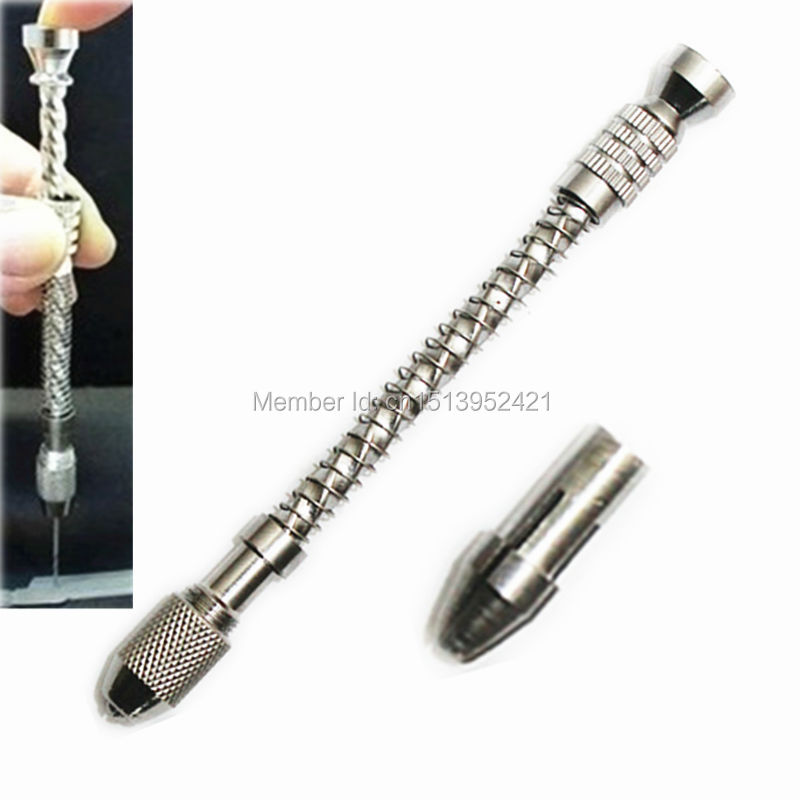
필요한 것
동영상 개요
-
-
마모된 나사는 더 이상 스크루드라이버로 풀 수가 없습니다. 중장비를 사용하기 전에 다음 방법들을 시도해 보세요:
-
다른 드라이버를 사용해보세요. 먼저 머리 크기가 약간 더 작거나 큰 일자 드라이버를 사용하여 마모된 나사 홈에 넣고 돌릴 수 있는지 확인하세요.
-
이 방법들 중 하나라도 효과가 있다면 축하합니다! 나사가 풀렸습니다.
-
-
-
마모된 나사 위에 고무줄을 얹으세요.
-
적당한 크기의 드라이버를 나사 머리에 끼우고 돌리세요.
This didn’t work since I used a small rubber band. I’m trying to remove the right screw from the optical drive. It’s already stripped and I’m planning on using the super glue which I’m deeply unsure of doing. I was thinking about using the #00 Philip screwdriver to add the super glue on. And I’m not sure if that worked for anyone especially if it didn’t snapped off. Any answers?
Instead of a rubber band I used a thin piece of fabric/soft cloth and this worked well. I’ve tried the rubber band in the past with no luck but fabric worked for me on a stripped #00 phillips
thanks for the tip, i was really struggling here
Not tried it, but, I saw a "hack" with super glue and baking powder...
Fill the screw head with baking powder, add some super glue gently insert correct size screwdriver wait for glue to set and apparently it grips the screw to remove it, obviously care is needed to prevent the glue, powder spreading and damaging surrounding areas...
-
-
-
나사 머리에 접근이 가능하다면 나사 추출용 펜치를 사용해 보세요. 나사 머리를 잘 잡을 수 있다면 펜치를 돌리세요. 이때, 나사는 펜치와 함께 돌아야 합니다!
-
나사가 약간 풀려 튀어나오게 되면 드라이버를 사용하여 나머지 부분을 풀 수 있습니다.
You can make your own screw extracting pliers using a file and old pair of regular pliers.
-
-
-
-
나사가 아직도 풀리지 않습니까? 나사 상단에 초강력 접착제를 약간 바르세요.
-
드라이버를 나사 머리에 끼우고 접착제가 마를 때까지 기다리세요.
-
드라이버를 세게 잡고 아래 방향으로 힘을 주어 강하게 누르며 돌려서 나사를 풀어주세요.
Also might suggest applying the tiny ammount of super glue to the tool tip not the screw. If you accidently squeeze out too much the overflow can be cleaned off the tool and the glue reapplied much easier than it can be removed from the screw and the surrounding areas of the device. Alternately the surrounding areas can be masked from excess glue with a bit of transparent tape.
James Todd - 답글
How would you remove the screw from the driver?
Please use the suggestions in the previous comments to improve this guide: add gel super glue to tip of driver and give instructions on how to remove screw from driver and clean the tip of driver.
Can we reuse the screw afterwards? I have my macbook pro 2.9 mm T3 Torx and 1.7 mm T3 Torx screws stuck but couldn’t find those screws to buy…
If the screw is stripped, why would you reuse it? You’ll have the same problem when trying to repair the Mac in the future if you need to repair it again. Don’t they have those screws available as a kit (with other screws) on iFixit?
Mac -
Long story short, laptop has been overheating and I thought it was a software issue, for months. I've tried everything. I come home after a stressful week, laptop crashed during a fresh windows reinstall. then I realized it has to be a bad part.
So I open it up and burn my finger on the heatsink. "Eureka!"
Take out heatsink and replace with same part that I already have. 4 screws, "finally a win!" I fixed Apache Helicopters for years, 4 screws, EASY! no prob. the last one strips, I want to burn the continent in my rage. I find this article and see "Try Super glue" chuckle to myself when I noticed my favorite kind of super glue right in front of me. "It must be fate! I'll likely to ruin the laptop, then I can justifiably smash it and get a new one."
Tiny dab of glue on the screw, place in the tiny screw bit and wait till it dries.
After 3 hours of trying not to notice the screw bit standing proudly, I gently yet firmly grasp it and give it a slow turn.
It worked. I cried and called the wife at work
atreestump - 답글
-
-
-
회전 도구에 얇은 절단 디스크를 부착하세요. 자르기를 시작하기 전에 디스크가 잘 고정되어 있는지 확인하세요.
Was going to post the same comment- absolutely agree that you should protect the device from conducting dust- could easily get lodged between IC pins, especially as magentised through grinding and would stick together in a sort of string.
If you're worried about conductive dust, then put the phone on its side and blast it with alcohol and a makeup brush.
You should take the board out of the enclosure before you use a rotary tool on the device.
Mac - 12/16/2020
Great idea, Mac. Unfortunately, I can’t get this %#*@ stripped screw out that’s securing the board to the enclosure.
-
-
-
일자 스크루드라이버를 사용하여 나사를 풀어주세요.
-
드라이버의 크기는 나사의 크기에 따라 달라지지만 홈에 맞는 가장 큰 드라이버를 사용하세요.
One technique that wasn't covered here but has worked wonders for me is to use a small dab of hot glue and hold the bit in it until hardened. The hot glue grabs any small imperfections and of course forms perfectly around the bit. A drop of oil in the treads helps too for tough cases. It works for basically any type of screw (even one you don't have quite the right size bit for). The downside is it's a bit tedious to do if there are many damaged screws. That's when it's time to invest in a proper damaged screw bit like shown here geometry dash 2.2
-


소개 영상에서 마모된 나사를 해결하는 몇 가지 추가 팁을 확인하세요. 언제나 고품질 스크루드라이버 만을 사용하세요. 질 낮은 재료로 만든 스크루드라이버는 나사를 손상시킬 수 있습니다.
소개 영상에서 마모된 나사를 해결하는 몇 가지 추가 팁을 확인하세요. 언제나 고품질 스크루드라이버 만을 사용하세요. 질 낮은 재료로 만든 스크루드라이버는 나사를 손상시킬 수 있습니다.
다른 246명이 해당 안내서를 완성하였습니다.
다음 번역가들에게 특별히 감사 드립니다:
100%


이 번역자 분들은 저희가 세상을 수리하는데 동참해 주시는 분입니다! 기여하시겠습니까?
번역 시작하기 ›

댓글 62개
"To reassemble your device, follow these instructions in reverse order."
Yeah, that makes perfect sense... If you put the saw in reverse it glues all the buts of iron back onto the screw :-)
But other than that, this could be useful in some situations. Be careful,of the iron filings on your electronics!
Haha, good catch! We've fixed the conclusion. Apologies to all who tried so very hard to follow these instructions in reverse.
There's always the ultimate tool if it won't go out, the drill.
Of course you'll have to make new threads if you drill out a screw. However, as a "weapon of last resort", the drill always works.
Thank you for this guide. The Vampliers, however, completely removed the head of my T6 screw. There are two of them holding the display to the top case of my 15'' Macbook Pro. I am on one of the last steps in the Top Case replacement guide.
Can I use a drill if my screw has virtually no head?
Thanks!
A Mac User - 답글
Using the rotary tool will spray metal filings all over the electronic components creating a short. Bad idea.
I agree, to a point.
But listing it as a last resort, for a device that is already broken and cannot be repaired until the stripped screw is removed, does fit this article. Metal shavings aren't making something that is already unusable worse off. Your observation that there are risks is probably something the article should mention though as part of the explanation for why this was listed last.
Thanks for mentioning this! We added a cautionary note to the last step, reminding readers to blow out the device with compressed air before reassembly. That should help reduce the risk from loose metal shavings.
This didn't help at all. In fact rubber band and glue made it worse. I don't want to use a drill. Not when the screw is so tiny. It can create more damage to the system
deberían ponerle un traductor de idioma
Jenny Diaz - 답글
Sí, solo usa el traductor de Google o aprende a hablar inglés
para mas facilidad a los que no sabemos hablar ingles
Jenny Diaz - 답글
google pajina trasnslacion mi amigo
The rubber band trick worked like a charm for me! I couldn't remove a sunken stripped and rounded out philips head from my tail light to change the bulb. I thought I was going to have to go to a shop to get the bulb changed. I tried the rubber band idea with no real expectation of it working and surprisingly it did.
Give it a try and it might just work for you too!
absoluteze - 답글
I would like to try this idea out with trying to take out those tiny screws on my iPhone (don’t know the technical name as I’m tool-challenged). My question is: does the width of the rubbery band matter much here? If so how much? And for those tiny screws what size rubber band should I use?
Came up with a better solution for the first or second try. Personally, I would do this first. The Story: Had a Canon G16 with a stripped screw head. Severely rounded phillips, appeared that wrong size driver was used. I noticed after a bit of inspection that my good screw driver was bottoming out, preventing any contact with any remaining slot. There wasn't much remaining slot at all. I filled off the point of my screw driver just a small amount but that let me "find" the remaining phillips head slots and with some strong pressure was able to turn the screw out. Worked great.
thanks for taking time to post this helpful information!!! thats very nice of you and i appreciate it very much. even if it ends up not working in my situation , which im sure one of these steps will
My screwhead is not stripped, the Screw just spins. What do I do to get it out, can't grab head either
See if you can slide a thin knife blade under the screw head and then carefully try to unscrew the screw (don't apply do much downward pressure here), as you turn the screw lift the knife edge easing out the screw until you can grab it.
Dan -
Hand operated micro drill, using a bit which is the same size as the hole the screw goes through. Just drill until the head of the screw pops off, clean up filings with a magnet. Once you've removed the part you can use pliers to remove the headless screw.
I think you're talking about a jewelers hand drill (or pin vise) like this one: Jewelers Drill
Dan -
This seems to be all regarding electronics. I have two screws that are stripped that hold small brackets on a wall. Previous owner of my home seemed to strip many screws. These screws are phillips and to top it off are not screwed in straight. I am remodeling my kitchen by myself and i am trying to repair all the holes in the wallboard. I would guess grabbing onto them with pliers might be the best idea. Any thoughts?
Deborah
Pliers should work! That's probably what I'd do. If you have trouble, there are screw extracting pliers made just for this purpose.
what if the screw is stripped and inside a whole like a Nintendo 3ds and cant cut it and glue or rubber band didn't work??
exactly the problem i have. I even sent it to Nintendo, they sent it back and said Nope.
joey c -
See Tim Lockwood's comment above. When all else fails, a drill will get the job done. It can be a bit messy, so I usually use it as a last resort.
See the problem is that I'm like poor. And when I say poor I mean broke. I don't have any fancy tools (rotary driver? nope!) and I really just want to take out the battery of my phone before I fix the screen since I'm waaaaayyy too cheap to buy a new phone and I don't want to die. Is there a cheap effective way to remove it (I tried all of the above except super glue, I don't have that either and won't be able to get any) I really don't care if the screw is destroyed since I have a second one anyways. ( I also don't own a drill)
Help?
Thanks for this guide. I didn't have a rubber band so I used some kitchen paper, and it worked. I guess anything that's thin, soft and have a descent amount of friction will work.
Enter the following site:___https://www.skruvat.se/
Use PermaPoxy Kemisk Metall 50 g, Universal to glow a suitable l a r g e r screw - on top of the damaged screw!
Perma Poxy Kemisk Metal. En 2-komponentsmassa med en konsistensliknande modellera. För reparation av gjutjärnsdetaljer, sprickor i motorblock, insug m m.
Lagar aluminium, mässing, järn, stål m.m. Blir hård som stål på 6 0 m i n . Motstår konstant tryck upp till 240 bar = 245 kg/cm2
Tål temp. från -50°C till +150°C.
[Rem. 1 Bar = 1.01972 Kilogram-force/Square Centimeter (kg/cm) Square]
Bo Skeppstedt
Yet one more idea that might work is a trick I sometimes use on larger seized fasteners on cars. Using a very sharply pointed punch (like a sturdy nail which has been sharpened) and a small hammer, make an indentation in the screws head out close to the edge (hold the punch vertical for first few taps) then tilt the punch about 45 degrees and while keeping the point in the indentation tap in the correct direction to unscrew the fastener. Repeated impacts will unscrew the fastener.
James Todd - 답글
Great advice, thank you! :o)
So, you get the screw out, now what? How do you get another screw to hold in a flogged out hole? Does anyone have any ideas?
Cheers
Rohan Ward - 답글
If you don't NEED to put a screw there, don't. However, if the whole thin g you are taking apart will fall apart if you don't than drill a new hole in the same spot to give its shape back
i love the layout of this website. This really helped me take my screw out of my skateboard
十分感谢Ifixit的指南,帮助我把笔记本散热模块上,一颗滑丝的螺丝去了下来。值得注意的是,在切割片的选择上,我更推荐砂轮切割片,而不是金刚石切割片;它不会产生火花,仅是有一些粉末,对主板的损害更小。
a792030492 - 답글
Thank you , this was actually very wise ,well done .
Hi,
on a very small stripped screw (inside a mcbook pro) i tried the rubber band trick and the pliers one, without success. i remembered i bought a normal’ sized screw extracting kit (3 bits, this type: https://fr.aliexpress.com/item/New-4pc-H...) and gave it a try, even though the bit looked huge for the screw.. but it worked perfectly !
allowed me to finish mounting that ssd in place of the dvd drive in the macbook pro mid 2010.
Thank you for this very helpfull post !
How does it work?
Yeah I'm taking apart a circumcision super action controller and somehow one of the screws was stripped in the factory.
What about headless screw?
I tried the rubberband method on a semi-stripped tri-wing screw, not expecting much. Wha’dya know, that did it!
This isn't helpful. If you can't afford a decent screwdriver in the first place chances are you won't have a rotary tool handy? maybe think of something a bit more practical.
How can you not afford a dollar for a screw driver?
Anyways next question, anyone know of a tool that's shaped like a “scapel” and that can grind down to create a star screw driver slot?
I find that this is most practical as it can be attached to your keyring & therefore almost always with you.
Not mentioned, and I read all, instead of the screw extractor pliers, cheap ‘ol me has used a pair of vice grips MANY times. I even got a a set of security screws (the ones that you can only tighten) out this way. They make several different sizes of vice grips.
To prevent problems I suggest only using good high quality screw drivers to begin with, nothing from your local grocery store, Walgreens, cheap discount stores.
If you don’t have rotary tools, a hacksaw still always works.
Oh yeah! These are perfect for removing those extremely annoying security screws or others.
Rather than the super glue (which is essentially plastic) I recommend metal (soldering)
Yeah. With a few bits of solder (and a soldering iron + a iron fork) you can extract 99% of the screws (no one makes aluminum screws)
that’s a good one. I will note that.
The screw that is stripped is in the back of a watch which is slightly sunken and very small. I have tried the rubber band and that did not work. I’m thinking my last resort is the superglue. I would be willing to break the back off and buy a new one if I could figure out how any suggestions.
I would love it if you could leave a comment at my email address pinhigh353@yahoo.com
All suggestions accepted, thank you.
This was real handy for me. Ended up using the super glue method with a home-made prop on my MackBook’s stripped keyboard screws (the 66 tiny ones of course). Took a cycle of about 14 hours for each of the 10 stripped screws, but they’re all out. What a nightmare that was. Rusted and stripped screws are a horrible thing to deal with.
Also if the screw is sticking up part way you can put the head of your drill around the head of the screw and clamp it down like a drill bit and put it on reverse. I just did it and both my screws came right out!
the screw I'm trying to get is in a little hole and I can't get at it with these methods. Any ideas on how to get it out?
Kyle Hoyer - 답글
One of the screws in my Mid 2012 MacBook Pro were stripped, and I used all of these techniques save for the super glue and rotary tool. I did however, use a drill which allowed me to get past the stripped screw. Using a drill is going to be dangerous however, because you could drill through the entire device, damaging it beyond repair. You have to be very careful, and only drill until the head of the screw comes off, then you have to use the pliers to finish removing the screw.
None of these worked for me, with my ps2 slim