주요 콘텐츠로 건너뛰기

1999-2002 Suzuki SV650 Valve Inspection and Adjustment Replacement

필요한 것

  1. 1999-2002 Suzuki SV650 Valve Inspection and Adjustment Replacement, Seat: 1 단계, 이미지 1/2 1999-2002 Suzuki SV650 Valve Inspection and Adjustment Replacement, Seat: 1 단계, 이미지 2/2
    • If you have frame covers below your seat, remove them by removing the 4 mm allen bolts holding them on. Use a 4 mm allen wrench to turn the screws counter-clockwise until they come off.

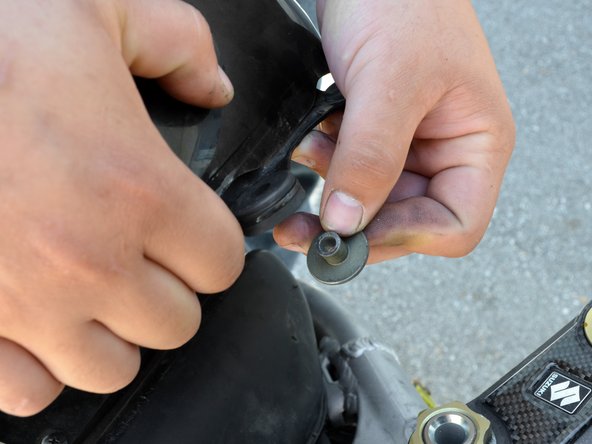
    • Once the frame covers are off, remove the 4 mm allen seat bolts on both sides of the seat. Use the 4 mm allen wrench to turn the screws counter-clockwise until they come off.

    • The bolt in the picture is not stock.

    • Lift the front of the seat, then pull it off the frame.

  2. 1999-2002 Suzuki SV650 Valve Inspection and Adjustment Replacement, Coolant Drain: 2 단계, 이미지 1/2 1999-2002 Suzuki SV650 Valve Inspection and Adjustment Replacement, Coolant Drain: 2 단계, 이미지 2/2
    • Remove the radiator cap security screw with a Phillips #1 screw driver by turning it counter-clockwise.

    • Remove the radiator cap by pressing down on it and turning it counter-clockwise until it can be lifted off the radiator.

    • If your engine has been running recently, be very careful. The system may be pressurized and hot which will cause coolant to flow out through the radiator filler hole when the cap is removed.

  3. 1999-2002 Suzuki SV650 Valve Inspection and Adjustment Replacement: 3 단계, 이미지 1/3 1999-2002 Suzuki SV650 Valve Inspection and Adjustment Replacement: 3 단계, 이미지 2/3 1999-2002 Suzuki SV650 Valve Inspection and Adjustment Replacement: 3 단계, 이미지 3/3
    • Locate the 10 mm hex coolant drain plug. It is on the right engine cover, just below the coolant outlet.

    • Turn the coolant drain plug counter-clockwise with a 10 mm socket wrench or box end wrench until it can be turned freely by hand.

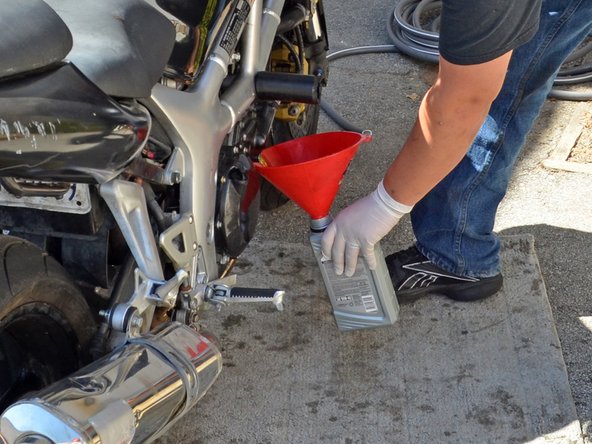
    • Place a container under the drain plug to catch the coolant when it streams out of the coolant drain hole.

    • Coolant capacity is 1.7L, ensure your container can accommodate this.

    • If you are not using a pan style container, it is recommended that you use a funnel to help prevent spills.

  4. 1999-2002 Suzuki SV650 Valve Inspection and Adjustment Replacement: 4 단계, 이미지 1/2 1999-2002 Suzuki SV650 Valve Inspection and Adjustment Replacement: 4 단계, 이미지 2/2
    • Finish removing the drain plug by hand and allow the coolant to drain into the container.

    • Once the draining coolant has slowed to a drip, stand the bike up vertically to allow the last of it to drain.

  5. 1999-2002 Suzuki SV650 Valve Inspection and Adjustment Replacement: 5 단계, 이미지 1/3 1999-2002 Suzuki SV650 Valve Inspection and Adjustment Replacement: 5 단계, 이미지 2/3 1999-2002 Suzuki SV650 Valve Inspection and Adjustment Replacement: 5 단계, 이미지 3/3
    • Put the coolant drain plug back in its hole and turn it clockwise with a socket wrench or box end wrench until it is snug.

    • Do not over-tighten the drain plug or you risk stripping the threads. Suzuki rates the drain plug torque at 9.5 lb-ft (13 N-m).

    • Place the radiator cap back over the filler hole and turn it clockwise until is snug.

    • Placing the radiator cap back on the radiator will prevent debris from entering the radiator while working on the bike.

  6. 1999-2002 Suzuki SV650 Valve Inspection and Adjustment Replacement, Tank: 6 단계, 이미지 1/3 1999-2002 Suzuki SV650 Valve Inspection and Adjustment Replacement, Tank: 6 단계, 이미지 2/3 1999-2002 Suzuki SV650 Valve Inspection and Adjustment Replacement, Tank: 6 단계, 이미지 3/3
    • Turn the two 4mm allen bolts in the front tank mounts counter-clockwise with an allen wrench until they come out.

    • The bolts shown in the picture are not stock.

    • Turn the two 12mm hex bolts in the tank's hinge base counter-clockwise with a socket wrench or box end wrench until they come out.

  7. 1999-2002 Suzuki SV650 Valve Inspection and Adjustment Replacement: 7 단계, 이미지 1/3 1999-2002 Suzuki SV650 Valve Inspection and Adjustment Replacement: 7 단계, 이미지 2/3 1999-2002 Suzuki SV650 Valve Inspection and Adjustment Replacement: 7 단계, 이미지 3/3
    • Disconnect the fuel level sensor connector, located near the tank hinge base. It will be a three wire connector and one side of the wire will be traceable to the underside of the tank.

    • Carefully lift the front of the tank to gain access to the hoses attached to the tank.

    • Do not lift the tank too much, or you risk damaging fuel lines, vacuum lines and spilling fuel.

    • There are small metal inserts that go into the front tank mounts. Make sure these do not fall out and get lost while working with the tank.

  8. 1999-2002 Suzuki SV650 Valve Inspection and Adjustment Replacement: 8 단계, 이미지 1/3 1999-2002 Suzuki SV650 Valve Inspection and Adjustment Replacement: 8 단계, 이미지 2/3 1999-2002 Suzuki SV650 Valve Inspection and Adjustment Replacement: 8 단계, 이미지 3/3
    • Locate the petcock on the left underside of the tank. It hill have 2 hoses attached to it and will be next to the fuel level sensor.

    • Disconnect the vacuum hose from the petcock.

    • It is advisable to always remove this hose first to reduce the amount of fuel spilled.

    • Disconnect the fuel hose from the petcock

    • Disconnect the tank breather hose from the base of the tank.

  9. 1999-2002 Suzuki SV650 Valve Inspection and Adjustment Replacement: 9 단계, 이미지 1/2 1999-2002 Suzuki SV650 Valve Inspection and Adjustment Replacement: 9 단계, 이미지 2/2
    • Carefully lift the tank up and off the frame of the bike, being sure that the fuel level sensor wire does not get caught in the frame.

    • When you set your tank aside, be mindful of the petcock hose fittings, especially the vacuum fitting on the bottom. These fittings can easily be broken by the weight of the tank and are costly to replace.

  10. 1999-2002 Suzuki SV650 Valve Inspection and Adjustment Replacement, Remove the Air box: 10 단계, 이미지 1/1
    • There will be two hoses connected on the rear left side of the air box. There will be two clips that will hold these hoses to the air box. These will allow all the excess oil to collect in a small spong-like section. After this is disconnected slowly pull the air box from the carburator

    • I removed the clips from my motorcycle so I do not have pictures of it but beware that yours probably does.

  11. 1999-2002 Suzuki SV650 Valve Inspection and Adjustment Replacement, Disconnect the fuel hose: 11 단계, 이미지 1/1
    • Slowly pull this out, this allows the vacuum to pull the necessary amount of gas from the tank into the carbs. As we will completely remove the carburetor from the motorcycle.

    • Do not pull mindlessly as you can damage the hose, pull at an angle and it should be easily removable.

    • This will be located at the right side of the bike.

  12. 1999-2002 Suzuki SV650 Valve Inspection and Adjustment Replacement, Loosen the clamps from the carbs on the Head Cylinder: 12 단계, 이미지 1/1
    • Before pulling the carbs off loosen the clamps on both the front and rear. Use your JIP-4 Screwdriver

  13. 1999-2002 Suzuki SV650 Valve Inspection and Adjustment Replacement, Loosen the carb from the Motorcycle: 13 단계, 이미지 1/1
    • From this point on we will disconnect the carb from the head. This will make it so we can perform the next step easier

    • Slowly pull from the top "gold" handle towards you. Do this from the opposite side of where you are pulling. You will need to use some strength but not a lot. This should easily disconnect the carb from the head

    • Do not pull the carburetor off and away from the bike as of yet. There are still the throttle cables and choke cables that need to be removed. Otherwise, you could break these.

  14. 1999-2002 Suzuki SV650 Valve Inspection and Adjustment Replacement, Removing the Choke Cables.: 14 단계, 이미지 1/2 1999-2002 Suzuki SV650 Valve Inspection and Adjustment Replacement, Removing the Choke Cables.: 14 단계, 이미지 2/2
    • Start by grabbing your JIP-4 screwdriver and slowly removing the screws. If they have never been touched before they can be hard to remove. Try your best not to strip these. After you are done with the first slowly pull the cable out of the carburator "body". Repeat the same caution for the second choke cable

    • The first picture is of the rear carb, the second picture is of the front

  15. 1999-2002 Suzuki SV650 Valve Inspection and Adjustment Replacement, Loosen the Throttle cables: 15 단계, 이미지 1/2 1999-2002 Suzuki SV650 Valve Inspection and Adjustment Replacement, Loosen the Throttle cables: 15 단계, 이미지 2/2
    • These will be found on the front right side of the carbs. It is also unnecessary to completely remove the nut. Just loosen them enough until they are able to be removed

    • Loosen the throttle cable nuts until they can be removed completely

    • Afterwards pull the cables out, you may need to use the screwdriver to push them out completely

  16. 1999-2002 Suzuki SV650 Valve Inspection and Adjustment Replacement, Disconnect the TPS Sensor: 16 단계, 이미지 1/1
    • Be careful not to forget to remove this. This will be located at the right of the rear carb

    • Carefully push in the clip and disconnect the cable.

  17. 1999-2002 Suzuki SV650 Valve Inspection and Adjustment Replacement, Remove the carb completely: 17 단계, 이미지 1/1
    • Congratulations. You can now take out the carb completely of the motorcycle!

    • The carb has an idle adjustment screw that is in a bracket. Mine was not in such a bracket so I could not show you but be careful when pulling the carb out that you do not damage said bracket

  18. 1999-2002 Suzuki SV650 Valve Inspection and Adjustment Replacement, Removing the rear and front Cylinder Head Cover: 18 단계, 이미지 1/2 1999-2002 Suzuki SV650 Valve Inspection and Adjustment Replacement, Removing the rear and front Cylinder Head Cover: 18 단계, 이미지 2/2
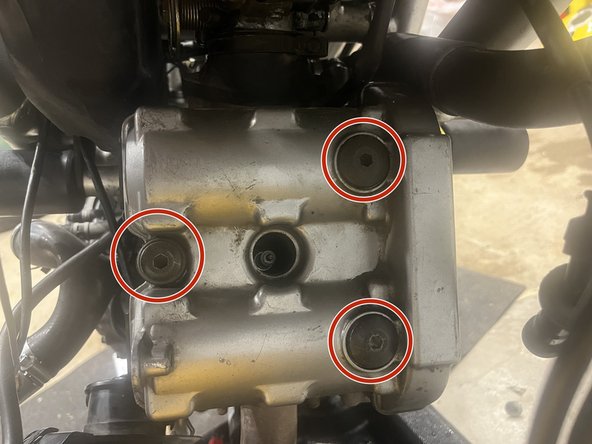
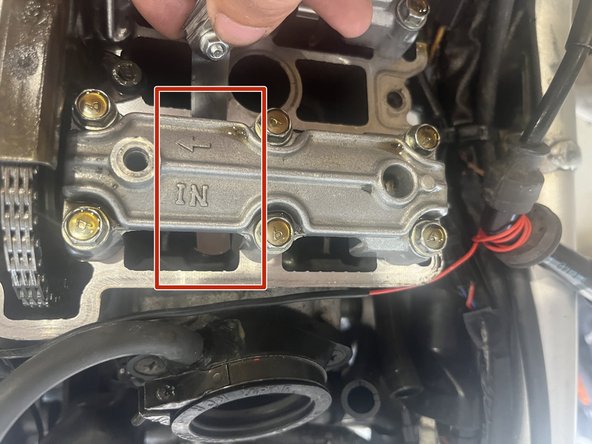
    • Use a 6 mm Allen Socket to remove all three of these. They hold the cover down on the front and rear heads.

    • Do NOT use SAE tools. Only Metric. You WILL strip these if you are not careful and use the wrong one.

  19. 1999-2002 Suzuki SV650 Valve Inspection and Adjustment Replacement, Unscrew and Tuck Away Rear brake Paddle: 19 단계, 이미지 1/3 1999-2002 Suzuki SV650 Valve Inspection and Adjustment Replacement, Unscrew and Tuck Away Rear brake Paddle: 19 단계, 이미지 2/3 1999-2002 Suzuki SV650 Valve Inspection and Adjustment Replacement, Unscrew and Tuck Away Rear brake Paddle: 19 단계, 이미지 3/3
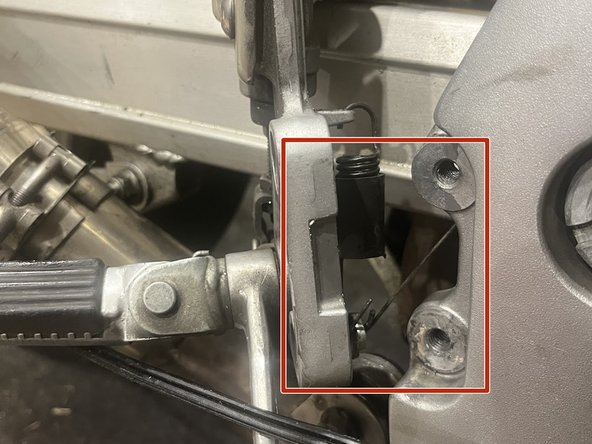
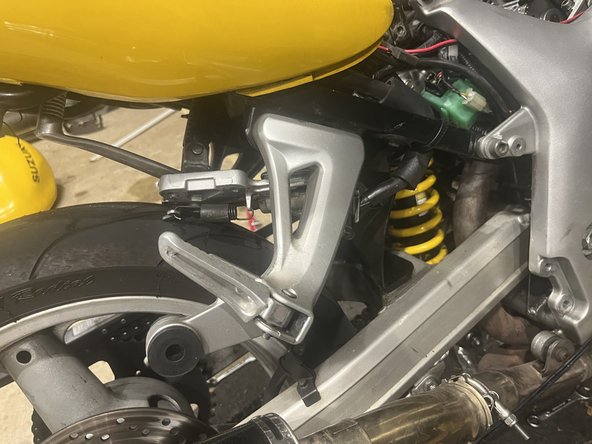
    • Unscrew these two bolts with your 6mm Allen Socket.

    • Unhook this from the break and foot rest. This is your rear light. Very important that you do not break or forget to reinstall later!

    • Tuck the rear brake/footrest onto the tire, easiest and most time efficient thing to do an won't damage anything if you push the foot rest in

    • I lost one screw in the first picture but yours has two ( or it should have it anyways), hence the two circles

  20. 1999-2002 Suzuki SV650 Valve Inspection and Adjustment Replacement, Removing the exhaust (partly): 20 단계, 이미지 1/1
    • Loosen the clamps on your exhaust and remove this. It is not 100% necessary to do this step but will make working with the tensioner a little easier. It only takes a few minutes anyways

  21. 1999-2002 Suzuki SV650 Valve Inspection and Adjustment Replacement, Remove these two big screws: 21 단계, 이미지 1/2 1999-2002 Suzuki SV650 Valve Inspection and Adjustment Replacement, Remove these two big screws: 21 단계, 이미지 2/2
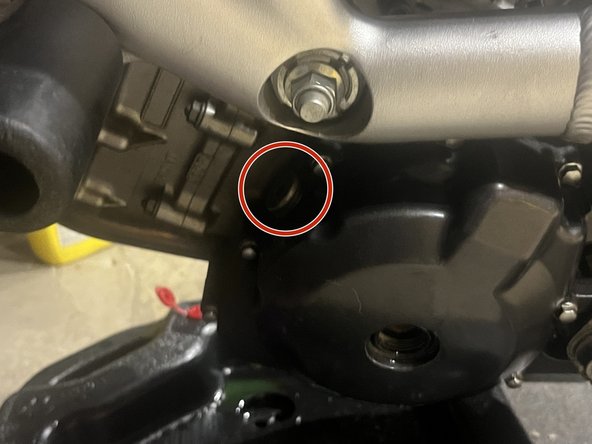
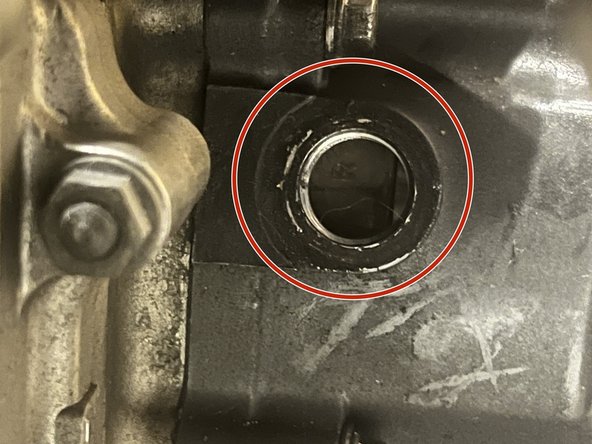
    • Unscrew this with a 10mm Allen Socket.

    • Unscrew the second screw with a 8 MM Allen Socket. We will be able to see if the bike is at TDC and put it on F or R depending on which one we are checking

  22. 1999-2002 Suzuki SV650 Valve Inspection and Adjustment Replacement, Turning over the Engine: 22 단계, 이미지 1/2 1999-2002 Suzuki SV650 Valve Inspection and Adjustment Replacement, Turning over the Engine: 22 단계, 이미지 2/2
    • Turn over the engine with a 18MM Socket ( I would recommend using a small extention) and turn counter clock wise until you can see the R

    • If you are starting with the front then put it on F. If you are starting with the rear like we are doing in this guide put it on R

  23. 1999-2002 Suzuki SV650 Valve Inspection and Adjustment Replacement, Checking Rear Valves: 23 단계, 이미지 1/3 1999-2002 Suzuki SV650 Valve Inspection and Adjustment Replacement, Checking Rear Valves: 23 단계, 이미지 2/3 1999-2002 Suzuki SV650 Valve Inspection and Adjustment Replacement, Checking Rear Valves: 23 단계, 이미지 3/3
    • We are finally at the point of checking the rear valves. Now there are the intake and exhaust valves. The Intake has a tolerance of 0.10 and 0.20 and the exhaust is 0.20mm and 0.30mm. Keep the bike in neutral as well.

    • Stick the feeler gauge from the inside out underneath the valve. Try the biggest allowed tolerance and work yourself down or up to see when it finally tightens.

  24. 1999-2002 Suzuki SV650 Valve Inspection and Adjustment Replacement, Clearance?: 24 단계, 이미지 1/1
    • If you are within the tolerated clearance then congratulations, you have reached the end of this guide, lucky guy.

    • If not it really depends on if you need to do only the rear or also the front (or vice versa).. In that case, you're in for a long ride

  25. 1999-2002 Suzuki SV650 Valve Inspection and Adjustment Replacement, Rewinding Tensioner: 25 단계, 이미지 1/3 1999-2002 Suzuki SV650 Valve Inspection and Adjustment Replacement, Rewinding Tensioner: 25 단계, 이미지 2/3 1999-2002 Suzuki SV650 Valve Inspection and Adjustment Replacement, Rewinding Tensioner: 25 단계, 이미지 3/3
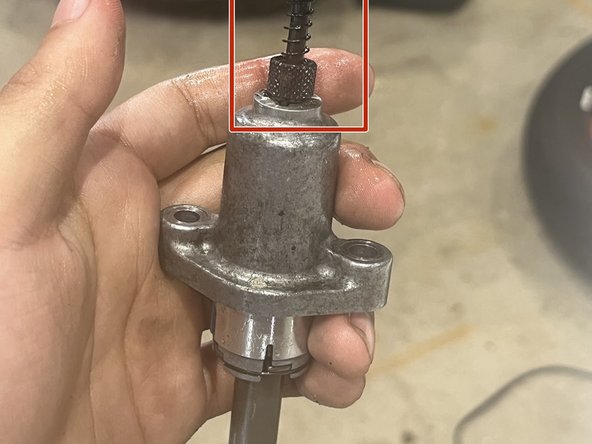
    • We will now bring our attention to the rear cam chain tensioner. Use a 10mm Socket and remove the middle screw. Grab your expensinve little 80 dollar tool and insert it in the middle and rewind the tension.

    • Here is how that looks with a tensioner I had laying around.

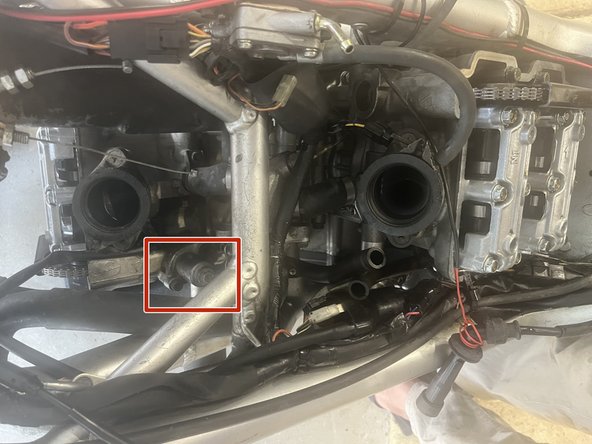
    • I will not be doing the Front valve adjustment as I probably stripped the head of my tensioner, but the last picture shows the location of the front cam chain tensioner. The same method applies here

  26. 1999-2002 Suzuki SV650 Valve Inspection and Adjustment Replacement, Timing chain Cover: 26 단계, 이미지 1/1
    • Use a 5mm Allen Socket to unscrew the cover

  27. 1999-2002 Suzuki SV650 Valve Inspection and Adjustment Replacement, Removing the valve covers: 27 단계, 이미지 1/2 1999-2002 Suzuki SV650 Valve Inspection and Adjustment Replacement, Removing the valve covers: 27 단계, 이미지 2/2
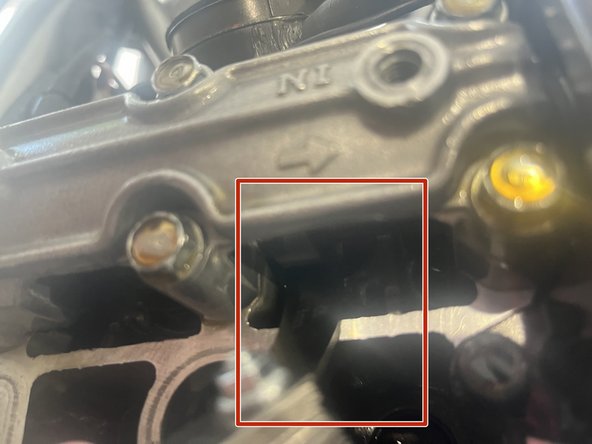
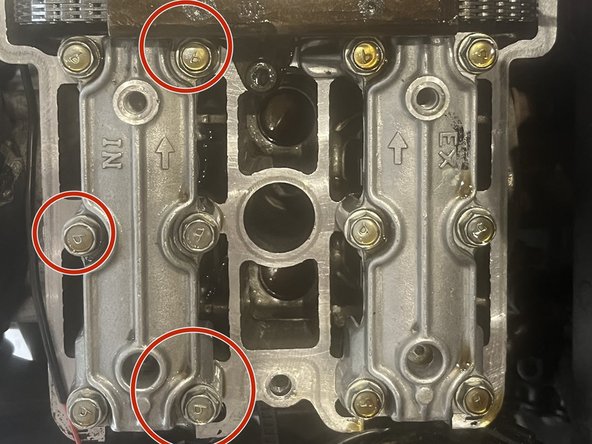
    • use a 10mm socket and remove the screws asshown on the pictures. This is to avoid too much tension on the cover. I have broken them before by not doing this (with installation, but its good practise to do it with removal as well) Do this for both covers

결론

To reassemble your device, follow these instructions in reverse order.

다른 한 분이 해당 안내서를 완성하였습니다.

첨부 문서

David Koster

회원 가입일: 11/20/22

403 평판

안내서 3개 작성하였습니다

댓글 2개

Thank you so very much for this detailed instructions guide. it is very easy to follow!!

Sam Lopez - 답글

You're welcome, I apologise for it not being as detailed and complete as I wish it would have been but I hope it will serve you well!

David Koster - 답글

댓글 쓰기

조회 통계:

24 시간 전: 0

7일 전: 2

30일 전: 21

전체 시간: 323