주요 콘텐츠로 건너뛰기

2000-2006 Toyota Celica Front Sway Bar Link Replacement

필요한 것

  1. 2000-2006 Toyota Celica Front Sway Bar Link Replacement, Sway Bar Links: 1 단계, 이미지 1/1
    • Tools needed:

    • A 14mm socket wrench

    • A 4mm Allen wrench

    • Penetrating lubricant

    • A lug wrench

    • Torque wrench

    • Two new sway bar links

  2. 2000-2006 Toyota Celica Front Sway Bar Link Replacement: 2 단계, 이미지 1/1
    • To access the bolts first remove cap center from wheel by prying with a screwdriver.

    • Using the lug wrench, turn the lug nuts for the front passenger side wheel counterclockwise until you break their resistance.

    • Use your foot or all of your body weight if necessary.

    • DO NOT remove bolts from the wheel.

  3. 2000-2006 Toyota Celica Front Sway Bar Link Replacement: 3 단계, 이미지 1/1
    • DO NOT USE THE JACK TO KEEP THE CAR LIFTED. Place jack stands or cinder blocks underneath the car.

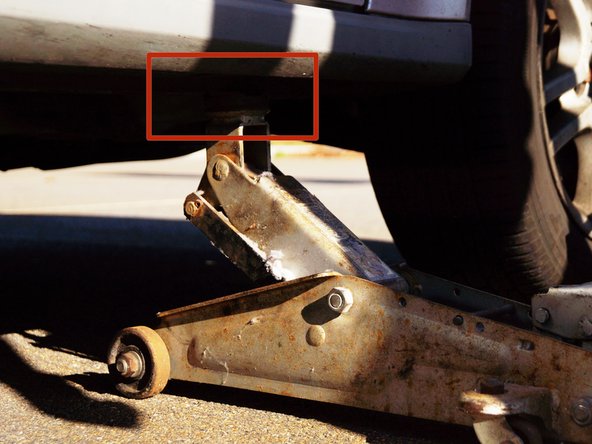
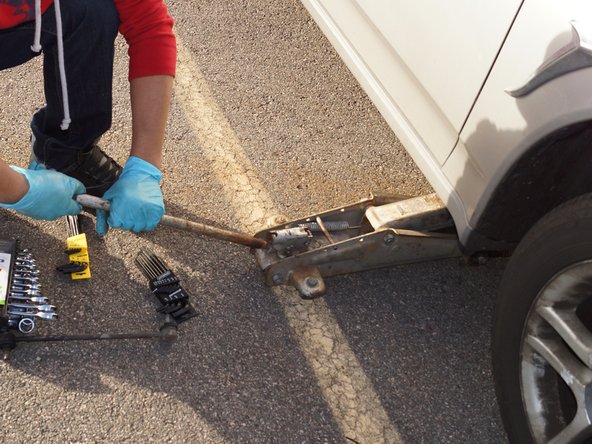
    • You will need to begin by jacking up the front of your car. If you need help with using a hydraulic jack, see the guide below:

    • How to Jack Up a Car (or Truck)

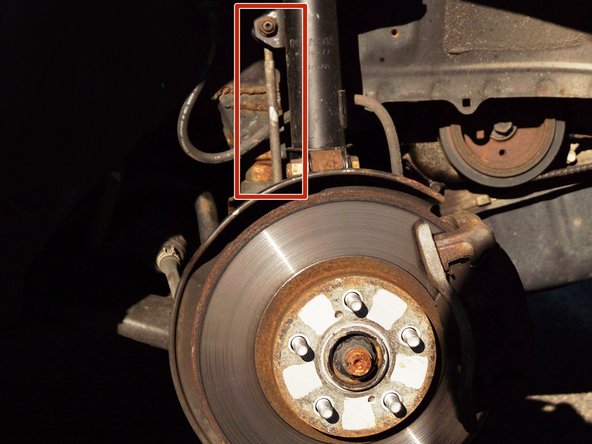
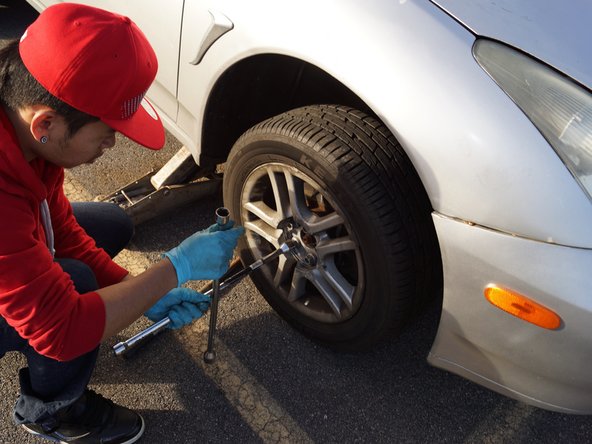
    • Take the 14mm lug wrench and loosen all the bolts until they come off of the wheel and remove the wheel.

  4. 2000-2006 Toyota Celica Front Sway Bar Link Replacement: 4 단계, 이미지 1/1
    • The sway bar link is located behind the brake shield, connecting the sway bar and suspension.

  5. 2000-2006 Toyota Celica Front Sway Bar Link Replacement: 5 단계, 이미지 1/2 2000-2006 Toyota Celica Front Sway Bar Link Replacement: 5 단계, 이미지 2/2
    • Use the penetrating lubricant to spray on the top nut, which attaches the sway bar link to the suspension.

    • Use the penetrating lubricant to spray the bottom nut, which attaches the sway bar link to the sway bar.

  6. 2000-2006 Toyota Celica Front Sway Bar Link Replacement: 6 단계, 이미지 1/2 2000-2006 Toyota Celica Front Sway Bar Link Replacement: 6 단계, 이미지 2/2
    • Use the 14mm socket wrench to take off the top nut.

    • If the sway bar link's joint is spinning and the nut does not come off, use the 4mm Allen wrench to hold down the sway bar link. See the second picture for details.

  7. 2000-2006 Toyota Celica Front Sway Bar Link Replacement: 7 단계, 이미지 1/1
    • Repeat Step 7 for the bottom nut of the sway bar link.

  8. 2000-2006 Toyota Celica Front Sway Bar Link Replacement: 8 단계, 이미지 1/1
    • After taking all the nuts off, use the bar from the hydraulic jack to push down the sway bar so that it is easier to take the sway bar link off.

  9. 2000-2006 Toyota Celica Front Sway Bar Link Replacement: 9 단계, 이미지 1/1
    • To put the new sway bar link in, use the bar from the hydraulic jack to push down the sway bar, and then insert the new sway bar link.

  10. 2000-2006 Toyota Celica Front Sway Bar Link Replacement: 10 단계, 이미지 1/1
    • Use the 4mm Allen wrench or 14mm socket wrench to tighten the nut onto the bottom sway bar link.

    • Repeat for the top sway bar link.

    • The 4mm Allen wrench is not necessary for this step.

  11. 2000-2006 Toyota Celica Front Sway Bar Link Replacement: 11 단계, 이미지 1/2 2000-2006 Toyota Celica Front Sway Bar Link Replacement: 11 단계, 이미지 2/2
    • Put the tire back on and tighten the lug nuts using the lug wrench.

    • Only tighten tire until there is enough resistance to keep the tire attached to the wheel hub, with the following pattern to ensure proper tire alignment.

  12. 2000-2006 Toyota Celica Front Sway Bar Link Replacement: 12 단계, 이미지 1/3 2000-2006 Toyota Celica Front Sway Bar Link Replacement: 12 단계, 이미지 2/3 2000-2006 Toyota Celica Front Sway Bar Link Replacement: 12 단계, 이미지 3/3
    • Place the hydraulic jack back under the car and lift it off the cinder blocks or jack stands.

    • Remove the cinder blocks or jack stands and lower the car back to the ground.

    • Further tighten the lug nuts using the torque wrench.

    • Tighten each nut with a torque wrench to a torque of 80ft/lb. See third picture for pattern to ensure proper tire alignment.

결론

Sway Bar Links tend to wear out at a similar rates. Repeat Steps 2-13 for the driver's side Sway Bar Link.

다른 8명이 해당 안내서를 완성하였습니다.

Chounly Morl

회원 가입일: 10/18/13

132 평판

안내서 1개 작성함

UMass Dartmouth, Team 4-1, Vijaybhaskar Fall 2013 UMass Dartmouth, Team 4-1, Vijaybhaskar Fall 2013 회원

UMASSD-VIJAYBHASKAR-F13S4G1

3 회원들

안내서 1개 작성하였습니다

댓글 2개

This is slightly wrong. You most likely will need a spanner and an allen key wrench to hold the bolt still while undoing the nut.

J Anything - 답글

What about rear? I think my sway bar is broken. Only one link on right side other is dangling and there is nothing to attach it to

Jason Prater - 답글

댓글 쓰기

조회 통계:

24 시간 전: 2

7일 전: 3

30일 전: 35

전체 시간: 6,385