소개
The steps in this guide are used to replace the brake rotors on all Focus models in the 2005-2007 generation, except for the ST model, which has slightly different brakes. Caution should be exercised when working with brake and suspension components, and proper safety goggles should be worn at all times.
Whenever working on your car's brakes and suspension, work on one side at a time. Keep the other side completely assembled so that you can reference it at any time.
This guide includes steps to replace the brake pads, in addition to the rotors. It is strongly suggested that brake rotors are not replaced by themselves. Never drive a car if the brakes on one side only are changed, because the car will "pull" to one side.
필요한 것
-
-
Put the car in park (automatic) or neutral (manual).
-
Apply the parking brake.
-
Place chocks behind the rear wheels.
-
-
-
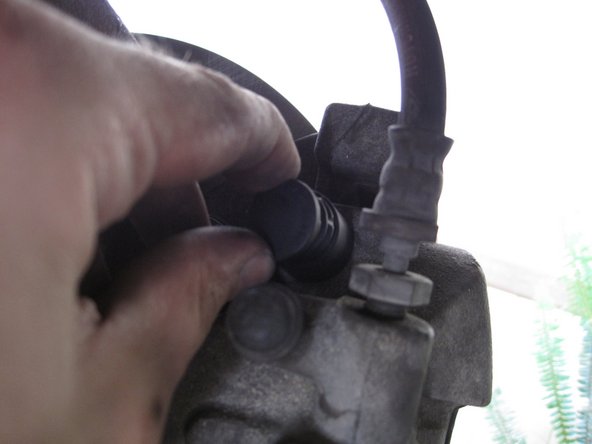
The brake fluid reservoir is located towards the back of the engine compartment.
-
Unscrew the cap and remove it.
-
-
-
-
Remove the two 15 mm mounting bracket bolts.
-
Lift the mounting bracket off the rotor.
-
-
-
Reinstall the mounting bracket.
-
Grease the mounting bracket bolts and install them.
I believe the correct torque spec is actually 98 ft * lbs, 133 N * m:
-
-
-
Place the cap back on the brake fluid reservoir.
-
Turn the key to the "on" position. Press the brake pedal a few times. It should go to the floor once, and then become firm.
-
Fill the brake fluid reservoir with new fluid, if needed.
-


다른 14명이 해당 안내서를 완성하였습니다.

댓글 9개
The time indicated is way off. 4 hours to replace disk brakes??? He must have gotten tired and gone for a 3 hour nap. I regularly do a set of front disks in an hour or less.
1) Removing a few ounces of brake fluid is something I have never done - and I have never seen any mechanic do it.
2) Spraying the caliper guide bolts with penetrating oil will help free the bolts.
3) The article doesn't mention that the caliper piston will have to be compressed to fit over a new rotor. Use a large C-clamp for this task.
4) Turning a rotor is a bad idea. You end up with a thin rotor that will warp easily. A new rotor is cheaper than the cost for turning one.
Stan, Your comments weren't necessary and they were rude. The intention of this blog is to educate not brag. Sounds like you are discouraging helpful blogs like this one because "you know it all". You used the word regular in your comment. This blog clearly isn't for experts. Chill!, and watch what happens with this generous man's excellent tutorial. The pictures are outstanding. David, you ought to be a technical writer. One like the one who probably wrote Stan's training manuals or Chiltons.
That retaining clip was a bear!! Thanks for the info. I found this very helpful. However, please wear shoes if you do this!!
Thanks - John
This is excellent, and exactly what I needed to give me the confidence to replace discs and pads myself. As for Stan the man’s comment above, why are you reading blogs like this if you regularly replace discs? And by the way, he does use a C-clamp to depress the rotor, so you obviously didn’t read the article properly did you…
The blog was good. It might be of use to discuss types of pads to use if you choose to use non OEM. Some one could post a thread about good suppliers in different areas. I have my favorite parts houses to buy from. A good parts man is worth knowing.
Good job David, well done! Saved me the “Learning Curve” on a First Time Job. Thank you!
May I suggest a small edit? First thing that got my attention was in the first line…. “Put the car in park (automatic) or neutral (manual).” The “Neutral “ direction is not correct The manual transmission should be fixed in second gear to help keep the car from moving while the car is being worked on. As to procedure, after the weight has been transferred to the axle jack stands, I like to leave the hydraulic jack in place slightly under load. If an emergency does happen for whatever reason, the jack is already in place to lift the vehicle. I also place the removed tire on the flat under the car as a secondary block under the car. Its extra little things thing I do to help prevent injury. I know someone who worked under a car just with a bottle jack, that failed, so I take extra steps. He was lucky in that he only suffered a broken shoulder. Could have been fatal. Anyways Thanks!
Mike Bates - 답글