이 버전에는 잘못된 편집 사항이 있을 수 있습니다. 최신 확인된 스냅샷으로 전환하십시오.
필요한 것
-
이 단계는 번역되지 않았습니다. 번역을 도와주십시오
-
Before getting started, go ahead and order a new AC Compressor Control Valve. eBay is a good option and so is your favorite online auto parts retailer. Search for "Dorman 917-275". About a $40 part. Some local auto parts stores may carry this part as well. Try NAPA.
-
-
이 단계는 번역되지 않았습니다. 번역을 도와주십시오
-
In order to replace the AC Compressor Control Valve safely, the AC system will need to be depressurized. This is best done professionally to ensure the refrigerant is disposed of properly.
-
Any automotive shop offering AC service can do this for half their 1 hour labor rate. In this case, $49 to evacuate the system.
-
-
이 단계는 번역되지 않았습니다. 번역을 도와주십시오
-
Now that the refrigerant has been removed professionally, it's your turn to go to work. Pop the hood of a 2005-2007 Ford Freestyle, Ford 500, or Mercury Montego and you're looking at a 3.0L V6 DOHC 24V DURATEC engine. This was the one and only engine option for these vehicles.
-
-
이 단계는 번역되지 않았습니다. 번역을 도와주십시오
-
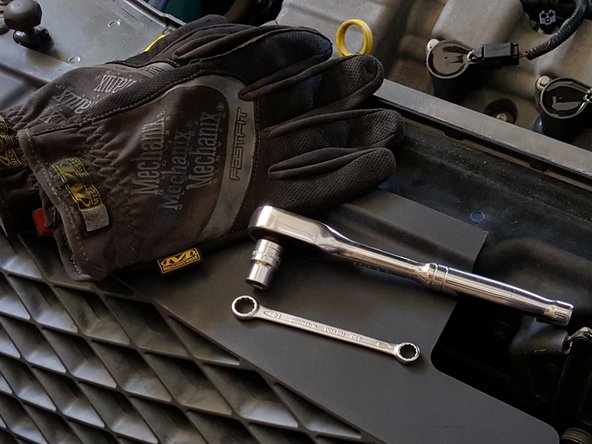
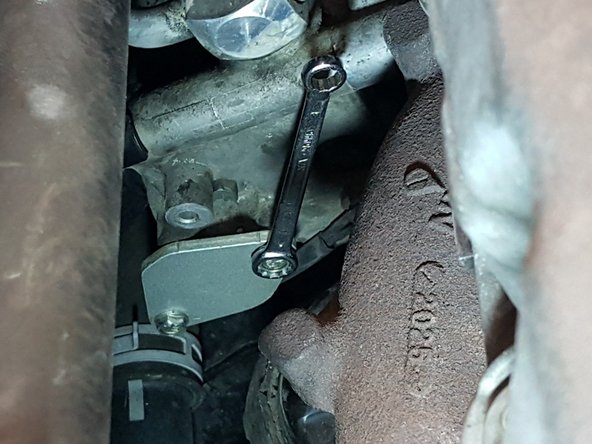
The AC Compressor Control Valve is located behind a backing plate on the rear of the AC compressor. The AC compressor itself does not need to be removed. A short 10mm box end wrench will get the job done. A ratchet and 10mm socket will help.
-
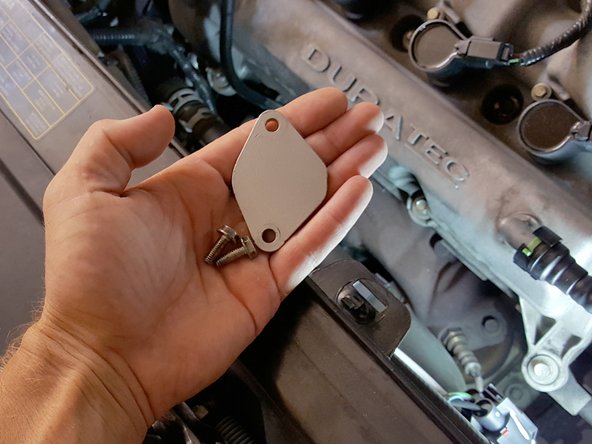
Remove plate with bolts. Set these items aside, they will be re-used. This is a good time to clean the plate and retaining bolts. A small amount of WD40 and shop towel will work fine.
-
-
이 단계는 번역되지 않았습니다. 번역을 도와주십시오
-
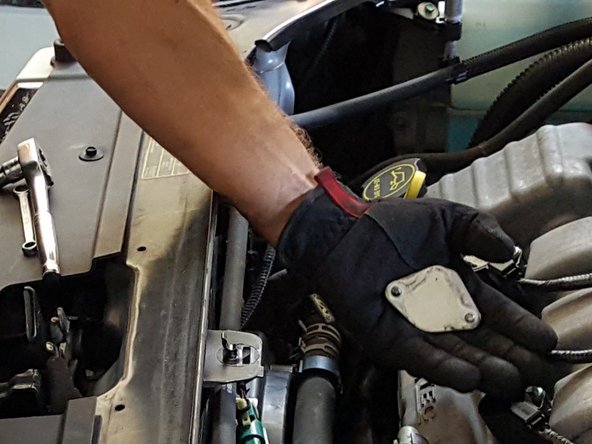
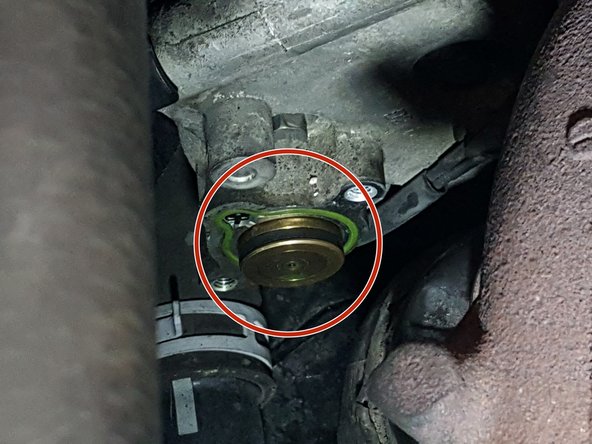
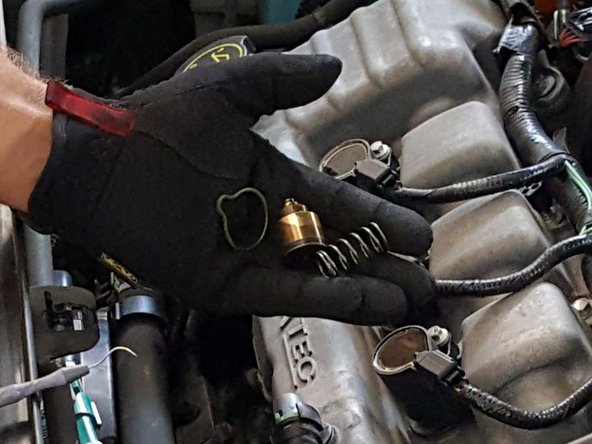
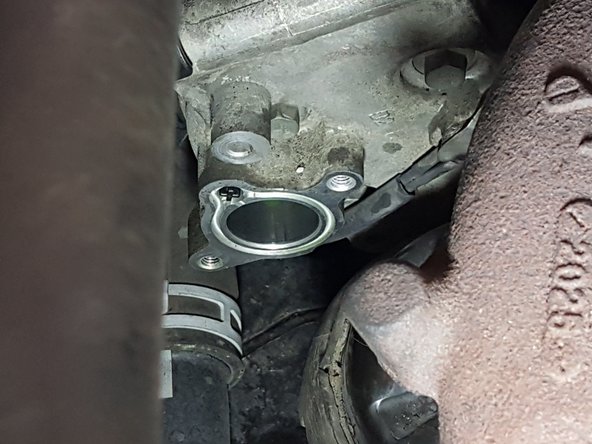
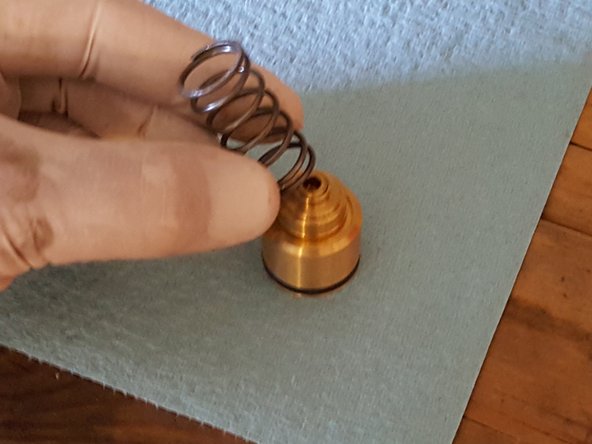
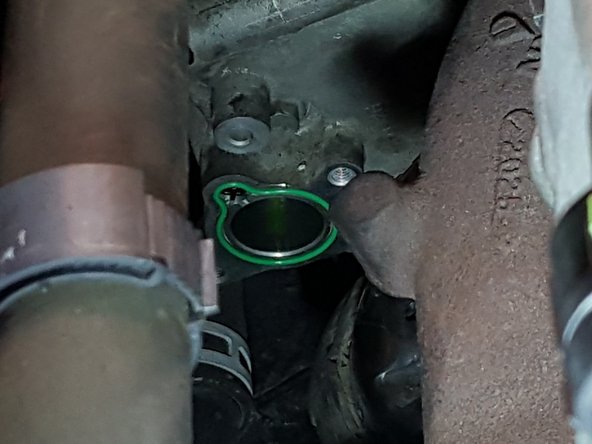
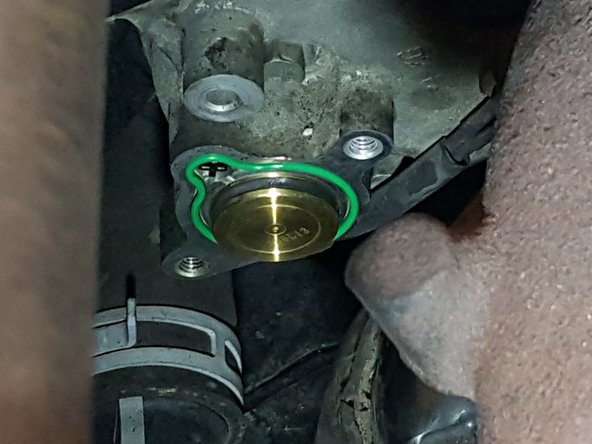
Removing the backing plate reveals the AC Compressor Control Valve and seal.
-
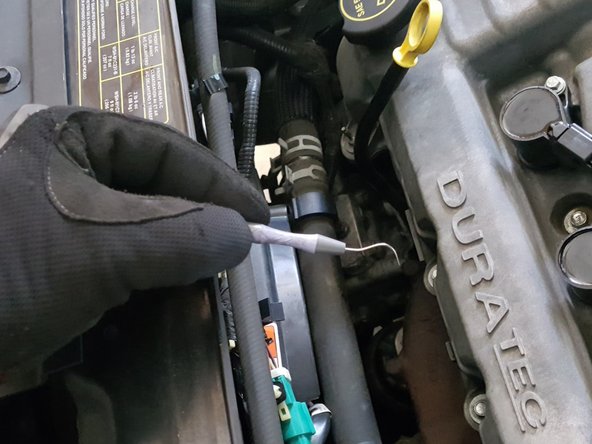
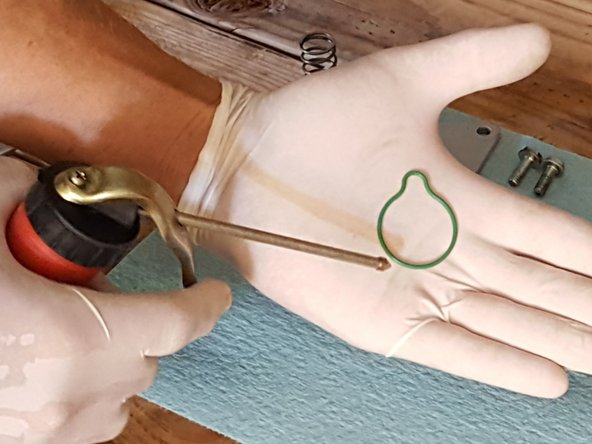
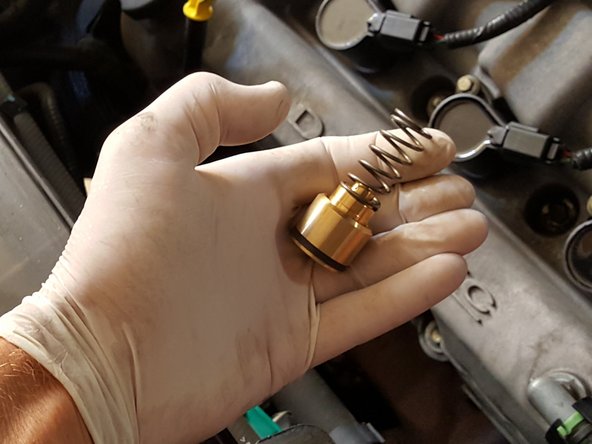
Using dexterous fingertips or a dental pick, slowly remove the AC Compressor Control Valve and spring. Use the dental pick to extrude the green rubber seal from its groove without marring the machined surface.
-
The used AC Compressor Control Valve and seal are waste. Keep the spring, it will be re-used.
-
-
이 단계는 번역되지 않았습니다. 번역을 도와주십시오
-
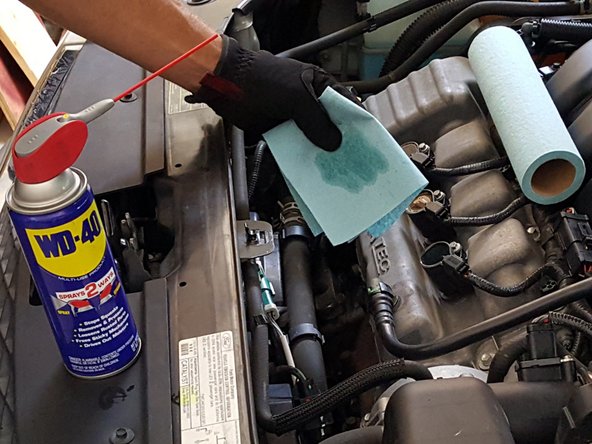
A small amount of WD40 on a shop towel will work fine to clean the backing plate mating surface on the AC Compressor.
-
Wipe the surface clean of refrigerant and be careful not to knock any road grime into the AC Compressor Control Valve housing.
-
-
-
이 단계는 번역되지 않았습니다. 번역을 도와주십시오
-
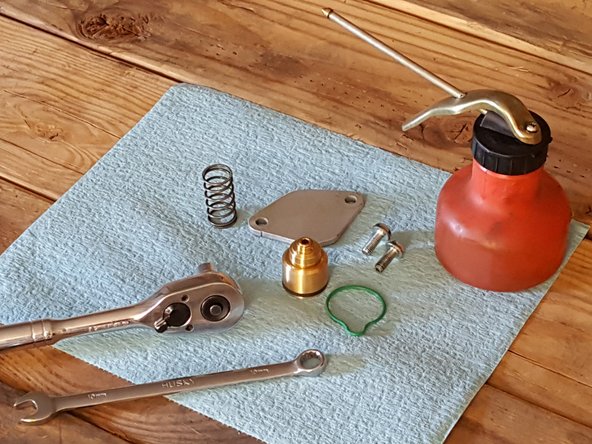
Use a clean surface to layout everything needed to install the new AC Compressor Control Valve and seal.
-
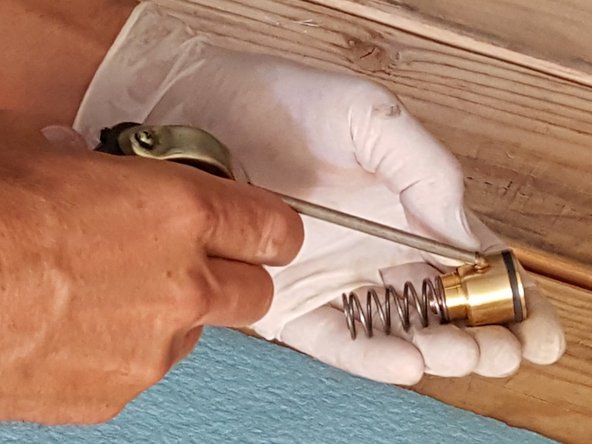
Attach spring to AC Compressor Control Valve. The spring will simply snap into place with an interference fit.
-
-
이 단계는 번역되지 않았습니다. 번역을 도와주십시오
-
Apply 2 drops of motor oil to the new seal and completely lubricate.
-
Carefully press seal into groove without picking up any debris during the process.
-
-
이 단계는 번역되지 않았습니다. 번역을 도와주십시오
-
Apply 3 drops of motor oil to the AC Compressor Control Valve mating surface and completely lubricate.
-
The AC Compressor Control Valve and spring assembly will install spring side first.
-
Install the assembly without picking up any debris during the process.
-
-
이 단계는 번역되지 않았습니다. 번역을 도와주십시오
-
There will be obvious witness marks on the backing plate indicating the install orientation of this part.
-
Install backing plate hand tight.
-
-
이 단계는 번역되지 않았습니다. 번역을 도와주십시오
-
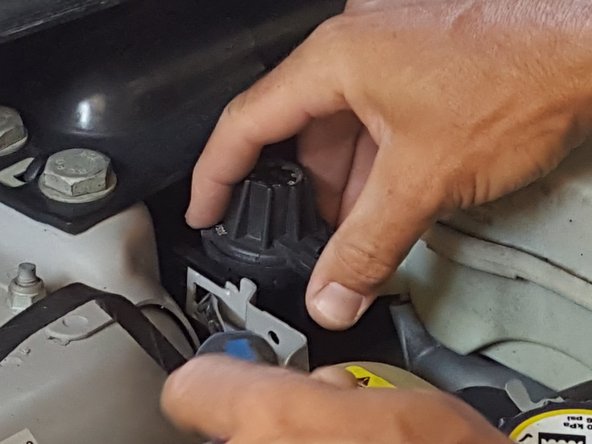
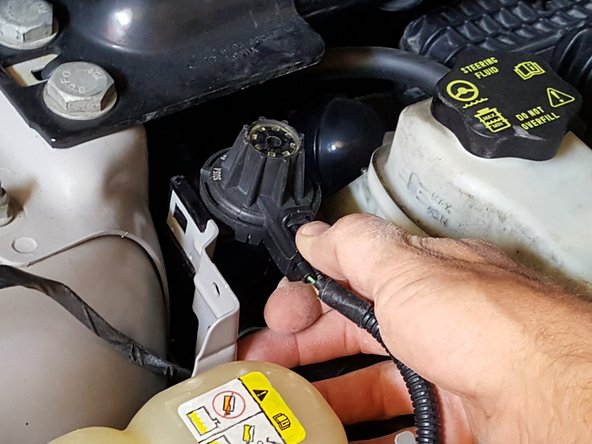
There is a module attached to the passenger side shock tower. Start by removing the module's wiring harness.
-
Next, use a standard sized flathead screwdriver to depress the clip holding the module to its mounting bracket.
-
Carefully place the module out of the way.
-
-
이 단계는 번역되지 않았습니다. 번역을 도와주십시오
-
The AC low pressure port is now in plain sight. The port is covered by a black cap.
-
Remove the black cap to reveal the port.
-
-
이 단계는 번역되지 않았습니다. 번역을 도와주십시오
-
2005-2007 Ford Freestyle, Ford 500, and Mercury Montego with "Front AC" (most) use 29 ounces of R-134A refrigerant.
-
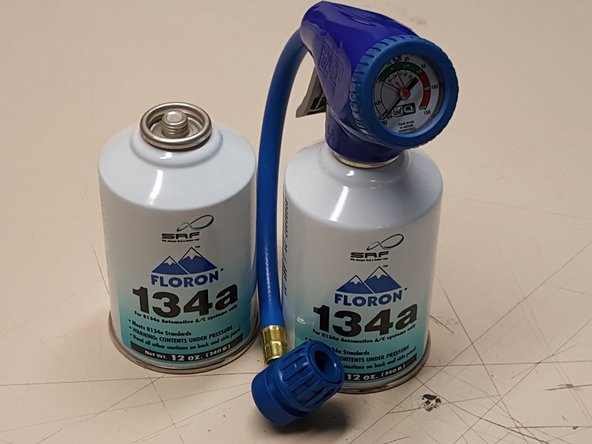
For a Front AC application start with 24 ounces or (2) 12 oz. cans of refrigerant. R-134A refrigerant is available at any auto parts store in 12 oz. cans. You will need a separate dispenser like the one shown here by EZ Chill.
-
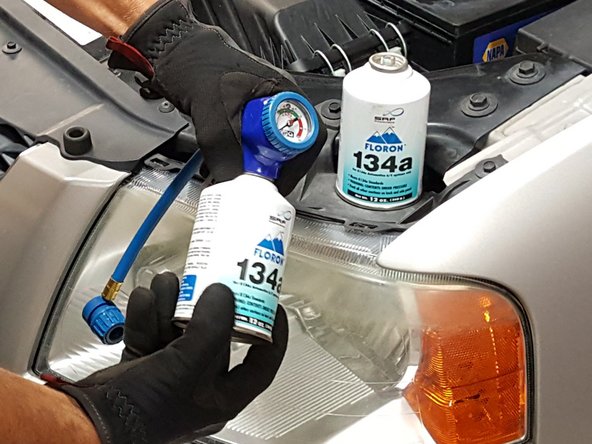
Refrigerant cans are designed to be attached to the dispenser full and removed from the dispenser empty. Proceed to thread the first can of refrigerant onto the dispenser. The dispenser will pierce and seal the can.
-
-
이 단계는 번역되지 않았습니다. 번역을 도와주십시오
-
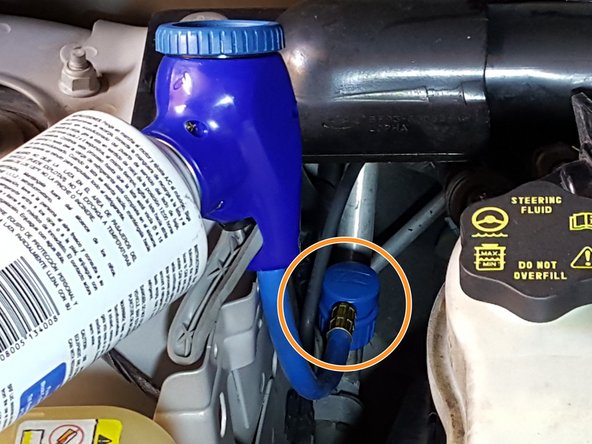
R-134A AC systems use quick disconnect ports. To attach the dispenser, first compress the coupler.
-
Next, cover the port squarely with coupler and release. Nest can in a secure spot.
-
-
이 단계는 번역되지 않았습니다. 번역을 도와주십시오
-
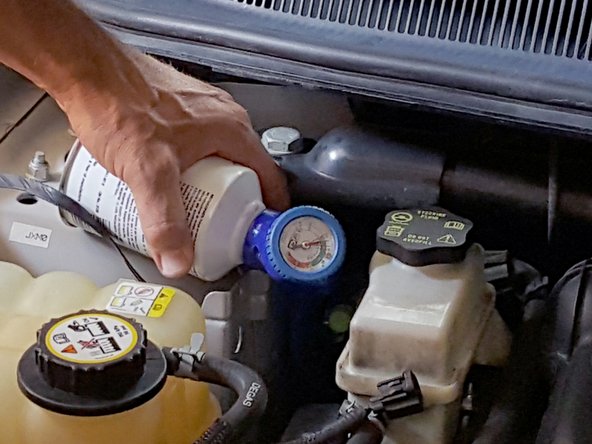
Start engine and let idle with transmission in park and parking brake engaged.
-
Set AC to coldest setting and turn fan to high.
-
-
이 단계는 번역되지 않았습니다. 번역을 도와주십시오
-
Pull trigger on dispenser while slowly clocking can back and forth until first can is completely empty.
-
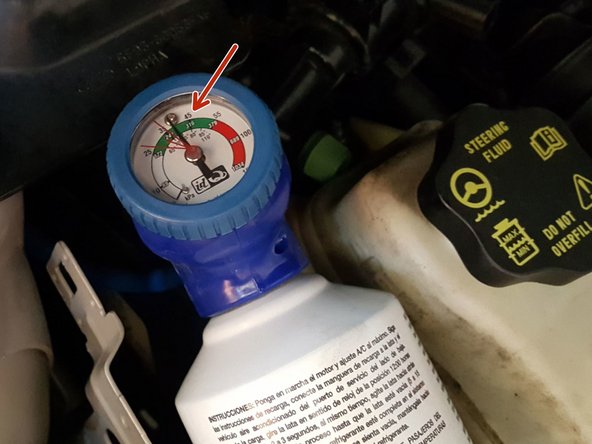
Attach second can of refrigerant and dispense until AC system holds steady at 40-45 psi. Detach coupler.
-
-
이 단계는 번역되지 않았습니다. 번역을 도와주십시오
-
Reinstall low pressure port cap.
-
Reinstall module and reattach harness. You're done with the replacement.
-


다른 9명이 해당 안내서를 완성하였습니다.

댓글 6개
clar and well illustrated
During The Last Few Steps, Just Before Adding New Refrigerant. You Should have Pulled An Vacuum On the System If You Are Not Going To Replace The Receiver, Drier Unit Or Also Called The Accumulator, Drier Unit, Because That Will Keep The Air And Moister Out Of The A/C System.
Retired Auto A/C Tech, Marcus
is the vacuuming an additional step along with evacuating the system? In other words, before replacing the control valve, I should evacuate as well as vacuum?
GREAT instructions and pics! the only problem I had were my FAT hands!
AC compressor control is a focusing process for ac maintenance. Always we have to clean the ac other wise ac occurred many problems. Because recently faced ac overheating problem then contacted the ac repair dubai service center and solve the problem.