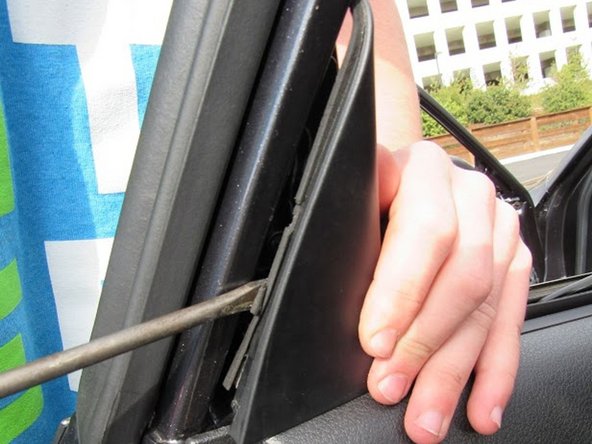
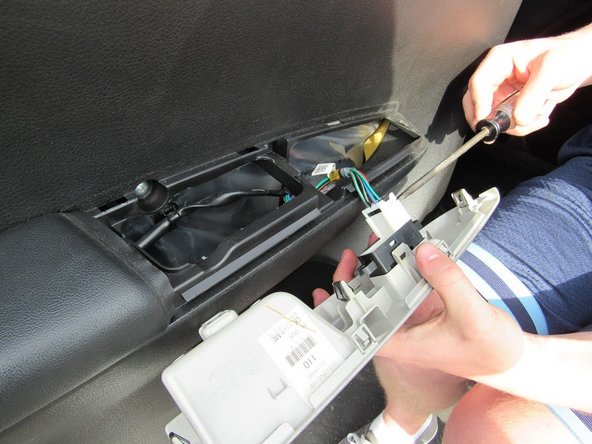
주요 콘텐츠로 건너뛰기

2009 Subaru Impreza WRX Rear Door Panel Replacement

필요한 것

  1. 2009 Subaru Impreza WRX Rear Door Panel Replacement, Rear Door Panel: 1 단계, 이미지 1/1
    • Pry off the plastic tab inside the rear door handle.

  2. 2009 Subaru Impreza WRX Rear Door Panel Replacement: 2 단계, 이미지 1/1
    • Use the Phillips screwdriver to unscrew the 8x3/4" Phillips screw inside the door handle.

  3. 2009 Subaru Impreza WRX Rear Door Panel Replacement: 3 단계, 이미지 1/1
    • Use a flathead screwdriver to pry up the plastic tab inside the rear door armrest.

  4. 2009 Subaru Impreza WRX Rear Door Panel Replacement: 4 단계, 이미지 1/1
    • Use the Phillips screwdriver to unscrew the 8x3/4" Phillips screw inside the armrest.

  5. 2009 Subaru Impreza WRX Rear Door Panel Replacement: 5 단계, 이미지 1/2 2009 Subaru Impreza WRX Rear Door Panel Replacement: 5 단계, 이미지 2/2
    • Use flathead to pry off the upper panel located at the top of the rear door panel.

  6. 2009 Subaru Impreza WRX Rear Door Panel Replacement: 6 단계, 이미지 1/2 2009 Subaru Impreza WRX Rear Door Panel Replacement: 6 단계, 이미지 2/2
    • Use the flathead screwdriver to pry off and remove the panel over the door handle.

  7. 2009 Subaru Impreza WRX Rear Door Panel Replacement: 7 단계, 이미지 1/1
    • Remove the bundle of wires from the panel by pressing the tabs on the sides of the large white plastic connector.

  8. 2009 Subaru Impreza WRX Rear Door Panel Replacement: 8 단계, 이미지 1/1
    • Use the Phillips screwdriver to unscrew the 8x3/4" screws behind the door handle panel that was just removed.

  9. 2009 Subaru Impreza WRX Rear Door Panel Replacement: 9 단계, 이미지 1/1
    • Use the flathead screwdriver to pry off the door panel, starting from the outside edge of the door.

  10. 2009 Subaru Impreza WRX Rear Door Panel Replacement: 10 단계, 이미지 1/1
    • Use your hands to pull off and remove the door panel from the frame.

  11. 2009 Subaru Impreza WRX Rear Door Panel Replacement: 11 단계, 이미지 1/1
    • Using your hands, remove the two remaining wires connecting the door panel to the frame.

    • The door panel is now completely removed from the frame.

결론

To reassemble your device, follow these instructions in reverse order.

Joseph Coplon

회원 가입일: 04/20/15

101 평판

안내서 1개 작성함

Cal Poly, Team 8-3, Regan Spring 2015 Cal Poly, Team 8-3, Regan Spring 2015 회원

CPSU-REGAN-S15S8G3

5 회원들

안내서 5개 작성하였습니다

댓글 0개

댓글 쓰기

조회 통계:

24 시간 전: 1

7일 전: 2

30일 전: 13

전체 시간: 2,435