주요 콘텐츠로 건너뛰기

2011-2013 Scion tC Radio Head Unit Replacement

필요한 것

  1. 2011-2013 Scion tC Radio Head Unit Replacement, Radio Head Unit: 1 단계, 이미지 1/2 2011-2013 Scion tC Radio Head Unit Replacement, Radio Head Unit: 1 단계, 이미지 2/2
    • Remove the dashboard panel around the radio head by pulling on the bottom of the unit.

  2. 2011-2013 Scion tC Radio Head Unit Replacement: 2 단계, 이미지 1/2 2011-2013 Scion tC Radio Head Unit Replacement: 2 단계, 이미지 2/2
    • Remove the wire header connected to the panel by pressing inward on the tabs.

  3. 2011-2013 Scion tC Radio Head Unit Replacement: 3 단계, 이미지 1/1
    • Remove the four #2 12mm screws securing the head unit in the housing

  4. 2011-2013 Scion tC Radio Head Unit Replacement: 4 단계, 이미지 1/2 2011-2013 Scion tC Radio Head Unit Replacement: 4 단계, 이미지 2/2
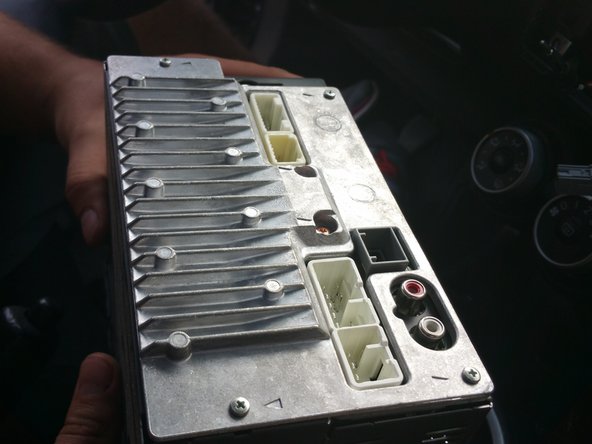
    • Remove each bundle of wires that is connected to the back of the head unit.

  5. 2011-2013 Scion tC Radio Head Unit Replacement: 5 단계, 이미지 1/2 2011-2013 Scion tC Radio Head Unit Replacement: 5 단계, 이미지 2/2
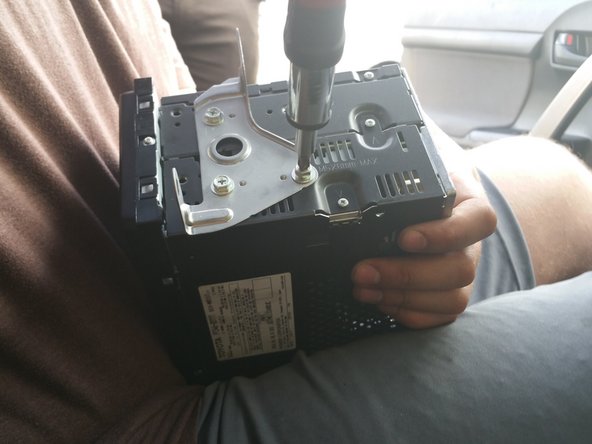
    • Locate the metal brackets on the side of the head unit.

    • Use a Philips head screwdriver, remove the three #2 25mm screws from both support brackets on the side of the head unit

  6. 2011-2013 Scion tC Radio Head Unit Replacement: 6 단계, 이미지 1/1
    • Screw the support brackets to the new radio head unit

    • Note that the brackets are unique to the car. They will not come with your new head unit.

결론

To reassemble your device, follow these instructions in reverse order.

다른 2명이 해당 안내서를 완성하였습니다.

Dylan Smith

회원 가입일: 05/01/15

143 평판

안내서 1개 작성함

Cal Poly, Team 8-2, Regan Spring 2015 Cal Poly, Team 8-2, Regan Spring 2015 회원

CPSU-REGAN-S15S8G2

5 회원들

안내서 7개 작성하였습니다

댓글 0개

댓글 쓰기

조회 통계:

24 시간 전: 3

7일 전: 14

30일 전: 40

전체 시간: 7,448