주요 콘텐츠로 건너뛰기

2012 Kawasaki Ninja Chain Tightening Replacement

필요한 것

  1. 2012 Kawasaki Ninja Chain Tightening Replacement, Chain Tightening: 1 단계, 이미지 1/2 2012 Kawasaki Ninja Chain Tightening Replacement, Chain Tightening: 1 단계, 이미지 2/2
    • Park your bike and get the essential tools

  2. 2012 Kawasaki Ninja Chain Tightening Replacement: 2 단계, 이미지 1/3 2012 Kawasaki Ninja Chain Tightening Replacement: 2 단계, 이미지 2/3 2012 Kawasaki Ninja Chain Tightening Replacement: 2 단계, 이미지 3/3
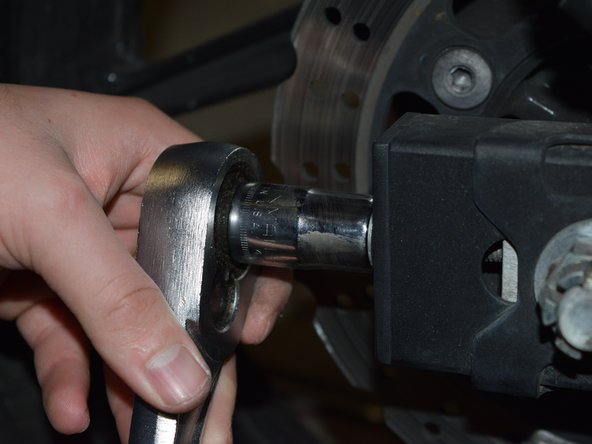
    • Remove any factory or aftermarket chain covers on your bike.

    • This can be removed by using your socket wrench (9mm for this specific one)

    • Set the cover and bolts aside.

    • Helpful hint: leave the bolts in the cover when setting it aside to help keep organized

    • Feel the chain. If there is more than 1 inch of play (movement up or down) then the chain should be tightened.

  3. 2012 Kawasaki Ninja Chain Tightening Replacement: 3 단계, 이미지 1/3 2012 Kawasaki Ninja Chain Tightening Replacement: 3 단계, 이미지 2/3 2012 Kawasaki Ninja Chain Tightening Replacement: 3 단계, 이미지 3/3
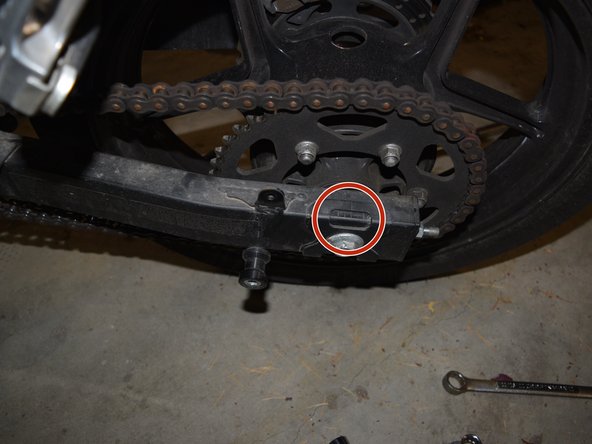
    • Notice the location of the slider on each side

    • This is located at the back of the bike on the rear wheel bars

    • Usually after use, the sliders become out of alignment and could be at different marker locations

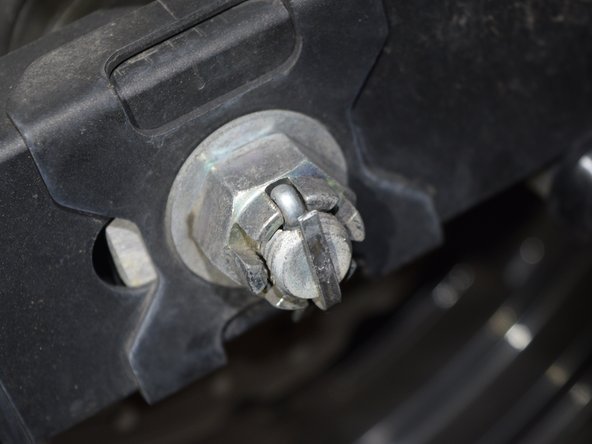
    • Locate the bolt that travels through the hub of the wheel

    • This will be the largest bolt of the back of the wheel

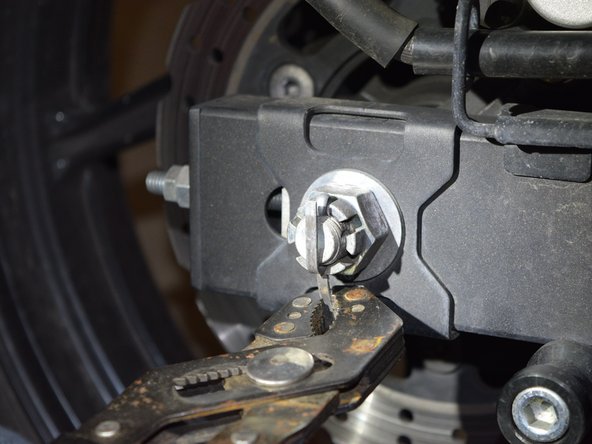
    • Remove the locking pin holding the nut in place

    • Use the grips to bend the pin straight

  4. 2012 Kawasaki Ninja Chain Tightening Replacement: 4 단계, 이미지 1/3 2012 Kawasaki Ninja Chain Tightening Replacement: 4 단계, 이미지 2/3 2012 Kawasaki Ninja Chain Tightening Replacement: 4 단계, 이미지 3/3
    • Remove the locking pin

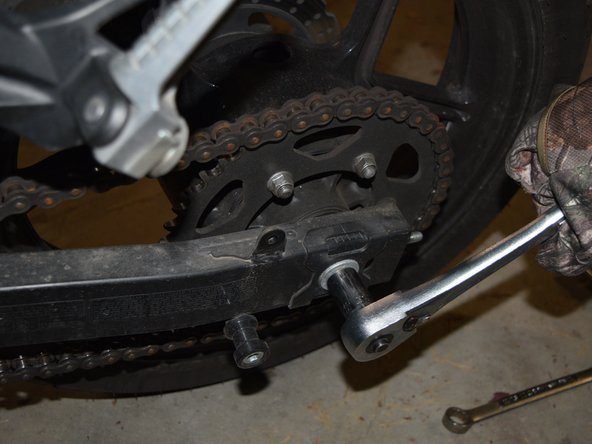
    • Place your 17mm socket on the bolt side and the 1 inch side over the nut

    • This is where the breaker bar would help as it could be very tight

    • Loosen the bolt to about half way

    • Do not take the bolt out or the nut off

  5. 2012 Kawasaki Ninja Chain Tightening Replacement: 5 단계, 이미지 1/2 2012 Kawasaki Ninja Chain Tightening Replacement: 5 단계, 이미지 2/2
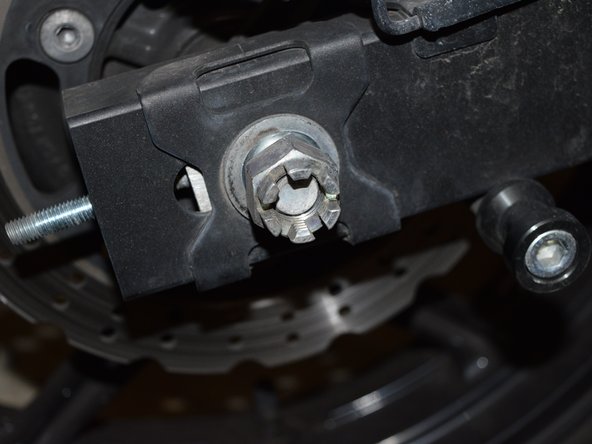
    • Locate the bolts on each side of the bike sticking out

    • There should be two nuts on each bolt

    • Loosen only the first nut on each side with a 12mm

    • This is the locking nut while the second one locks the chain in place.

  6. 2012 Kawasaki Ninja Chain Tightening Replacement: 6 단계, 이미지 1/3 2012 Kawasaki Ninja Chain Tightening Replacement: 6 단계, 이미지 2/3 2012 Kawasaki Ninja Chain Tightening Replacement: 6 단계, 이미지 3/3
    • Begin tightening the second nut on the side with the chain (usually the left side) with a 14mm

    • You should visually see the chain tightening and the sliders moving which marks the chain position

    • Tighten to where there is about ½ to ¾ inch of play in the chain.

    • Notice the mark of the slider on the side you tightened first

    • Tighten the opposite side till the slider is in the same position as the first side you tightened

  7. 2012 Kawasaki Ninja Chain Tightening Replacement: 7 단계, 이미지 1/1
    • Make sure the chain is tightened to your liking

    • Should be about ½ inch to ¾ inch play

    • Repeat the tightening process if it is not to your liking

  8. 2012 Kawasaki Ninja Chain Tightening Replacement: 8 단계, 이미지 1/1
    • Begin putting the bike back together

    • Start by retightening the small bolts with the 12mm

  9. 2012 Kawasaki Ninja Chain Tightening Replacement: 9 단계, 이미지 1/2 2012 Kawasaki Ninja Chain Tightening Replacement: 9 단계, 이미지 2/2
    • Retighten the main bolt with the 1 inch socket and the 17mm.

    • Make sure the hole in the nut and bolt line up for the locking pin

    • Reinsert the locking pin once the main bolt is tightened

  10. 2012 Kawasaki Ninja Chain Tightening Replacement: 10 단계, 이미지 1/1
    • Lastly reinsert the chain guard and tighten the bolts

  11. 2012 Kawasaki Ninja Chain Tightening Replacement: 11 단계, 이미지 1/1
    • Proceed to ride and test your work.

    • You will feel smooth and the bike will glide well in neutral if done properly.

결론

To reassemble, follow these instructions in reverse order.

다른 2명이 해당 안내서를 완성하였습니다.

matthew pennell

회원 가입일: 09/26/18

247 평판

안내서 1개 작성함

댓글 0개

댓글 쓰기

조회 통계:

24 시간 전: 2

7일 전: 3

30일 전: 10

전체 시간: 178