2016-2017 Toyota Tacoma High-Beam Headlight Bulb Replacement
소개
If you clicked on this guide, it means that one or both of the high-beam headlight bulbs of your car are very old and worn down, and you wish to replace them. Luckily, you've come to the right place, for this guide will show you how to replace the high-beam bulbs yourself.
High-beam headlights are crucial for when there are no other vehicles around and when you're dealing with unusually poor visibility of the road, like driving in the middle of the night or through the fog.
The guide will use a 2017 Toyota Tacoma for the demonstration, but it should also work with most other kinds of vehicles. Throughout the entire process, make sure that the engine is always kept off to avoid any accidents that may occur if it were to be turned on.
First things first, you need to access the car's engine, which is done by popping (A.K.A. opening) the hood of the vehicle.
Locate the hood release lever that is found under the dashboard to the left of the driver's side and pull it.
Some cars may have their hood release levers near the kick panel of the driver's side instead, so you could also check there if it's not under the dashboard.
After pulling the hood release lever, the hood will open a gap just big enough to access the secondary release lock. Push that lock to the side to fully release the hood.
With the hood fully released, start lifting it carefully up, then prop it up using the hood shock(s) or prop rod(s) that comes with the car.
In order to replace the high-beam bulbs, you first need to know where they are located.
To find the left high-beam bulb, look between the inside of the left headlight and the car's windshield wiper fluid container.
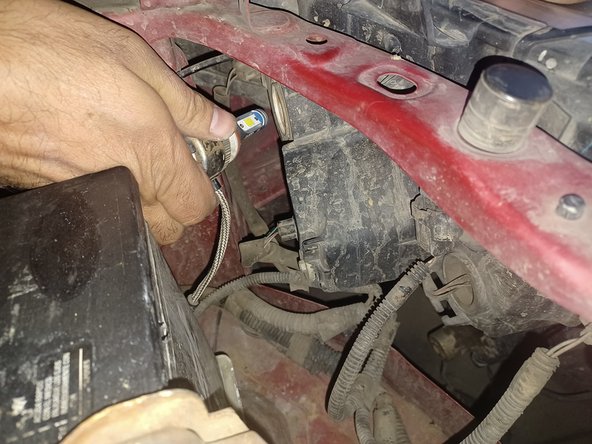
To find the right high-beam bulb, look between the inside of the right headlight and the car's battery.
As you are about to see, this guide shows the replacement process of the right bulb for a 2017 Toyota Tacoma. This means that the engine may not look exactly the same as your vehicle's engine. If that's the case, a good rule of thumb to find the bulb is to use the headlight as a reference point. The bulb will always be located behind the headlight.
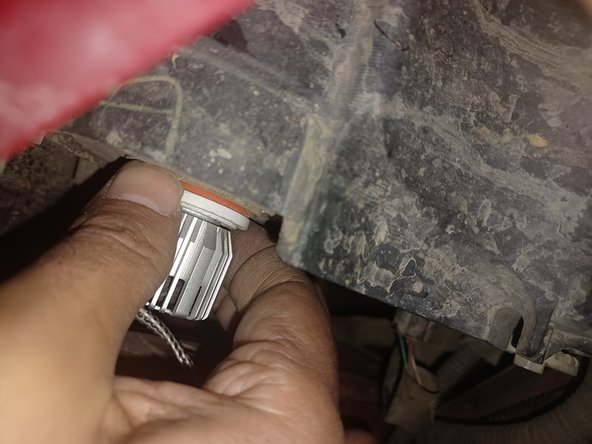
Now that we can access the high-beam bulb, we can begin the replacement process. The first step to replacing the bulb is to remove the old one from its socket.
Hold the bulb by the base and twist it clockwise to unhook its wedges from the socket.
Pull back the bulb while passing its wedges through their designated gaps until you see it fully out of the socket.
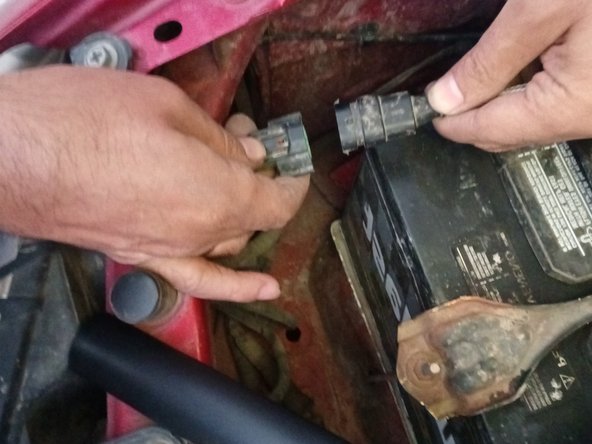
As you may have noticed already, the bulb is connected to its power cable via a plug. The next step will be to disconnect the bulb's plug from its socket.
Press down on the top of the socket with your thumb to release the hook mechanism that keeps the plug and the socket together.
While keeping the hook mechanism lifted, hold the plug with your other hand and separate the two ends apart from each other.
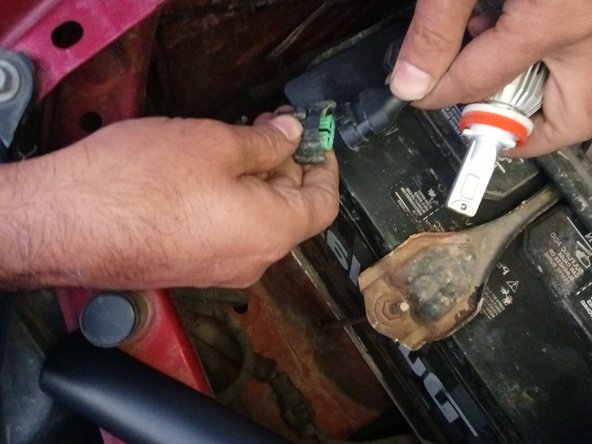
Now that the old bulb has been completely removed, you can move on to retracing your steps to insert the new bulb. You begin this process by connecting the new bulb's plug to the power cable's socket.
Just like in the previous step, hold down on the top of the socket with your thumb to lift the hook mechanism.
While holding the plug with your other hand, insert the plug into the socket, then let go of the top of the socket to secure both ends in place.
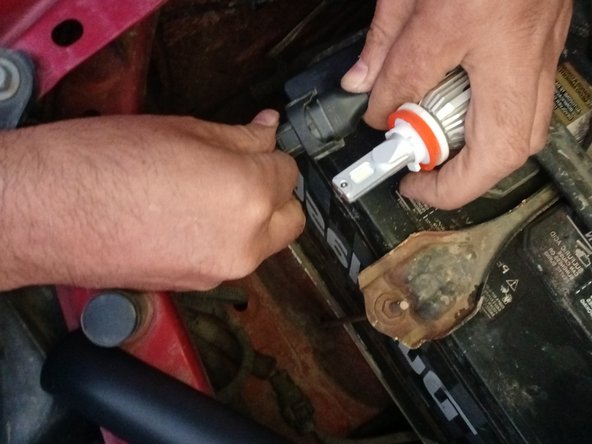
Now that the new bulb is connected to the power cable, you can move on to the final step of the guide (if you don't include closing the hood), which is placing the new bulb into the socket that the old part was originally removed from.
Hold the bulb by the base and insert it into the socket. You'll know you've done it right if the bulb's wedges pass through their designated gaps.
While the other half of the bulb is inside the socket, twist the bulb counter-clockwise to hook the wedges into it.
You can test if the bulb is firmly set in place by pulling it after twisting it counterclockwise.