소개
Headphone jacks are frequently subjected to wear through their normal usage. Instead of purchasing a new pair of headphones, which can sometimes have a hefty cost, replacing the connector is often a cheaper choice.
The use of a soldering iron is required in order to complete this repair. Since the wires used in headphones are often very small, this repair is only recommended for individuals with decent amount of experience in soldering.
Extra precautions should be taken while using the soldering iron, they are extremely hot and you will be working in very small spaces. The use of an Electrician's Helping Hand tool is highly recommended.
필요한 것
-
-
Cut the headphone cable near the old headphone jack. Leave some cable attached to the jack.
-
-
-
Turn on the multimeter and set it to measure resistance.
-
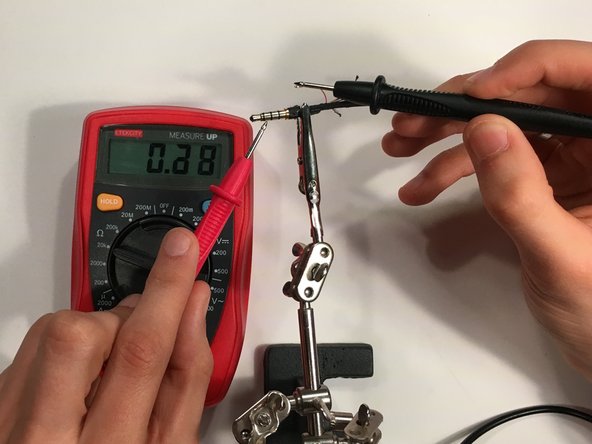
Select a wire and touch one of the multimeter leads to the soldered tip.
-
Touch the other multimeter lead to each of the segments on the headphone jack until the multimeter indicates that the wire is connected.
-
Repeat the process for each wire.
-
-


You have now completed the replacement process. Plug it into an audio source and play some music to test your work.
You have now completed the replacement process. Plug it into an audio source and play some music to test your work.
다른 28명이 해당 안내서를 완성하였습니다.
팀

Michigan Tech, Team 1-25, Lauer Spring 2016 Michigan Tech, Team 1-25, Lauer Spring 2016 회원
MTU-LAUER-S16S1G25
1 회원
안내서 8개 작성하였습니다
댓글 13개
This is a plug replacement, not a jack replacement.
This is a jack replacement.
can you please tell me which color wire and where to solder !
Wire colors are not standardized. They even differ among models of the same manufacturer. The only way is to test against the plug that is being replaced. Hopefully most wires still connect to the plug contacts, so a process of elimination can be used. Typical colors are red, blue, green and no color. Ground is usually no color, and sometimes there are 2 grounds (e.g. for ‘zipper’ style wires). The contacts for most phones are as follows (from tip to outside barrel): Right, Left, Ground, Mic. My Samsung S3 cord was very strange: red, green, no color and 2 black wires. One black was Ground, the other was MIC. Soldering requires a magnifier and a fine tipped iron.
No pinout, seriously?
Old Liquid - 답글