이 버전에는 잘못된 편집 사항이 있을 수 있습니다. 최신 확인된 스냅샷으로 전환하십시오.
필요한 것
-
이 단계는 번역되지 않았습니다. 번역을 도와주십시오
-
Hold the controller with its back facing towards you.
-
Insert an opening pick between the L1 or R1 button and the backplate, and pry the backplate off of the controller.
-
-
이 단계는 번역되지 않았습니다. 번역을 도와주십시오
-
Place the controller face down on a solid surface.
-
Remove the seven screws with the Phillips #00 screwdriver.
-
-
-
이 단계는 번역되지 않았습니다. 번역을 도와주십시오
-
Lift the body of the controller up and away from the controller's face and buttons.
-
-
이 단계는 번역되지 않았습니다. 번역을 도와주십시오
-
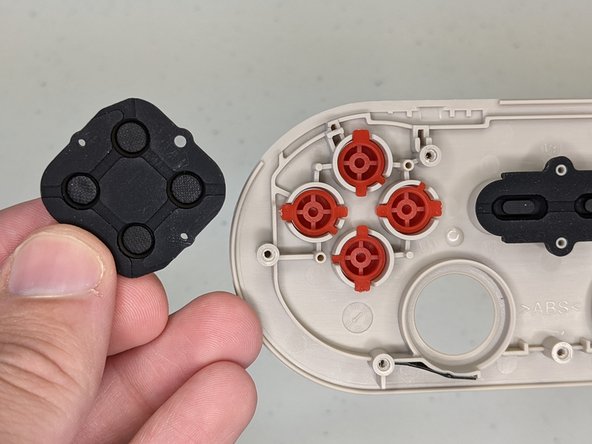
Lift away the black rubber pads that sit between the face buttons and body of the controller.
-
-
이 단계는 번역되지 않았습니다. 번역을 도와주십시오
-
Align the notches of the face buttons to put them back into place.
-
Attach the rubber pads by placing their smaller and larger holes around the matching size pegs.
-


다른 한 분이 해당 안내서를 완성하였습니다.

팀

Grand Valley State University, Team S1-G6, DeVasto Winter 2021 Grand Valley State University, Team S1-G6, DeVasto Winter 2021 회원
GVSU-DEVASTO-W21S1G6
1 회원
안내서 1개 작성하였습니다
댓글 2개
Hello there, any idea where I can find those black rubber pads for replacement ? mine is torn.
Thx
Ben Kakita - 답글
sorry, i try to search every where, have a tone for other controller, even have for 8bitdo snes, but not for nes 30 pro.
if you find it, answer on that chat. Good luck