주요 콘텐츠로 건너뛰기

8bitDo Ultimate C 2.4g Wireless Controller Battery Replacement

필요한 것

  1. 8bitDo Ultimate C 2.4g Wireless Controller Battery Replacement, Battery: 1 단계, 이미지 1/3 8bitDo Ultimate C 2.4g Wireless Controller Battery Replacement, Battery: 1 단계, 이미지 2/3 8bitDo Ultimate C 2.4g Wireless Controller Battery Replacement, Battery: 1 단계, 이미지 3/3
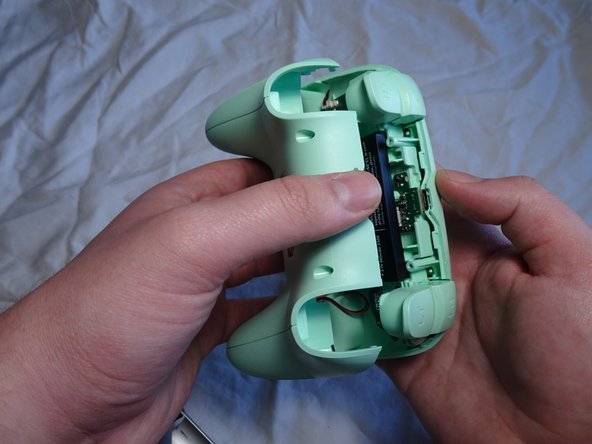
    • Remove the four screws from the back cover of the controller using a T6 Torx screwdriver.

  2. 8bitDo Ultimate C 2.4g Wireless Controller Battery Replacement: 2 단계, 이미지 1/3 8bitDo Ultimate C 2.4g Wireless Controller Battery Replacement: 2 단계, 이미지 2/3 8bitDo Ultimate C 2.4g Wireless Controller Battery Replacement: 2 단계, 이미지 3/3
    • Insert a Jimmy into the crevice of one of the controller's bottom grips and use it to follow the lining of the crevice around the whole controller.

    • Opting for a plastic wedge instead of other metal tools may be a more practical choice. Metal tools may bend and cause cosmetic damage.

  3. 8bitDo Ultimate C 2.4g Wireless Controller Battery Replacement: 3 단계, 이미지 1/3 8bitDo Ultimate C 2.4g Wireless Controller Battery Replacement: 3 단계, 이미지 2/3 8bitDo Ultimate C 2.4g Wireless Controller Battery Replacement: 3 단계, 이미지 3/3
    • Gently separate the front and back casing of the controller to expose the battery.

  4. 8bitDo Ultimate C 2.4g Wireless Controller Battery Replacement: 4 단계, 이미지 1/3 8bitDo Ultimate C 2.4g Wireless Controller Battery Replacement: 4 단계, 이미지 2/3 8bitDo Ultimate C 2.4g Wireless Controller Battery Replacement: 4 단계, 이미지 3/3
    • Gently grab the white plastic front of the wire that is connected to the motherboard to detach it from its plug.

    • Be sure to only unplug the wire that connects the battery to the motherboard. No other wire needs to be unplugged for this specific replacement.

  5. 8bitDo Ultimate C 2.4g Wireless Controller Battery Replacement: 5 단계, 이미지 1/3 8bitDo Ultimate C 2.4g Wireless Controller Battery Replacement: 5 단계, 이미지 2/3 8bitDo Ultimate C 2.4g Wireless Controller Battery Replacement: 5 단계, 이미지 3/3
    • Remove the battery from its position.

    • There will be adhesive at the back of the battery that may raise concern. However, removing the battery will not damage it or the controller.

  6. 8bitDo Ultimate C 2.4g Wireless Controller Battery Replacement: 6 단계, 이미지 1/1
    • Apply the iFixit stretch release adhesive to the back of the replacement battery and place the new battery in the same spot as the old one.

    • Make sure to plug in the new battery's wire into the controller's motherboard.

결론

To reassemble your device, follow these instructions in reverse order.

다른 2명이 해당 안내서를 완성하였습니다.

letarian

회원 가입일: 02/21/24

190 평판

안내서 1개 작성함

CSU Sacramento, Team 1-3, Laflen Spring 2024 CSU Sacramento, Team 1-3, Laflen Spring 2024 회원

CSUSAC-LAFLEN-S24S1G3

1 회원

안내서 1개 작성하였습니다

댓글 4개

Where did you boght the battery replacement? I'm trying to find it on the internet but no clues yet

Lucas Simões - 답글

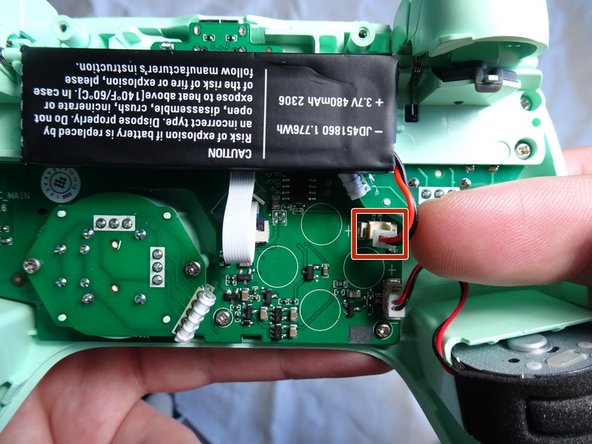
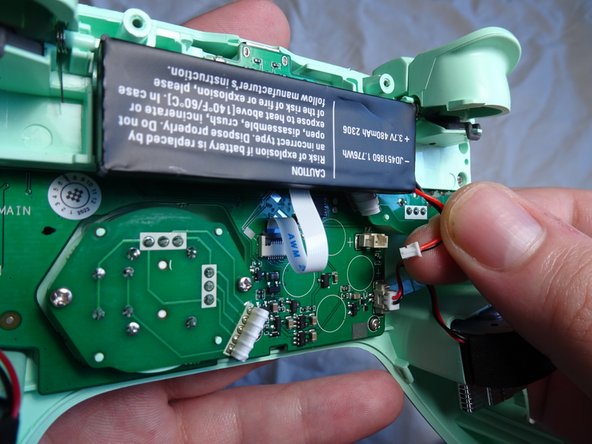
Did some digging based on the specs listed in the picture (3.7V, 480mAh) and it appears that 303454 is the standard name for said specs, although not the same shape and size as the one pictured as they appear to be using a custom form factor. That said, it looks like there should be enough spare room in the controller to make it work, but I can't verify it myself as I'm only shopping for the controller at the time of writing. I was able to find a 303454 battery with the connector on Amazon for about $5, so no soldering should be required, and it looks thin enough to be compatible. They also have other capacities if you want to upgrade to 950 or 2,000mAh while you're at it. Let me know if you're able to try it!

egarcia1360 -

Hi, where can I get the new battery for replacement?

Juan Manuel - 답글

See my reply to Lucas above.

egarcia1360 -

댓글 쓰기

조회 통계:

24 시간 전: 11

7일 전: 93

30일 전: 350

전체 시간: 886