주요 콘텐츠로 건너뛰기

ACER Aspire 7750G-6645 Motherboard Replacement

필요한 것

  1. ACER Aspire 7750G-6645 Motherboard Replacement, Motherboard: 1 단계, 이미지 1/1
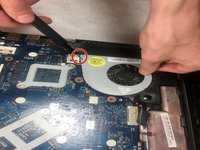
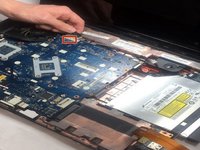
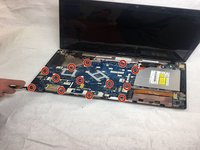
    • Remove the six 2.5mm Phillips #0 screws from the back of the laptop.

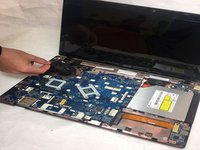
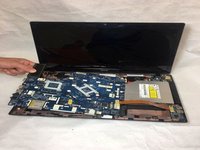
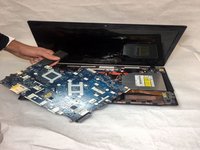
    • Flip the laptop over carefully.

  2. ACER Aspire 7750G-6645 Motherboard Replacement: 2 단계, 이미지 1/3 ACER Aspire 7750G-6645 Motherboard Replacement: 2 단계, 이미지 2/3 ACER Aspire 7750G-6645 Motherboard Replacement: 2 단계, 이미지 3/3
    • Remove the framing that encases the keyboard.

    • Next remove the keypad.

  3. ACER Aspire 7750G-6645 Motherboard Replacement: 3 단계, 이미지 1/3 ACER Aspire 7750G-6645 Motherboard Replacement: 3 단계, 이미지 2/3 ACER Aspire 7750G-6645 Motherboard Replacement: 3 단계, 이미지 3/3
    • Remove the single 2.5mm Phillips #0 screw.

    • Remove the silver plating above the fan.

    • Pull out the fan.

  4. ACER Aspire 7750G-6645 Motherboard Replacement: 4 단계, 이미지 1/1
    • Disconnect the ribbon strip from the motherboard by removing the two 2.5mm Phillips #0 screws.

  5. ACER Aspire 7750G-6645 Motherboard Replacement: 5 단계, 이미지 1/3 ACER Aspire 7750G-6645 Motherboard Replacement: 5 단계, 이미지 2/3 ACER Aspire 7750G-6645 Motherboard Replacement: 5 단계, 이미지 3/3
    • Disconnect the cables plugged into the motherboard.

  6. ACER Aspire 7750G-6645 Motherboard Replacement: 6 단계, 이미지 1/3 ACER Aspire 7750G-6645 Motherboard Replacement: 6 단계, 이미지 2/3 ACER Aspire 7750G-6645 Motherboard Replacement: 6 단계, 이미지 3/3
    • Remove the thirteen 2.5mm Phillips #0 screws connecting the motherboard to the body.

    • Remove the motherboard from the laptop body.

결론

To reassemble your device, follow these instructions in reverse order.

다른 한 분이 해당 안내서를 완성하였습니다.

Shania Webb

회원 가입일: 11/12/19

250 평판

안내서 2개 작성하였습니다

IUPUI, Team S2-G3, Harley Fall 2019 IUPUI, Team S2-G3, Harley Fall 2019 회원

IUPUI-HARLEY-F19S2G3

3 회원들

안내서 2개 작성하였습니다

댓글 0개

댓글 쓰기

조회 통계:

24 시간 전: 1

7일 전: 3

30일 전: 10

전체 시간: 788