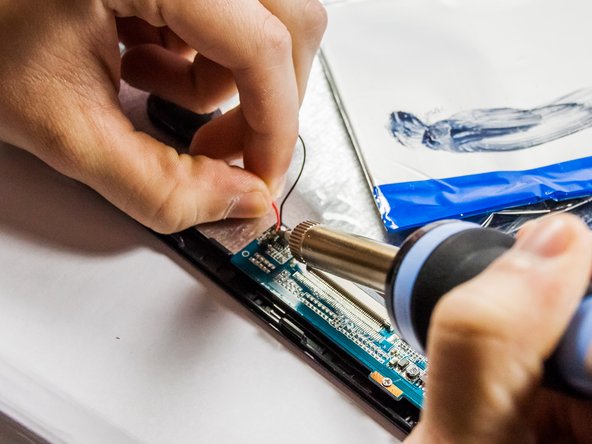
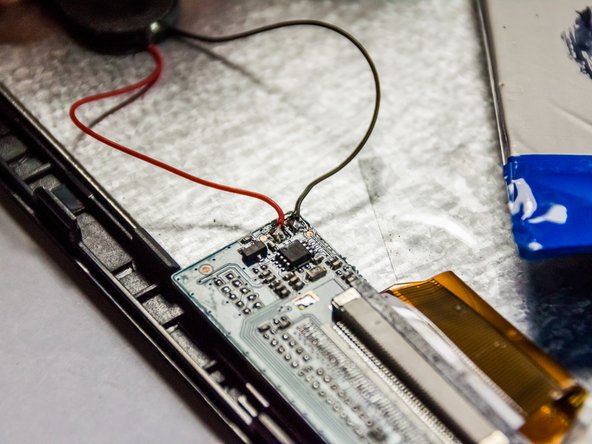
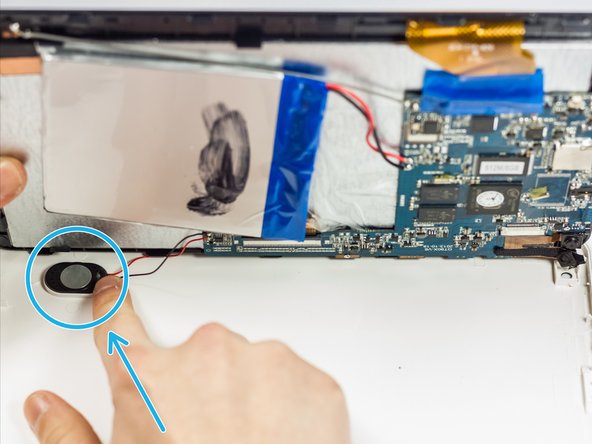
주요 콘텐츠로 건너뛰기

AKASO KingPad A90 Rear Speaker Replacement

필요한 것

  1. AKASO KingPad A90 Rear Speaker Replacement, Rear Speaker: 1 단계, 이미지 1/3 AKASO KingPad A90 Rear Speaker Replacement, Rear Speaker: 1 단계, 이미지 2/3 AKASO KingPad A90 Rear Speaker Replacement, Rear Speaker: 1 단계, 이미지 3/3
    • Remove screws.

    • Insert spudger tool on the middle of the left side, between the white and black plastic.

    • Slide in a plastic opening tool and use it to further pull the back off.

    • Work your way around the edge of the tablet with the plastic opening tool and insert more as needed.

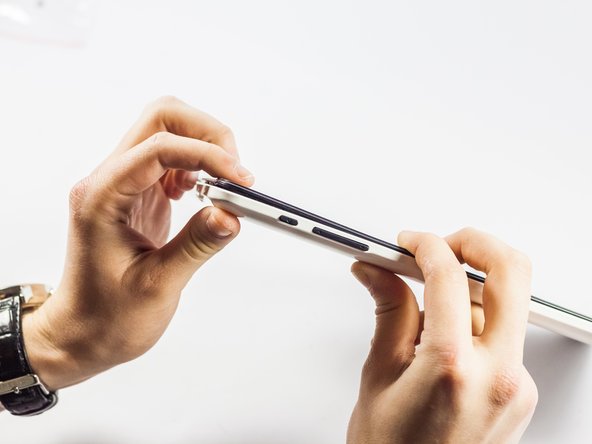
    • Pull off the back cover.

  2. AKASO KingPad A90 Rear Speaker Replacement: 2 단계, 이미지 1/3 AKASO KingPad A90 Rear Speaker Replacement: 2 단계, 이미지 2/3 AKASO KingPad A90 Rear Speaker Replacement: 2 단계, 이미지 3/3
    • Plug in soldering iron and let it warm up for ten minutes.

    • Locate the speaker solder points and note where it is attached to the motherboard.

    • Solder the old speaker out of its mark. (Touch the tip of the solder iron to the soldering point).

  3. AKASO KingPad A90 Rear Speaker Replacement: 3 단계, 이미지 1/3 AKASO KingPad A90 Rear Speaker Replacement: 3 단계, 이미지 2/3 AKASO KingPad A90 Rear Speaker Replacement: 3 단계, 이미지 3/3
    • Solder the new speaker onto the points where the old speaker was.

  4. AKASO KingPad A90 Rear Speaker Replacement: 4 단계, 이미지 1/3 AKASO KingPad A90 Rear Speaker Replacement: 4 단계, 이미지 2/3 AKASO KingPad A90 Rear Speaker Replacement: 4 단계, 이미지 3/3
    • Replace the back cover with the new rear speaker unit in place.

    • Gently press the speaker into place.

    • Don't let the volume rocker unit fall out of place.

    • Replace the screws.

결승점

camchristo

회원 가입일: 03/24/15

71 평판

안내서 1개 작성함

UMass Dartmouth, Team 4-6, Vijaybhaskar Spring 2015 UMass Dartmouth, Team 4-6, Vijaybhaskar Spring 2015 회원

UMASSD-VIJAYBHASKAR-S15S4G6

3 회원들

안내서 6개 작성하였습니다

댓글 0개

댓글 쓰기

조회 통계:

24 시간 전: 0

7일 전: 2

30일 전: 5

전체 시간: 364