이 버전에는 잘못된 편집 사항이 있을 수 있습니다. 최신 확인된 스냅샷으로 전환하십시오.
필요한 것
-
이 단계는 번역되지 않았습니다. 번역을 도와주십시오
-
Pry all four of the plastic feet off the bottom of the enclosure using the iPod opening tool.
-
-
이 단계는 번역되지 않았습니다. 번역을 도와주십시오
-
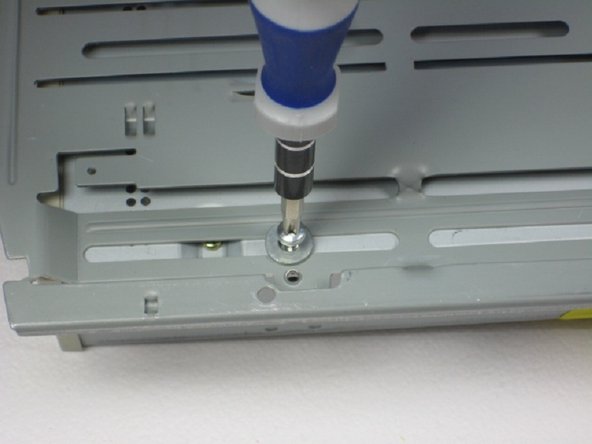
Unscrew the four screws previously covered by the feet with a Phillips #1 screwdriver.
-
-
이 단계는 번역되지 않았습니다. 번역을 도와주십시오
-
Flip the device right side up.
-
Gently slide the casing upwards and off the hard drive.
-
-
-
이 단계는 번역되지 않았습니다. 번역을 도와주십시오
-
Flip device upside down again.
-
Gently pry the bottom gray casing away from the device.
-
-
이 단계는 번역되지 않았습니다. 번역을 도와주십시오
-
Rotate so the back of the device is facing you.
-
Gently pry the back casing away.
-
When the back casing is removed, the fan will become loose.
-
-
이 단계는 번역되지 않았습니다. 번역을 도와주십시오
-
Flip so device is upside down.
-
Remove 4 screws with Phillips #1 screw driver.
-
-
이 단계는 번역되지 않았습니다. 번역을 도와주십시오
-
Slide the internal drive component away from the back of the device.
-
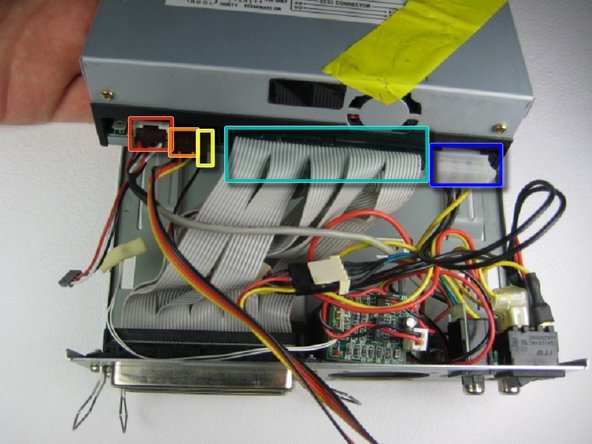
Remove the connections from the back of the internal component in the order of your choosing, we suggest left to right. The connections are:
-
Audio Connection
-
SCSI ID
-
Terminate On
-
SCSI Connection
-
DC Input (power)
-


다른 2명이 해당 안내서를 완성하였습니다.

팀

Cal Poly, Team 24-60, Amido Spring 2011 Cal Poly, Team 24-60, Amido Spring 2011 회원
CPSU-AMIDO-S11S24G60
5 회원들
안내서 12개 작성하였습니다