주요 콘텐츠로 건너뛰기

ASUS E210MA-TB.CL464BK Battery Replacement

필요한 것

  1. ASUS E210MA-TB.CL464BK Battery Replacement, Battery: 1 단계, 이미지 1/3 ASUS E210MA-TB.CL464BK Battery Replacement, Battery: 1 단계, 이미지 2/3 ASUS E210MA-TB.CL464BK Battery Replacement, Battery: 1 단계, 이미지 3/3
    • Place the laptop with the bottom side facing up. Have the front (where the mousepad is) facing toward you.

    • Start by removing the ten 7mm screws on the bottom of the laptop using a JIS #00 JIS screwdriver.

  2. ASUS E210MA-TB.CL464BK Battery Replacement: 2 단계, 이미지 1/1
    • Double-check to make sure all of the screws are removed.

    • If you have a Jimmy or other flat, straight-edge object, slide it in the crack where the halves of the case meet.

    • When the parts are separated, pull them apart to expose the insides of the case.

  3. ASUS E210MA-TB.CL464BK Battery Replacement: 3 단계, 이미지 1/2 ASUS E210MA-TB.CL464BK Battery Replacement: 3 단계, 이미지 2/2
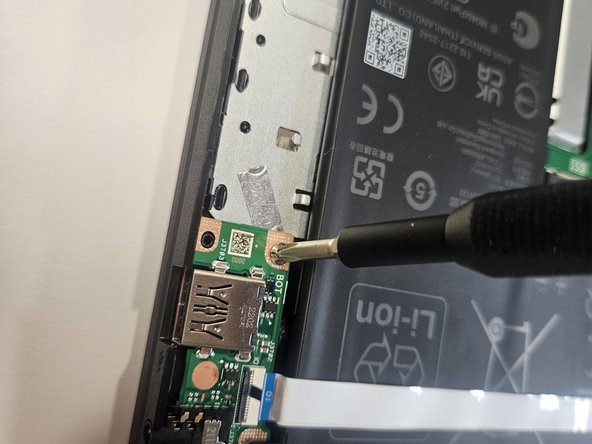
    • Remove the 4 mm screws around the USB port.

  4. ASUS E210MA-TB.CL464BK Battery Replacement: 4 단계, 이미지 1/2 ASUS E210MA-TB.CL464BK Battery Replacement: 4 단계, 이미지 2/2
    • Remove the 3 mm screws around the battery.

    • Carefully lift up the USB port and set it to the side.

  5. ASUS E210MA-TB.CL464BK Battery Replacement: 5 단계, 이미지 1/2 ASUS E210MA-TB.CL464BK Battery Replacement: 5 단계, 이미지 2/2
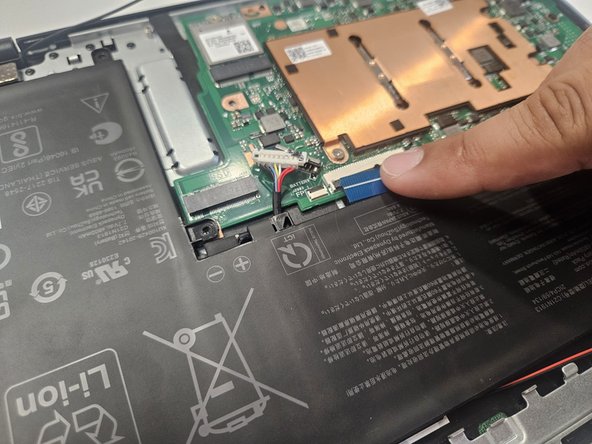
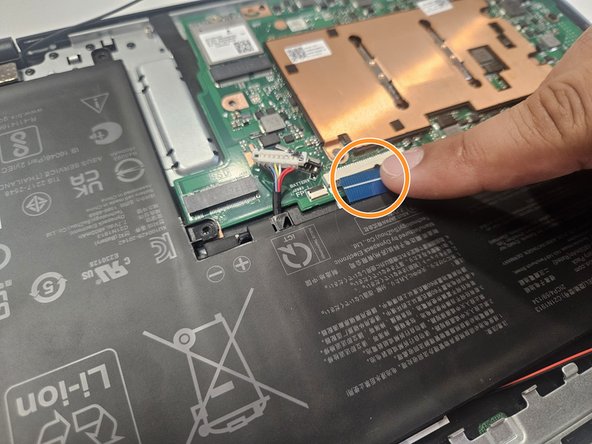
    • Unplug the connection between the motherboard and the battery by pulling towards the speaker side.

    • Repeat the same process to remove the blue tape on the second picture.

  6. ASUS E210MA-TB.CL464BK Battery Replacement: 6 단계, 이미지 1/1
    • Lift up and remove the battery.

결론

To reassemble your device, follow these instructions in reverse order.

John Hutchins

회원 가입일: 02/07/23

763 평판

안내서 5개 작성하였습니다

Gateway, Team 73-6, Gonzalez Spring 2023 Gateway, Team 73-6, Gonzalez Spring 2023 회원

GCC-GONZALEZ-S23S73G6

5 회원들

안내서 5개 작성하였습니다

댓글 0개

댓글 쓰기

조회 통계:

24 시간 전: 0

7일 전: 8

30일 전: 41

전체 시간: 429