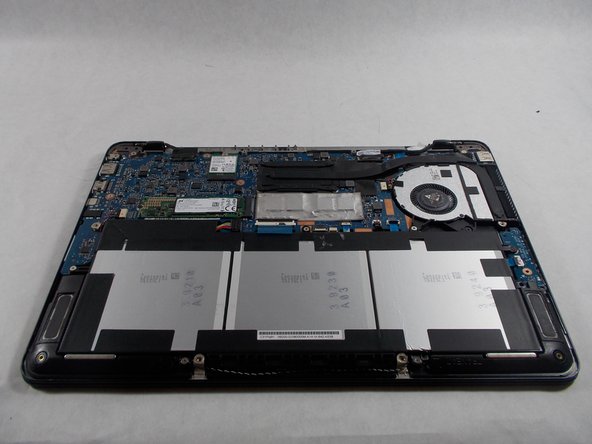
주요 콘텐츠로 건너뛰기

ASUS Q324UA-BHI7T17 Motherboard Replacement

필요한 것

  1. ASUS Q324UA-BHI7T17 Motherboard Replacement, Battery: 1 단계, 이미지 1/1
    • Remove all 10 Phillips screws on the backplate.

    • All 10 screws are 0.55 inches and 20 mm in diameter.

  2. ASUS Q324UA-BHI7T17 Motherboard Replacement: 2 단계, 이미지 1/2 ASUS Q324UA-BHI7T17 Motherboard Replacement: 2 단계, 이미지 2/2
    • Carefully remove the backplate using the plastic opening tool.

  3. ASUS Q324UA-BHI7T17 Motherboard Replacement: 3 단계, 이미지 1/1
    • Locate the battery near the bottom.

  4. ASUS Q324UA-BHI7T17 Motherboard Replacement: 4 단계, 이미지 1/1
    • Next, lift up the battery connector from the laptop in the upper left side of the battery, using tweezers or spudger.

    • Make sure to complete this step with caution, because if the battery is not unplugged, the motherboard may shock you.

  5. ASUS Q324UA-BHI7T17 Motherboard Replacement: 5 단계, 이미지 1/2 ASUS Q324UA-BHI7T17 Motherboard Replacement: 5 단계, 이미지 2/2
    • Remove the six screws holding in the battery with a Phillips #0 screwdriver.

    • Once battery is lifted out and removed, proper dispose of the old battery.

    • Each screw is 0.5 cm in length and 0.5 cm in diameter.

  6. ASUS Q324UA-BHI7T17 Motherboard Replacement, CPU Fan: 6 단계, 이미지 1/2 ASUS Q324UA-BHI7T17 Motherboard Replacement, CPU Fan: 6 단계, 이미지 2/2
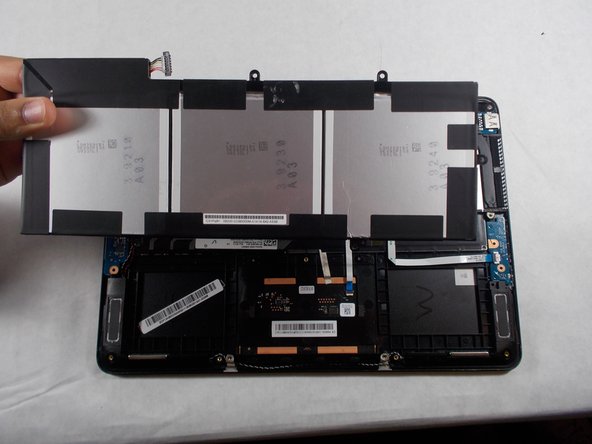
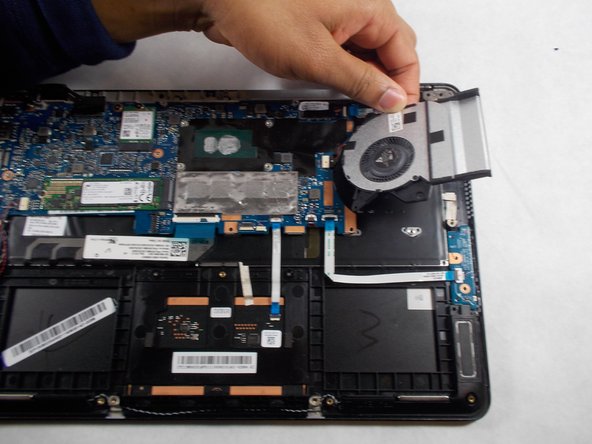
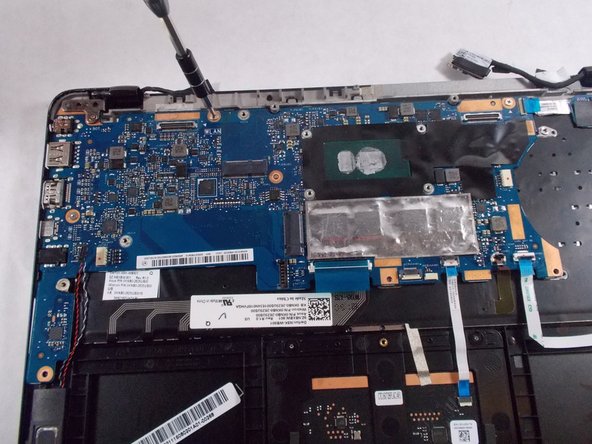
    • Using a Phillips #0 screwdriver remove the six screws holding the CPU Fan and Heatsink in place.

    • All six screws are 0.4 cm in length and have a 0.5 cm head diameter.

  7. ASUS Q324UA-BHI7T17 Motherboard Replacement: 7 단계, 이미지 1/2 ASUS Q324UA-BHI7T17 Motherboard Replacement: 7 단계, 이미지 2/2
    • Next, carefully remove the sliding connector that connect the CPU Fan and the laptop together using the tweezers.

  8. ASUS Q324UA-BHI7T17 Motherboard Replacement: 8 단계, 이미지 1/1
    • Remove the CPU Fan and Heatsink by simply lifting upwards.

  9. ASUS Q324UA-BHI7T17 Motherboard Replacement, Motherboard: 9 단계, 이미지 1/2 ASUS Q324UA-BHI7T17 Motherboard Replacement, Motherboard: 9 단계, 이미지 2/2
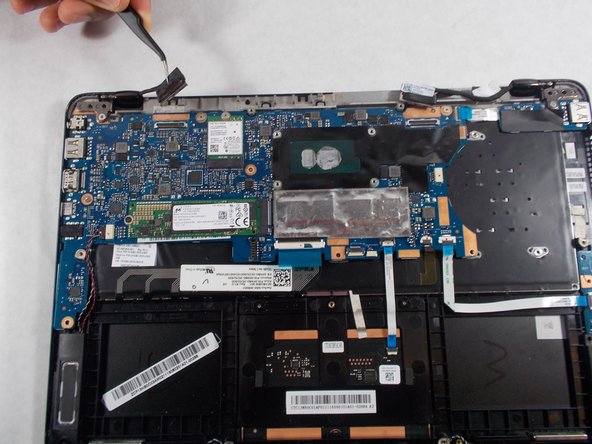
    • Locate the two connectors that are located near the top of the motherboard.

    • Simply lift the two connectors up and they should pop out easily.

  10. ASUS Q324UA-BHI7T17 Motherboard Replacement: 10 단계, 이미지 1/2 ASUS Q324UA-BHI7T17 Motherboard Replacement: 10 단계, 이미지 2/2
    • Locate all 5 ribbon cables that are connected to the motherboard.

    • Using tweezers lift the black component up therefore allowing the ribbon cable to be released and taken out.

  11. ASUS Q324UA-BHI7T17 Motherboard Replacement: 11 단계, 이미지 1/2 ASUS Q324UA-BHI7T17 Motherboard Replacement: 11 단계, 이미지 2/2
    • Locate the single sliding connector that is attached to the motherboard.

    • Using tweezers slightly remove the sliding connector from the motherboard.

  12. ASUS Q324UA-BHI7T17 Motherboard Replacement: 12 단계, 이미지 1/3 ASUS Q324UA-BHI7T17 Motherboard Replacement: 12 단계, 이미지 2/3 ASUS Q324UA-BHI7T17 Motherboard Replacement: 12 단계, 이미지 3/3
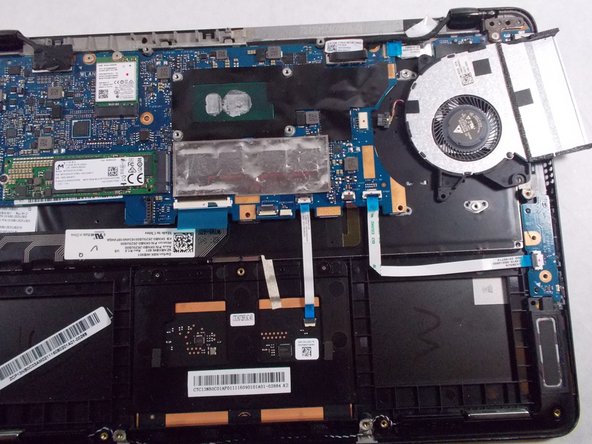
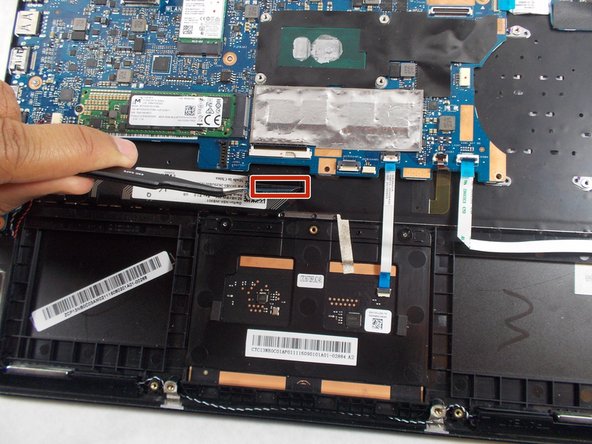
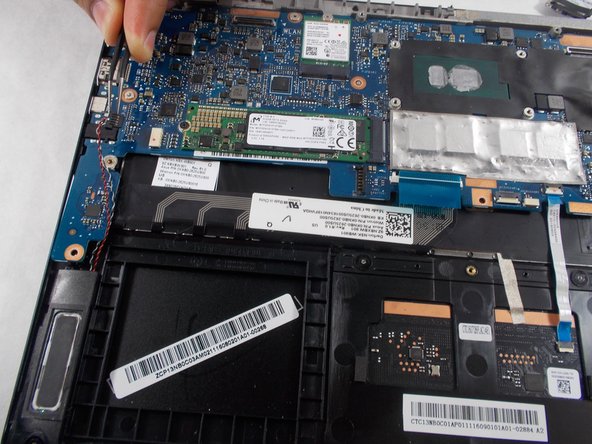
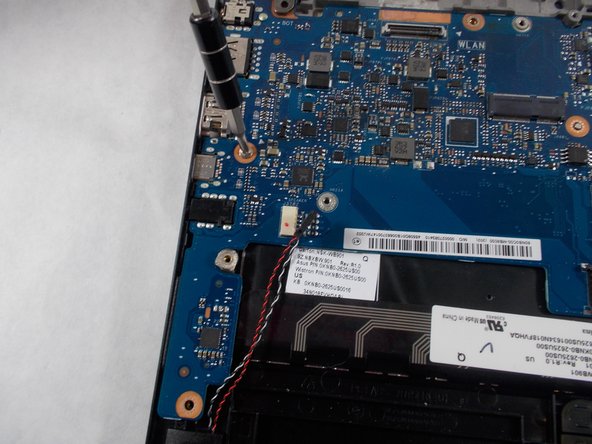
    • There are two chips that are attached to the motherboard. One is a square wifi card and one is a rectangular m.2 ssd, locate them on the motherboard.

    • Remove the two screws holding the chips in place on the mother board.

    • The screw for the rectangle chip is 0.5cm in length and 0.5cm in head diameter. While the square chip screw has a 0.3 cm length and 0.5 cm head diameter.

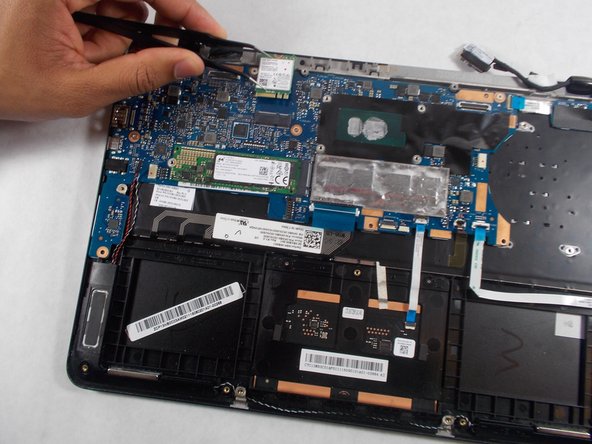
    • Both chips now can be removed by simply sliding them out of their connectors.

  13. ASUS Q324UA-BHI7T17 Motherboard Replacement: 13 단계, 이미지 1/2 ASUS Q324UA-BHI7T17 Motherboard Replacement: 13 단계, 이미지 2/2
    • Locate the 3 screws near the top of the motherboard holding the motherboard in place.

    • Using a Phillips head #0 screw driver remove each screw driver.

    • The screw all the way to the right is 0.5cm in length and 0.4cm in head diameter. The screw all the way to the left is 0.6 cm in length and 0.4cm in head diameter. The screw in the middle is 0.3cm in length and 0.5 cm in head diameter.

  14. ASUS Q324UA-BHI7T17 Motherboard Replacement: 14 단계, 이미지 1/3 ASUS Q324UA-BHI7T17 Motherboard Replacement: 14 단계, 이미지 2/3 ASUS Q324UA-BHI7T17 Motherboard Replacement: 14 단계, 이미지 3/3
    • Locate the final screw that holds the motherboard in place, on the left side of the motherboard near the middle.

    • Using a Phillips head #0 screwdriver remove the screw. The motherboard should easily pop out and from there properly dispose of the mother board.

    • The screw is 0.3cm in length and 0.5 cm in head diameter.

결론

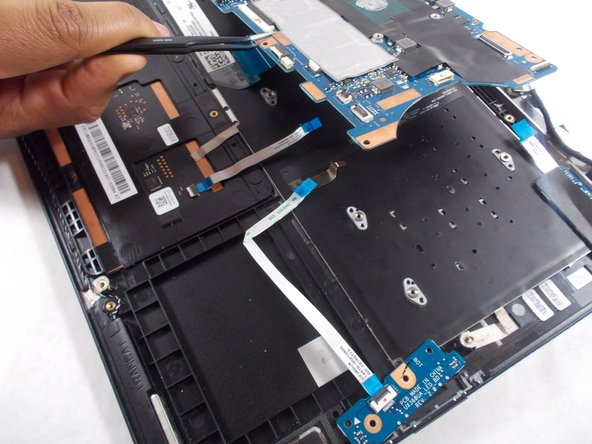
To reassemble your device, follow these instructions in reverse order.

Scott Santiago

회원 가입일: 10/17/17

534 평판

안내서 5개 작성하였습니다

UMass Dartmouth, Team S1-G1, Simcock Fall 2017 UMass Dartmouth, Team S1-G1, Simcock Fall 2017 회원

UMASSD-SIMCOCK-F17S1G1

3 회원들

안내서 5개 작성하였습니다

댓글 0개

댓글 쓰기

조회 통계:

24 시간 전: 0

7일 전: 4

30일 전: 4

전체 시간: 898