주요 콘텐츠로 건너뛰기

ASUS TUF Gaming FX505DY Speakers Replacement

필요한 것

  1. ASUS TUF Gaming FX505DY Speakers Replacement, Back Case: 1 단계, 이미지 1/1
    • Turn off the laptop.

    • Disconnect the charging cable.

    • Failure to disconnect the charging cable and power down the computer could result in personal or property damage.

    • Flip the laptop so the back is facing up.

  2. ASUS TUF Gaming FX505DY Speakers Replacement: 2 단계, 이미지 1/2 ASUS TUF Gaming FX505DY Speakers Replacement: 2 단계, 이미지 2/2
    • Use a Phillips #1 screwdriver to remove the five 6 mm screws that secure the back panel.

    • Use the same screwdriver to remove the six 13 mm screws securing the back panel.

  3. ASUS TUF Gaming FX505DY Speakers Replacement: 3 단계, 이미지 1/2 ASUS TUF Gaming FX505DY Speakers Replacement: 3 단계, 이미지 2/2
    • Insert the plastic opening tool at a corner and pry up along the edges, leaving the back side with the hinges for last.

    • Do not insert the opening tool too far into the laptop to avoid damaging internal components.

  4. ASUS TUF Gaming FX505DY Speakers Replacement: 4 단계, 이미지 1/2 ASUS TUF Gaming FX505DY Speakers Replacement: 4 단계, 이미지 2/2
    • Gently lift up the back panel to release any remaining clips on the side with the hinges and remove the panel.

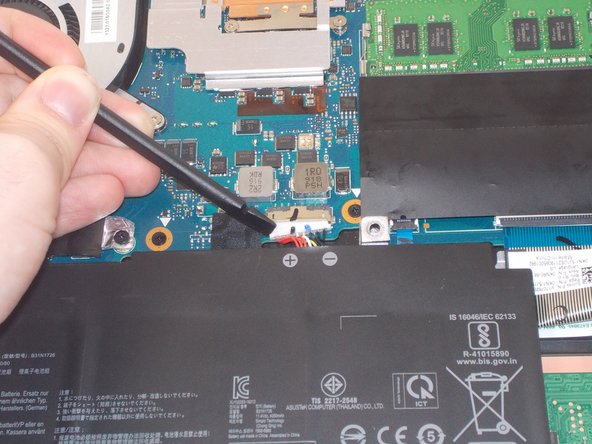
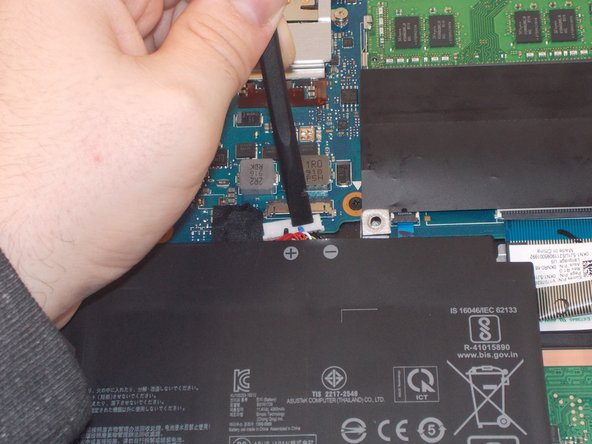
  5. ASUS TUF Gaming FX505DY Speakers Replacement, Battery: 5 단계, 이미지 1/3 ASUS TUF Gaming FX505DY Speakers Replacement, Battery: 5 단계, 이미지 2/3 ASUS TUF Gaming FX505DY Speakers Replacement, Battery: 5 단계, 이미지 3/3
    • Using an ESD-safe spudger, disconnect the battery connector by pulling the plug away from its port.

  6. ASUS TUF Gaming FX505DY Speakers Replacement: 6 단계, 이미지 1/2 ASUS TUF Gaming FX505DY Speakers Replacement: 6 단계, 이미지 2/2
    • Remove the 6 mm screw holding the battery in place using a Phillips #1 screwdriver.

    • Avoid cutting, puncturing, or otherwise damaging the battery. Li-ion batteries can combust or explode if damaged.

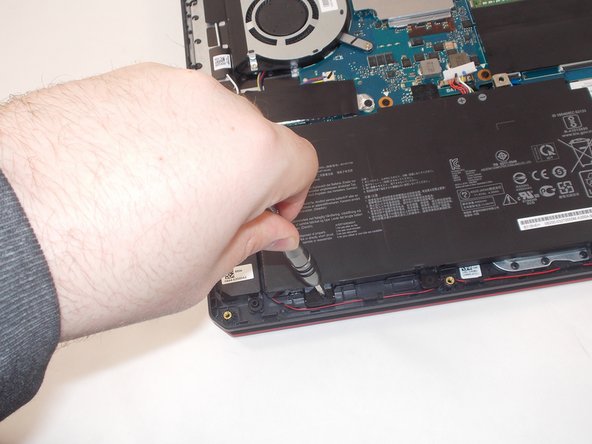
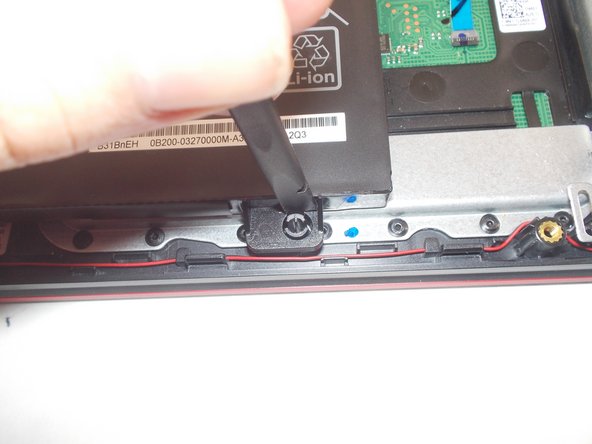
  7. ASUS TUF Gaming FX505DY Speakers Replacement: 7 단계, 이미지 1/3 ASUS TUF Gaming FX505DY Speakers Replacement: 7 단계, 이미지 2/3 ASUS TUF Gaming FX505DY Speakers Replacement: 7 단계, 이미지 3/3
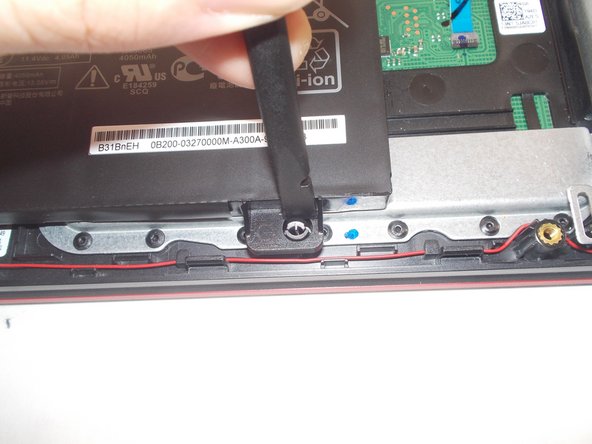
    • Use a spudger to pry the retaining pin into the closed position to allow the battery frame to be removed.

  8. ASUS TUF Gaming FX505DY Speakers Replacement: 8 단계, 이미지 1/1
    • Lift the battery up out of the computer.

  9. ASUS TUF Gaming FX505DY Speakers Replacement, Speakers: 9 단계, 이미지 1/2 ASUS TUF Gaming FX505DY Speakers Replacement, Speakers: 9 단계, 이미지 2/2
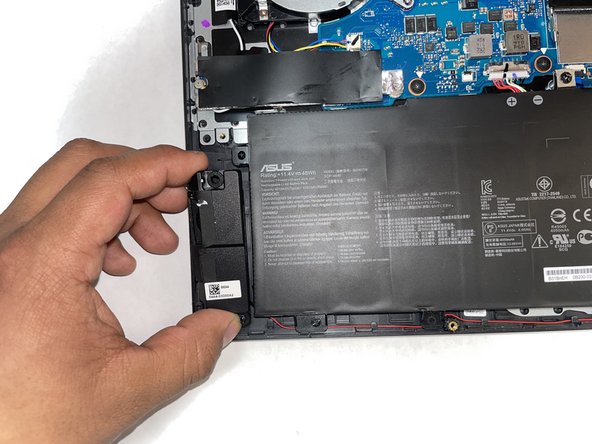
    • Lift the speakers from the pegs holding them down. Use minimal force as to not break the pegs or the speakers.

  10. ASUS TUF Gaming FX505DY Speakers Replacement: 10 단계, 이미지 1/2 ASUS TUF Gaming FX505DY Speakers Replacement: 10 단계, 이미지 2/2
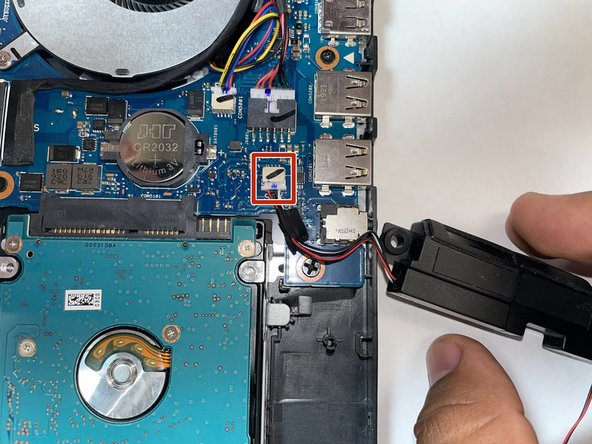
    • Identify the place where the speaker cable connects to the motherboard. The port should be "SPK"

  11. ASUS TUF Gaming FX505DY Speakers Replacement: 11 단계, 이미지 1/2 ASUS TUF Gaming FX505DY Speakers Replacement: 11 단계, 이미지 2/2
    • Pull the cable off the motherboard using a plastic pick or other pointed item and remove the speakers.

결론

To reassemble your device, follow these instructions in reverse order.

Nick Pearcy

회원 가입일: 03/28/23

313 평판

안내서 3개 작성하였습니다

IUPUI, Team 2-3, Harley Spring 2023 IUPUI, Team 2-3, Harley Spring 2023 회원

IUPUI-HARLEY-S23S2G3

3 회원들

안내서 3개 작성하였습니다

댓글 한 개

model for the speaker. I want to buy a replacement , which one should I buy . I cant get original.

albert enstine - 답글

댓글 쓰기

조회 통계:

24 시간 전: 5

7일 전: 15

30일 전: 44

전체 시간: 466