주요 콘텐츠로 건너뛰기

ASUS Transformer Book Flip TP500LA Motherboard Replacement

필요한 것

  1. ASUS Transformer Book Flip TP500LA Motherboard Replacement, Back Case: 1 단계, 이미지 1/3 ASUS Transformer Book Flip TP500LA Motherboard Replacement, Back Case: 1 단계, 이미지 2/3 ASUS Transformer Book Flip TP500LA Motherboard Replacement, Back Case: 1 단계, 이미지 3/3
    • Remove the ten 10 mm Phillips #0 screws found on the computer's back case.

  2. ASUS Transformer Book Flip TP500LA Motherboard Replacement: 2 단계, 이미지 1/2 ASUS Transformer Book Flip TP500LA Motherboard Replacement: 2 단계, 이미지 2/2
    • Slide a heavy-duty spudger between the back case and the computer.

    • Slowly work around the edges to undo the clips to fully separate the back case from the computer.

    • Gently lift off the back case.

  3. ASUS Transformer Book Flip TP500LA Motherboard Replacement, Battery: 3 단계, 이미지 1/2 ASUS Transformer Book Flip TP500LA Motherboard Replacement, Battery: 3 단계, 이미지 2/2
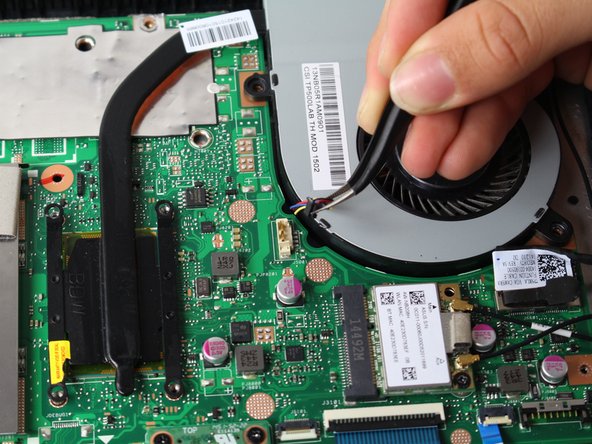
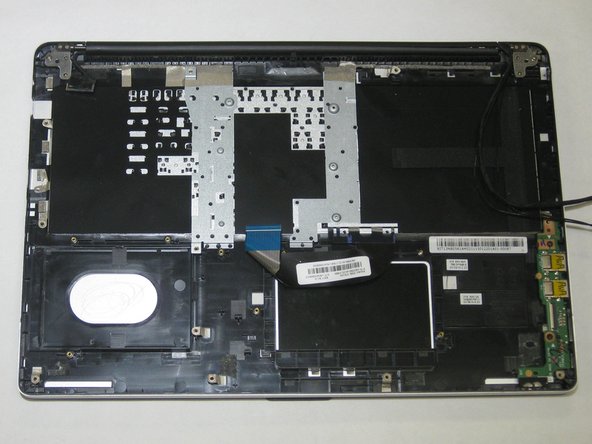
    • Slide a heavy-duty spudger into the ZIF connector and gently flip up the retaining flap to open the connector.

    • Pull the blue tab to remove the ribbon.

  4. ASUS Transformer Book Flip TP500LA Motherboard Replacement: 4 단계, 이미지 1/2 ASUS Transformer Book Flip TP500LA Motherboard Replacement: 4 단계, 이미지 2/2
    • Remove the three 5 mm Phillips #0 screws.

    • Remove the single 6 mm Phillips #0 screw.

  5. ASUS Transformer Book Flip TP500LA Motherboard Replacement: 5 단계, 이미지 1/2 ASUS Transformer Book Flip TP500LA Motherboard Replacement: 5 단계, 이미지 2/2
    • Use the heavy-duty spudger to pry the white 8-pin connector away from the motherboard.

    • Gently pull the connector away from the motherboard.

    • The black 8-pin connector on the motherboard is very fragile, so be careful when removing the white 8-pin connector.

  6. ASUS Transformer Book Flip TP500LA Motherboard Replacement: 6 단계, 이미지 1/2 ASUS Transformer Book Flip TP500LA Motherboard Replacement: 6 단계, 이미지 2/2
    • Use the blue plastic opening tool to loosen and remove the three black wires from the battery.

    • Slide the battery out from the computer to remove.

  7. ASUS Transformer Book Flip TP500LA Motherboard Replacement, Fan: 7 단계, 이미지 1/2 ASUS Transformer Book Flip TP500LA Motherboard Replacement, Fan: 7 단계, 이미지 2/2
    • Unscrew the six 5 mm Phillips #0 screws.

  8. ASUS Transformer Book Flip TP500LA Motherboard Replacement: 8 단계, 이미지 1/3 ASUS Transformer Book Flip TP500LA Motherboard Replacement: 8 단계, 이미지 2/3 ASUS Transformer Book Flip TP500LA Motherboard Replacement: 8 단계, 이미지 3/3
    • Grasp the top of the 3-pin connector with tweezers.

    • Wiggle the connector until it loosens itself from the motherboard.

    • Gently lift the connector from the motherboard attachment.

  9. ASUS Transformer Book Flip TP500LA Motherboard Replacement: 9 단계, 이미지 1/1
    • Carefully lift the fan off the motherboard.

    • Attached to the fan is thermal pasting that needs to be reapplied when attaching the fan back to the motherboard. Follow this guide to reapply thermal pasting correctly.

  10. ASUS Transformer Book Flip TP500LA Motherboard Replacement, Motherboard: 10 단계, 이미지 1/1
    • Disconnect the two display cables from the motherboard.

  11. ASUS Transformer Book Flip TP500LA Motherboard Replacement: 11 단계, 이미지 1/2 ASUS Transformer Book Flip TP500LA Motherboard Replacement: 11 단계, 이미지 2/2
    • Using the Phillips #0 screwdriver, remove the three screws holding the motherboard to the rest of the device.

  12. ASUS Transformer Book Flip TP500LA Motherboard Replacement: 12 단계, 이미지 1/2 ASUS Transformer Book Flip TP500LA Motherboard Replacement: 12 단계, 이미지 2/2
    • Remove the motherboard from the device.

결론

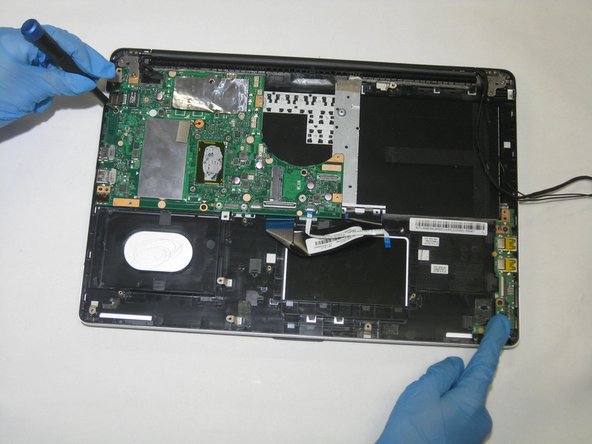
To reassemble your device, follow these instructions in reverse order.

Graham Haigood

회원 가입일: 02/23/21

253 평판

안내서 3개 작성하였습니다

댓글 0개

댓글 쓰기

조회 통계:

24 시간 전: 0

7일 전: 1

30일 전: 24

전체 시간: 501