주요 콘텐츠로 건너뛰기

ASUS VivoBook S400C I/O Board Replacement

필요한 것

  1. ASUS VivoBook S400C I/O Board Replacement, Remove the Bottom Cover: 1 단계, 이미지 1/1
    • Flip the device over and remove the ten 5.7 mm screws with a Phillips #0 screwdriver.

  2. ASUS VivoBook S400C I/O Board Replacement: 2 단계, 이미지 1/2 ASUS VivoBook S400C I/O Board Replacement: 2 단계, 이미지 2/2
    • Use a spudger or your fingers to go around and lift the edges and release the back panel.

  3. ASUS VivoBook S400C I/O Board Replacement, Disconnect the Battery: 3 단계, 이미지 1/1
    • Using a spudger, lift up the plug connecting the battery to the motherboard.

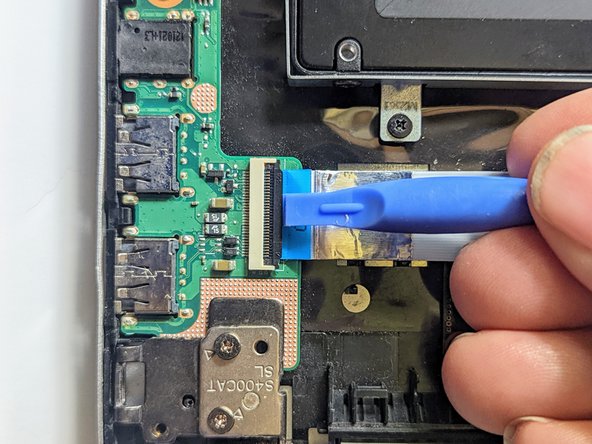
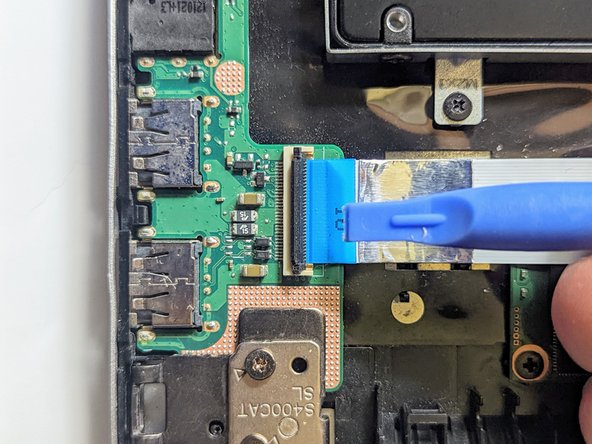
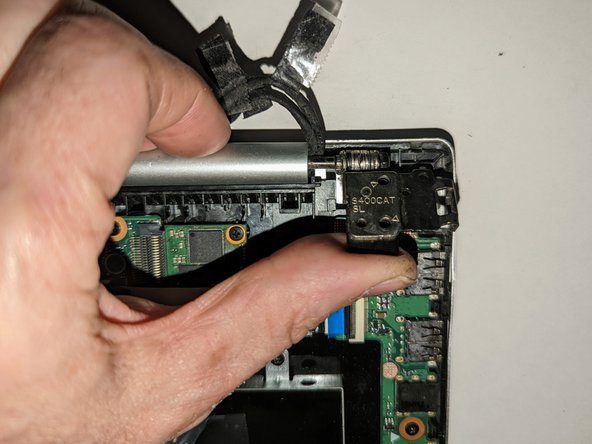
  4. ASUS VivoBook S400C I/O Board Replacement, I/O Board: 4 단계, 이미지 1/3 ASUS VivoBook S400C I/O Board Replacement, I/O Board: 4 단계, 이미지 2/3 ASUS VivoBook S400C I/O Board Replacement, I/O Board: 4 단계, 이미지 3/3
    • Flip up the retaining latch on the I/O board ribbon cable.

  5. ASUS VivoBook S400C I/O Board Replacement: 5 단계, 이미지 1/2 ASUS VivoBook S400C I/O Board Replacement: 5 단계, 이미지 2/2
    • Pull the cable straight out of the connector by the blue tab.

  6. ASUS VivoBook S400C I/O Board Replacement: 6 단계, 이미지 1/2 ASUS VivoBook S400C I/O Board Replacement: 6 단계, 이미지 2/2
    • Remove the two screws securing the left hinge to the I/O board.

    • Pry the hinge up by hand to a 90 degree angle.

  7. ASUS VivoBook S400C I/O Board Replacement: 7 단계, 이미지 1/1
    • Remove the retaining screw.

  8. ASUS VivoBook S400C I/O Board Replacement: 8 단계, 이미지 1/1
    • Lift the board on the ribbon cable side far enough to clear the guide pin(s) then pull it back away from the side of the case.

결론

To reassemble your device, follow these instructions in reverse order.

Jerry Wheeler

회원 가입일: 03/21/22

57,827 평판

안내서 69개 작성하였습니다

Oregonians Oregonians 회원

Community

7 회원들

안내서 176개 작성하였습니다

댓글 0개

댓글 쓰기

조회 통계:

24 시간 전: 0

7일 전: 0

30일 전: 3

전체 시간: 125