주요 콘텐츠로 건너뛰기

ASUS VivoBook S400C LCD Adhesive Replacement

필요한 것

  1. ASUS VivoBook S400C LCD Adhesive Replacement, Remove the Old Adhesive Tape: 1 단계, 이미지 1/3 ASUS VivoBook S400C LCD Adhesive Replacement, Remove the Old Adhesive Tape: 1 단계, 이미지 2/3 ASUS VivoBook S400C LCD Adhesive Replacement, Remove the Old Adhesive Tape: 1 단계, 이미지 3/3
    • Skip this step if you're replacing the digitizer, unless you have a used touch screen and the adhesive tape is not usable.

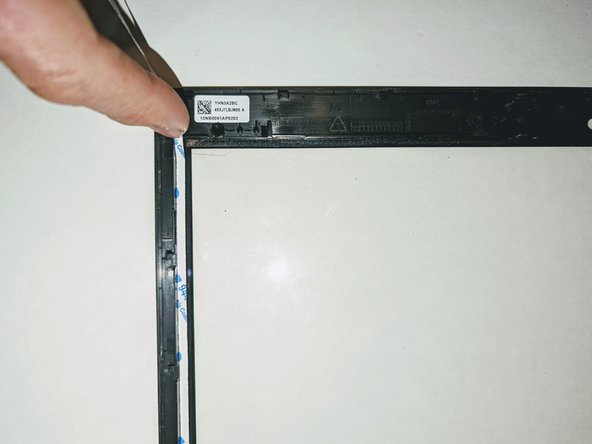
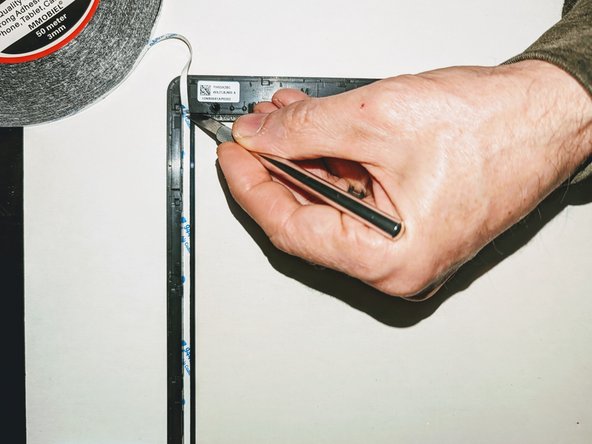
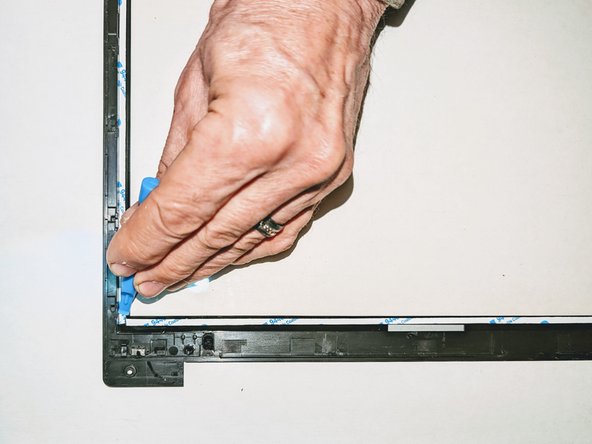
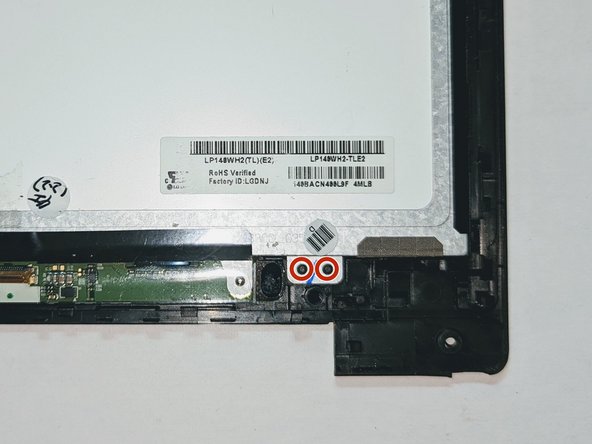
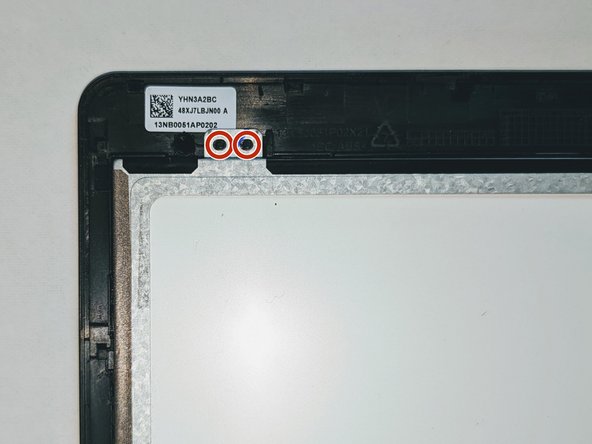
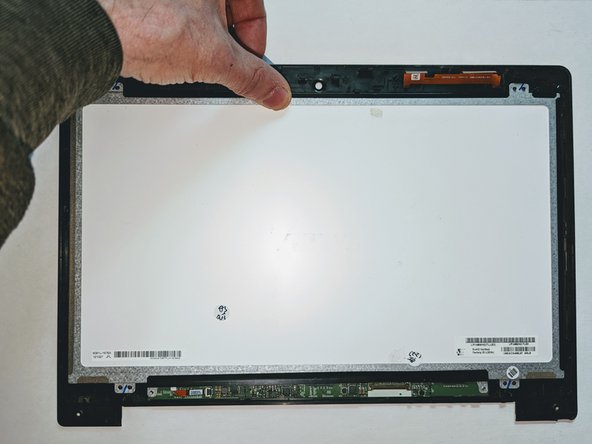
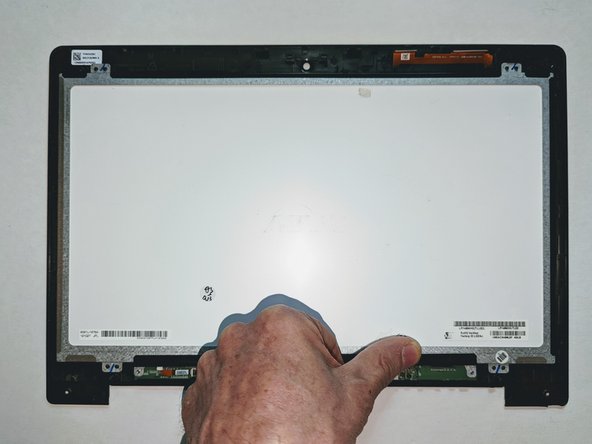
    • Peel up one end of an adhesive strip along the edge of the digitizer.

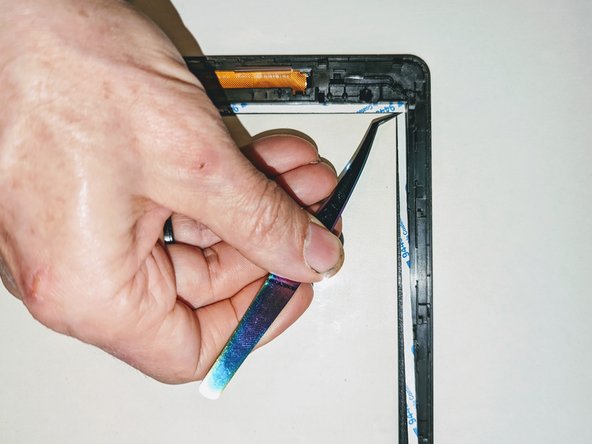
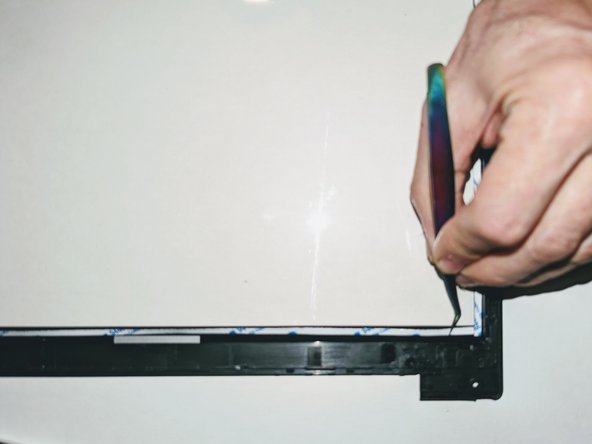
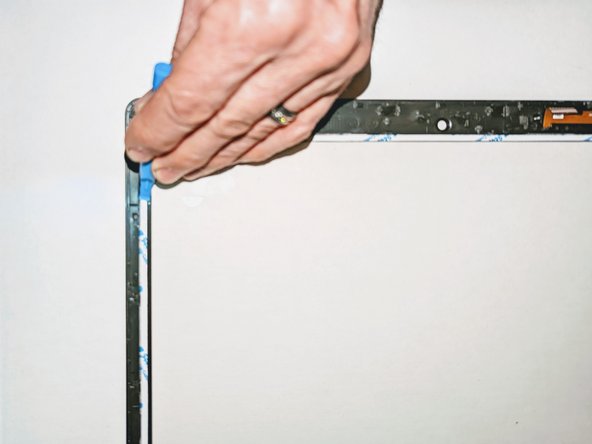
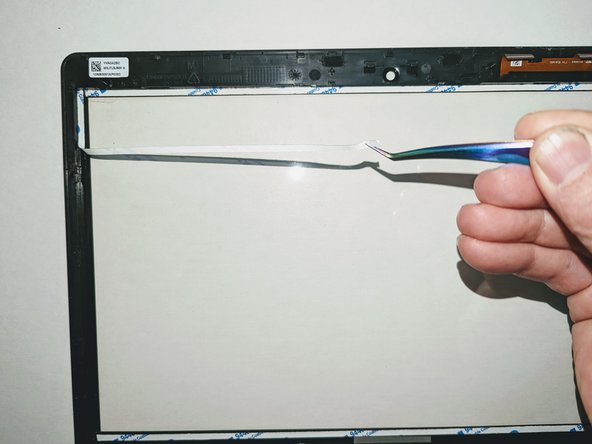
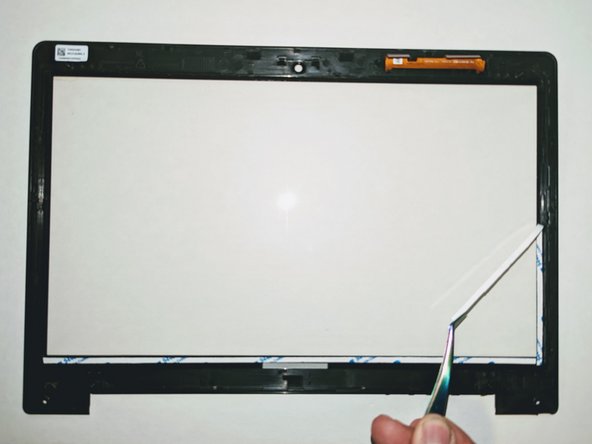
    • Grasp the freed end and pull it off the frame.

  2. ASUS VivoBook S400C LCD Adhesive Replacement: 2 단계, 이미지 1/3 ASUS VivoBook S400C LCD Adhesive Replacement: 2 단계, 이미지 2/3 ASUS VivoBook S400C LCD Adhesive Replacement: 2 단계, 이미지 3/3
    • Repeat for the other three strips of adhesive tape.

    • If desired, you can clean any adhesive residue with acetone at this point.

  3. ASUS VivoBook S400C LCD Adhesive Replacement, Lay Down New Adhesive Tape: 3 단계, 이미지 1/3 ASUS VivoBook S400C LCD Adhesive Replacement, Lay Down New Adhesive Tape: 3 단계, 이미지 2/3 ASUS VivoBook S400C LCD Adhesive Replacement, Lay Down New Adhesive Tape: 3 단계, 이미지 3/3
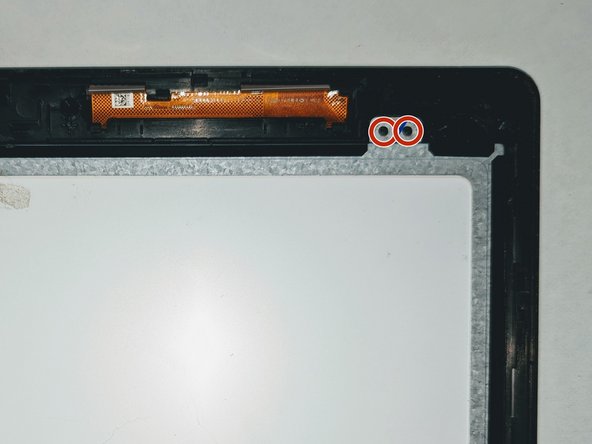
    • Unroll a length of 3mm double-sided tape long enough to cover the side being worked on.

    • Starting at the end, press it down onto the edge of the screen, outside of the transparent glass.

    • Using scissors or a sharp knife, cut the tape to length.

  4. ASUS VivoBook S400C LCD Adhesive Replacement: 4 단계, 이미지 1/3 ASUS VivoBook S400C LCD Adhesive Replacement: 4 단계, 이미지 2/3 ASUS VivoBook S400C LCD Adhesive Replacement: 4 단계, 이미지 3/3
    • Repeat for the other three sides.

  5. ASUS VivoBook S400C LCD Adhesive Replacement: 5 단계, 이미지 1/3 ASUS VivoBook S400C LCD Adhesive Replacement: 5 단계, 이미지 2/3 ASUS VivoBook S400C LCD Adhesive Replacement: 5 단계, 이미지 3/3
    • With the adhesive tape in place on all four sides, go over it with a spudger and press it firmly onto the digitizer to secure it.

    • This is a good opportunity to thoroughly clean the inside of the touch screen, as you won't be able to once the LCD is in place. Any dirt or fingerprints left on the screen will be visible.

  6. ASUS VivoBook S400C LCD Adhesive Replacement: 6 단계, 이미지 1/3 ASUS VivoBook S400C LCD Adhesive Replacement: 6 단계, 이미지 2/3 ASUS VivoBook S400C LCD Adhesive Replacement: 6 단계, 이미지 3/3
    • Remove the backing to expose the adhesive on all four edges.

  7. ASUS VivoBook S400C LCD Adhesive Replacement, Secure the LCD to the Touch Screen: 7 단계, 이미지 1/3 ASUS VivoBook S400C LCD Adhesive Replacement, Secure the LCD to the Touch Screen: 7 단계, 이미지 2/3 ASUS VivoBook S400C LCD Adhesive Replacement, Secure the LCD to the Touch Screen: 7 단계, 이미지 3/3
    • Before you begin this step, now is a good time to thoroughly clean the LCD if needed, as you won't be able to once the LCD is glued to the touch screen. Any dirt or fingerprints left on the screen will be visible.

    • If you are reusing the LCD or have purchased a pre-owned replacement, you may want to use acetone to clean any adhesive residue from the frame.

    • Position the LCD on the guide pins at the bottom of the screen, holding the top away from the adhesive so it doesn't adhere prematurely.

  8. ASUS VivoBook S400C LCD Adhesive Replacement: 8 단계, 이미지 1/3 ASUS VivoBook S400C LCD Adhesive Replacement: 8 단계, 이미지 2/3 ASUS VivoBook S400C LCD Adhesive Replacement: 8 단계, 이미지 3/3
    • Lower the top of the LCD down onto the digitizer, making sure the upper guide pins are aligned.

  9. ASUS VivoBook S400C LCD Adhesive Replacement: 9 단계, 이미지 1/3 ASUS VivoBook S400C LCD Adhesive Replacement: 9 단계, 이미지 2/3 ASUS VivoBook S400C LCD Adhesive Replacement: 9 단계, 이미지 3/3
    • Press on the metal frame around the edge of the LCD to ensure it adheres to the digitizer.

  10. ASUS VivoBook S400C LCD Adhesive Replacement, Nice Work: 10 단계, 이미지 1/1
    • The touch screen / LCD assembly is now ready to be reinstalled.

결론

To reassemble your device, return to the guide you were using and follow the instructions in reverse order.

Jerry Wheeler

회원 가입일: 03/21/22

57,827 평판

안내서 69개 작성하였습니다

Oregonians Oregonians 회원

Community

7 회원들

안내서 176개 작성하였습니다

댓글 0개

댓글 쓰기

조회 통계:

24 시간 전: 0

7일 전: 0

30일 전: 3

전체 시간: 166