소개
Replacing the Wi-Fi card itself is quite simple, however, they did not make it easy to get to. To remove the Wi-Fi card you will need to remove most of the internal parts of the computer. All pre-requisite guides are listed and shown above.
필요한 것
-
-
Use the Phillips #00 screwdriver to remove the seven 90mm screws.
-
Use the Phillips #00 screwdriver to remove the four 50mm screws.
-
-
-
Remove the four 5mm screws that attach the hard drive bracket using the Phillips #0 screwdriver.
-
-
-
-
Use the plastic opening tool to flip up the small clamp and pull out the ribbon cable.
-
-
-
Locate the I/O board on the left of the computer. Using the Phillips #0 screwdriver, unscrew the three 5mm screws to unhinge the screen, which will free the board allowing it to be removed and replaced.
-
-
-
Use the Phillips #0 screwdriver to remove the last five 5mm screws holding the motherboard down.
-
-
-
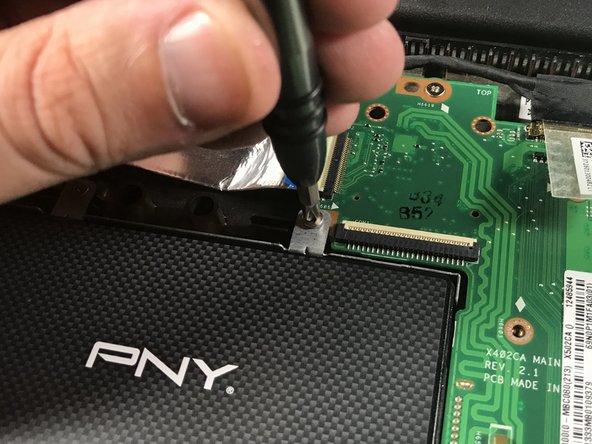
Take out the 2.5mm PH #0 screw located on the top of the Wi-Fi card.
-
Lift the card up and pull it out.
-


To reassemble your device, follow these instructions in reverse order.
To reassemble your device, follow these instructions in reverse order.
팀

UMass Dartmouth, Team S5-G6, Gulbrandsen Fall 2018 UMass Dartmouth, Team S5-G6, Gulbrandsen Fall 2018 회원
UMASSD-GULBRANDSEN-F18S5G6
3 회원들
안내서 5개 작성하였습니다
댓글 한 개
Thank you
What type of card should we buy? We have to be ready with the replacement to start to take the parts out.
Can you post a picture of the card so we can see the slot and read what is written on it. I know you have 2 pictures but the red circle cover the writing.
Do you know the slot type of that card? Is it PCI-E slot ?
Do you know if that computer can accept 802.11ac or 802.11ax card ?
Can you post a link to the card that you used as replacement or another compatible card?