주요 콘텐츠로 건너뛰기

AT&T CL4940 Number Pad Replacement and Cleaning

필요한 것

  1. AT&T CL4940 Number Pad Replacement and Cleaning, Number Pad: 1 단계, 이미지 1/2 AT&T CL4940 Number Pad Replacement and Cleaning, Number Pad: 1 단계, 이미지 2/2
    • Unplug your device before beginning disassembly.

    • Remove the phone line from the back cover of the device.

    • Remove the power cord from the side of the device.

    • Remove the phone cable from the side of the device.

  2. AT&T CL4940 Number Pad Replacement and Cleaning: 2 단계, 이미지 1/1
    • Remove the five 4mm X 10mm screws from the back cover of the device using a Phillips #1 screwdriver.

  3. AT&T CL4940 Number Pad Replacement and Cleaning: 3 단계, 이미지 1/3 AT&T CL4940 Number Pad Replacement and Cleaning: 3 단계, 이미지 2/3 AT&T CL4940 Number Pad Replacement and Cleaning: 3 단계, 이미지 3/3
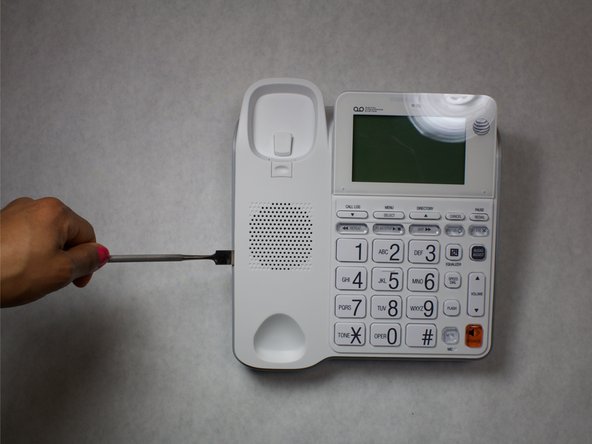
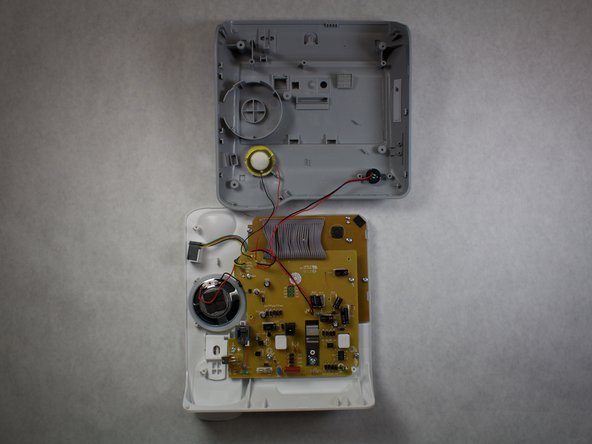
    • Using a metal spudger, pry the white, plastic cover from the gray, plastic bottom. Start from below the keypad and work your way evenly around the device.

    • There are brackets every few inches along the edge of the device. These may be difficult to pull apart.

    • The internals of the device will be accessible once the white, plastic cover and grey, plastic bottom are separated.

  4. AT&T CL4940 Number Pad Replacement and Cleaning: 4 단계, 이미지 1/3 AT&T CL4940 Number Pad Replacement and Cleaning: 4 단계, 이미지 2/3 AT&T CL4940 Number Pad Replacement and Cleaning: 4 단계, 이미지 3/3
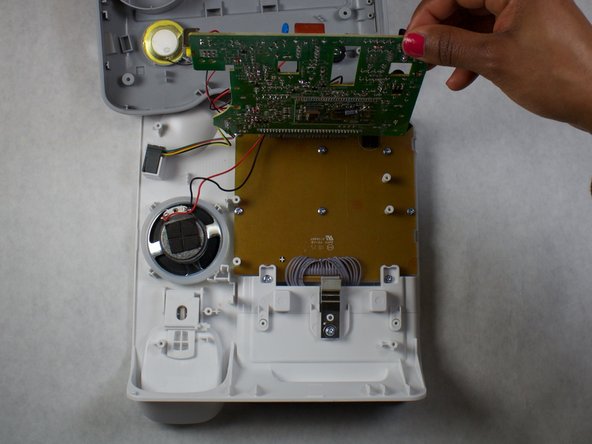
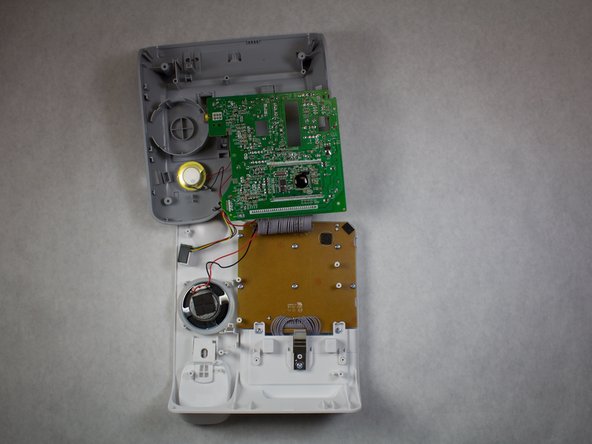
    • Remove the five 5mm X 5mm screws located on the yellow side of the motherboard using a Phillips #1 screwdriver.

    • Set the motherboard out of the way.

  5. AT&T CL4940 Number Pad Replacement and Cleaning: 5 단계, 이미지 1/3 AT&T CL4940 Number Pad Replacement and Cleaning: 5 단계, 이미지 2/3 AT&T CL4940 Number Pad Replacement and Cleaning: 5 단계, 이미지 3/3
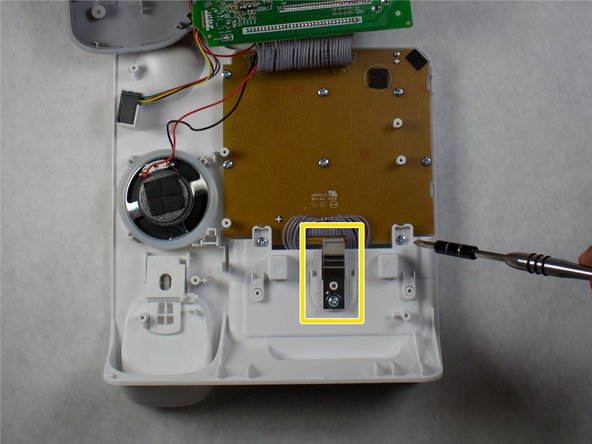
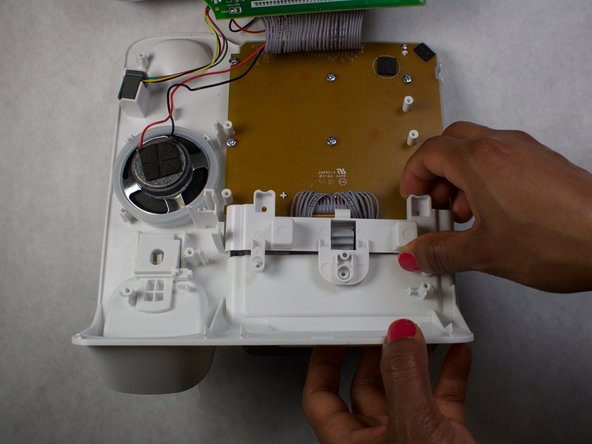
    • Remove the two 5mm X 8mm large number pad screws using a Phillips #1 screwdriver.

    • Remove the 5mm X 6mm latch screw using the same screwdriver.

    • Remove the small, metal latch.

    • Remove the plastic plate previously secured by the screws and latch.

  6. AT&T CL4940 Number Pad Replacement and Cleaning: 6 단계, 이미지 1/3 AT&T CL4940 Number Pad Replacement and Cleaning: 6 단계, 이미지 2/3 AT&T CL4940 Number Pad Replacement and Cleaning: 6 단계, 이미지 3/3
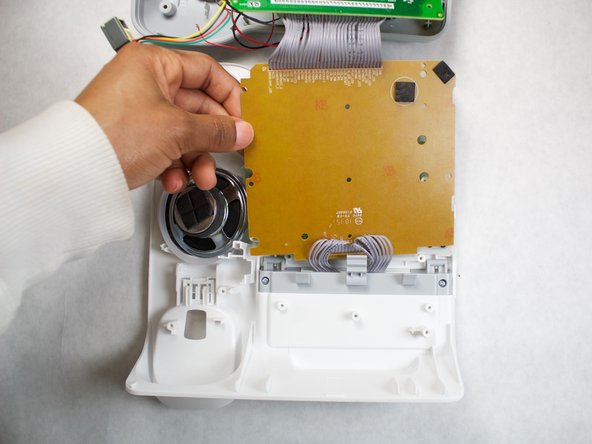
    • Remove the remaining six 5mm X 8mm large number pad screws using a Phillips #1 screwdriver.

    • Remove the two 3mm X 6mm small number pad screws using the same screwdriver.

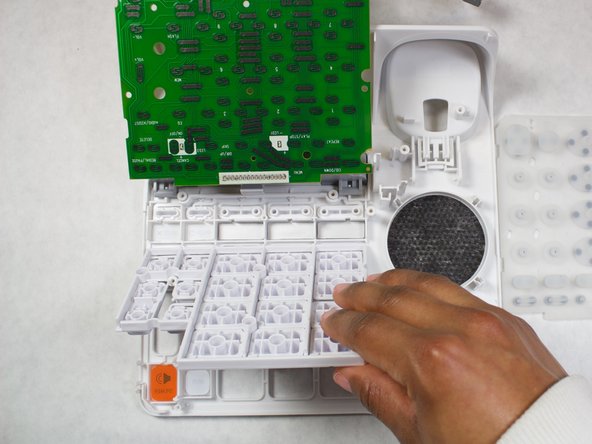
    • Grab the edge of the number pad board and peel it away from the screw posts.

    • Using a clean towel or cloth, move the number pad board away from the keys that lie below.

    • Set the number pad board out of the way for further disassembly.

  7. AT&T CL4940 Number Pad Replacement and Cleaning: 7 단계, 이미지 1/2 AT&T CL4940 Number Pad Replacement and Cleaning: 7 단계, 이미지 2/2
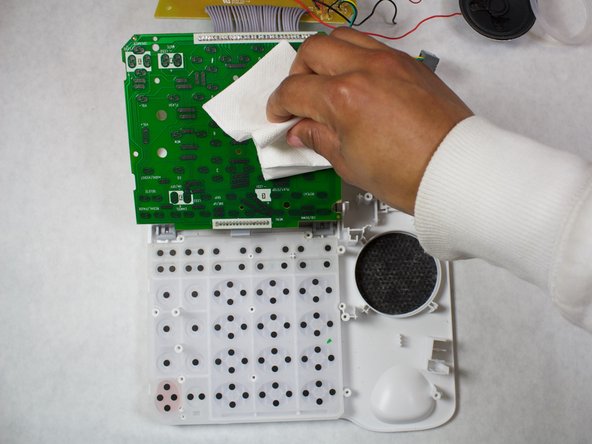
    • Peel away the white, rubber mat and set it aside for cleaning.

    • Remove the main key pad and any remaining keys. Remember where each key is located for reassembly.

    • Clean the rubber mat with a damp paper towel to remove any dust or foreign substances.

    • Replace any broken or cracked keys.

결론

To reassemble your device, follow these instructions in reverse order.

다른 3명이 해당 안내서를 완성하였습니다.

Nigel Mathias

회원 가입일: 02/16/16

215 평판

안내서 1개 작성함

IUPUI, Team 2-2, Harley Spring 2016 IUPUI, Team 2-2, Harley Spring 2016 회원

IUPUI-HARLEY-S16S2G2

4 회원들

안내서 8개 작성하였습니다

댓글 0개

댓글 쓰기

조회 통계:

24 시간 전: 0

7일 전: 3

30일 전: 17

전체 시간: 457