주요 콘텐츠로 건너뛰기

Abask J05 Front Case Replacement

필요한 것

  1. Abask J05 Front Case Replacement, Front Case: 1 단계, 이미지 1/2 Abask J05 Front Case Replacement, Front Case: 1 단계, 이미지 2/2
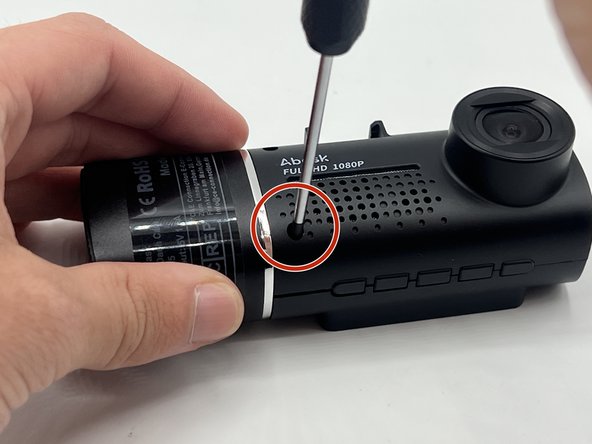
    • Gently press on the SD card with a fingernail until it clicks.

    • Release, then remove the card.

  2. Abask J05 Front Case Replacement: 2 단계, 이미지 1/1
    • Remove the 5 mm screw from the side of the device next to the suction cup dock with a Phillips #00 screwdriver.

  3. Abask J05 Front Case Replacement: 3 단계, 이미지 1/2 Abask J05 Front Case Replacement: 3 단계, 이미지 2/2
    • Remove the two 8 mm screws from opposite sides of the screen with a Phillips #00 precision screwdriver.

  4. Abask J05 Front Case Replacement: 4 단계, 이미지 1/2 Abask J05 Front Case Replacement: 4 단계, 이미지 2/2
    • Gently lift the screen.

    • Push up on the interior camera portion of the device. It should pop out of the socket. Being careful to keep the wires attached, set it to the side.

  5. Abask J05 Front Case Replacement: 5 단계, 이미지 1/2 Abask J05 Front Case Replacement: 5 단계, 이미지 2/2
    • Reach into the device with a spudger to release the top two snap joints keeping the end cap attached one at a time until the front face lifts off.

    • Be careful not to touch the screen.

    • Repeat the process with the two remaining snap joints.

결론

To reassemble your device, follow these instructions in reverse order.

Kristen Gismondi

회원 가입일: 11/12/14

85,242 평판

안내서 215개 작성하였습니다

iFixit iFixit 회원

Staff

140 회원들

안내서 18,077개 작성하였습니다

댓글 0개

댓글 쓰기

조회 통계:

24 시간 전: 0

7일 전: 1

30일 전: 3

전체 시간: 13