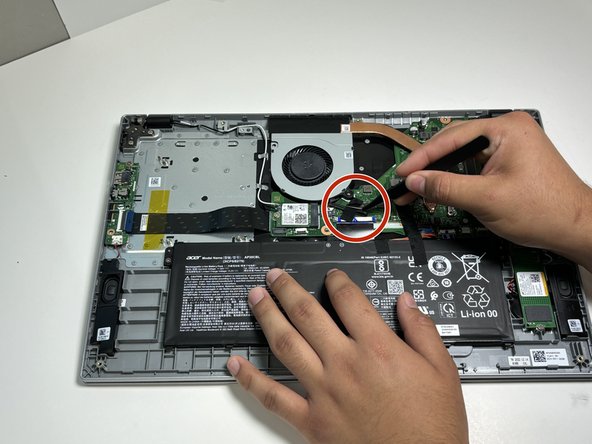
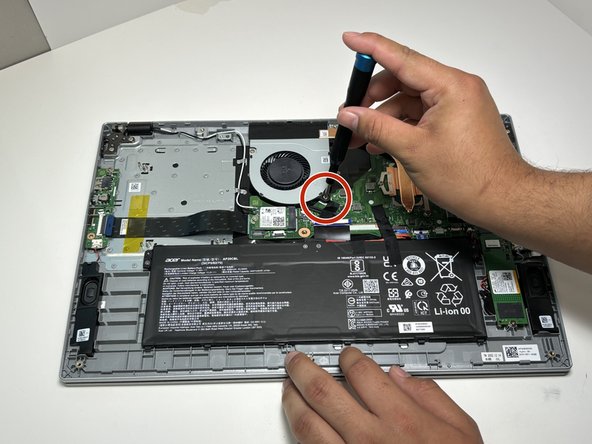
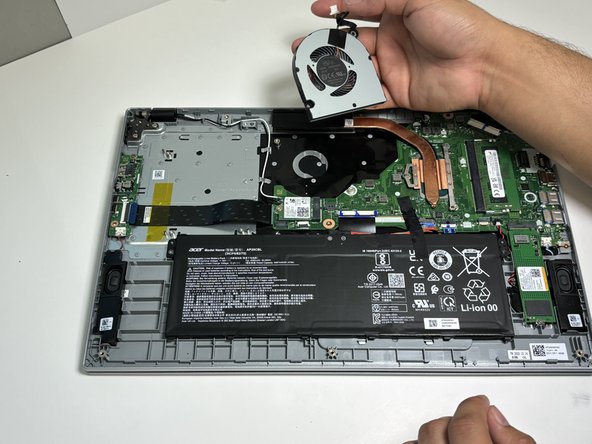
주요 콘텐츠로 건너뛰기

Acer Aspire 3 A315-58-350L Fan Replacement

필요한 것

  1. Acer Aspire 3 A315-58-350L Fan Replacement, Lower Case: 1 단계, 이미지 1/2 Acer Aspire 3 A315-58-350L Fan Replacement, Lower Case: 1 단계, 이미지 2/2
    • Remove the eleven 7 mm Phillips screws that secure the lower case.

  2. Acer Aspire 3 A315-58-350L Fan Replacement: 2 단계, 이미지 1/3 Acer Aspire 3 A315-58-350L Fan Replacement: 2 단계, 이미지 2/3 Acer Aspire 3 A315-58-350L Fan Replacement: 2 단계, 이미지 3/3
    • Insert an opening tool into the seam between the lower case and chassis.

    • Pry along the perimeter until the lower case releases.

    • Lift off the lower case.

  3. Acer Aspire 3 A315-58-350L Fan Replacement, Fan: 3 단계, 이미지 1/2 Acer Aspire 3 A315-58-350L Fan Replacement, Fan: 3 단계, 이미지 2/2
    • Use tweezers to remove the black tape that secures the fan cable.

  4. Acer Aspire 3 A315-58-350L Fan Replacement: 4 단계, 이미지 1/2 Acer Aspire 3 A315-58-350L Fan Replacement: 4 단계, 이미지 2/2
    • Remove both of the 4 mm Phillips screws that secure the fan.

  5. Acer Aspire 3 A315-58-350L Fan Replacement: 5 단계, 이미지 1/2 Acer Aspire 3 A315-58-350L Fan Replacement: 5 단계, 이미지 2/2
    • Use tweezers to disconnect the white fan connector from its motherboard socket.

    • Lift the fan up and out of the chassis.

결론

To reassemble your device, follow these instructions in reverse order.

Jesus Salazar

회원 가입일: 01/30/24

100 평판

안내서 1개 작성함

Austin Community College, Team 9-1, Watkins Spring 2024 Austin Community College, Team 9-1, Watkins Spring 2024 회원

AUSTINCC-WATKINS-S24S9G1

4 회원들

안내서 9개 작성하였습니다

댓글 0개

댓글 쓰기

조회 통계:

24 시간 전: 1

7일 전: 2

30일 전: 23

전체 시간: 54