소개
This guide demonstrates how to access the hard drive on the Acer Aspire 3000. This will allow users to remove and replace the hard drive in their device.
필요한 것
-
-
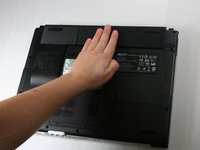
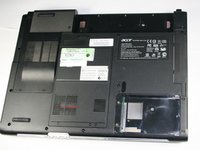
Begin with the device face down.
-
Orient the laptop so that the battery is on the side opposite of you and the headphone ports are facing towards you.
 FixBot에 문의하기
-
-
-
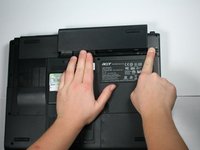
Slide the button found below the battery to the left into the unlocked position.
-
-
-
-
Locate the battery and the tab to the right of it.
-
Pull the tab to the right while simultaneously pushing the battery away from you.
-
-
-
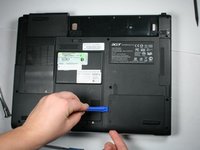
Unscrew the two 4.6 mm Phillips #1 screws on the left side of the hard drive panel in the lower right corner on the back of the laptop using the phillips head j1 bit.
-
-
-
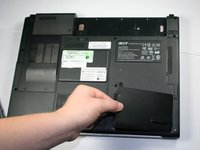
Insert the plastic opening tool under left side of the hard drive cover and gently pry the cover open.
-
Pull the cover up and out to release the tabs on the right side of the cover and remove from the device.
-


To reassemble your device, follow these instructions in reverse order.
다른 4명이 해당 안내서를 완성하였습니다.
팀

Baylor, Team 4-2, Williams Fall 2016 Baylor, Team 4-2, Williams Fall 2016 회원
BU-WILLIAMS-F16S4G2
4 회원들
안내서 7개를 작성함