주요 콘텐츠로 건너뛰기

Acer Aspire 4743-6481 Screen Replacement

필요한 것

  1. Acer Aspire 4743-6481 Screen Replacement, Battery: 1 단계, 이미지 1/1
    • Turn over the laptop to view the underside.

  2. Acer Aspire 4743-6481 Screen Replacement: 2 단계, 이미지 1/1
    • Use tweezers (or a similar tool) to slide the orange push pin. To release the battery, push it to the left.

  3. Acer Aspire 4743-6481 Screen Replacement: 3 단계, 이미지 1/1
    • You can lift the battery up and out now.

  4. Acer Aspire 4743-6481 Screen Replacement, Screen: 4 단계, 이미지 1/1
    • Position the laptop so you have a clear view of the front of the screen.

    • Remove the two screw covers at the bottom sides of the screen casing using a flat tool.

    • Remove the two 5.0 mm Phillips screws. They will be directly underneath the screw covers.

  5. Acer Aspire 4743-6481 Screen Replacement: 5 단계, 이미지 1/1
    • Use a flat tool, to pry open along every side of the front casing of the screen.

    • It will require a small amount of force to grudge open. Make sure every side of the casing is loose before removing it.

    • You should use a metal pry tool only if you are unsuccessful with a plastic one. The metal tool could cause damage to your device.

  6. Acer Aspire 4743-6481 Screen Replacement: 6 단계, 이미지 1/1
    • Remove the front casing.

    • Remove the four 5.0 mm Phillips screws located next to every corner of the screen.

  7. Acer Aspire 4743-6481 Screen Replacement: 7 단계, 이미지 1/1
    • After removing the screws, gently place the screen on top of the keyboard.

    • Do not attempt to remove the screen yet since it is not fully disconnected from the laptop.

    • You may use a piece of cloth or similar material beneath the new screen to avoid scratching it with the other surface.

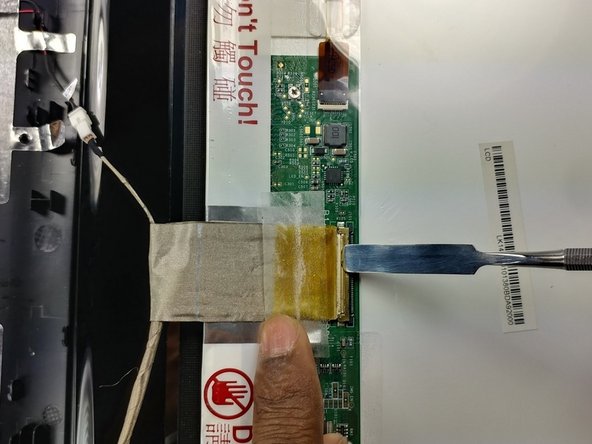
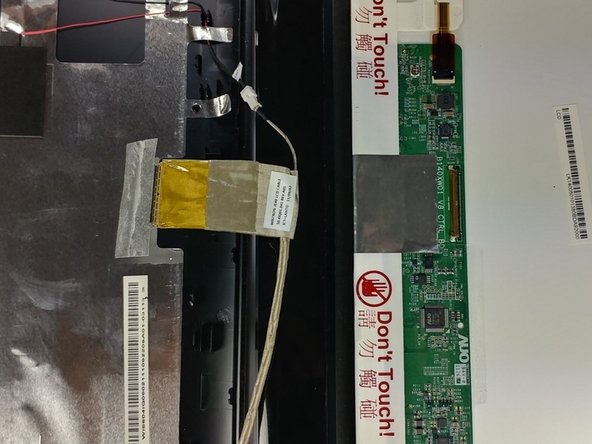
  8. Acer Aspire 4743-6481 Screen Replacement: 8 단계, 이미지 1/3 Acer Aspire 4743-6481 Screen Replacement: 8 단계, 이미지 2/3 Acer Aspire 4743-6481 Screen Replacement: 8 단계, 이미지 3/3
    • Gently remove the tape that covers the connector cable, as highlighted in the first picture.

    • With a flat tool, gently disconnect the connector cable from the damaged screen.

  9. Acer Aspire 4743-6481 Screen Replacement: 9 단계, 이미지 1/1
    • Remove the four remaining 3.5 mm Phillips screws from the screen piece.

    • There will be two screws on each side, one on the bottom and another on the top.

  10. Acer Aspire 4743-6481 Screen Replacement: 10 단계, 이미지 1/1
    • The screen can be easily removed from its frame now.

결론

To reassemble your device, carefully follow these instructions in reverse order.

다른 2명이 해당 안내서를 완성하였습니다.

Juan Seijas

회원 가입일: 02/15/17

199 평판

안내서 1개 작성함

USF Tampa, Team S5-G1, Lacy Spring 2017 USF Tampa, Team S5-G1, Lacy Spring 2017 회원

USFT-LACY-S17S5G1

4 회원들

안내서 5개 작성하였습니다

댓글 0개

댓글 쓰기

조회 통계:

24 시간 전: 2

7일 전: 4

30일 전: 12

전체 시간: 1,722