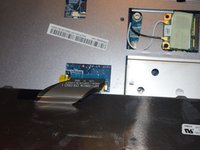
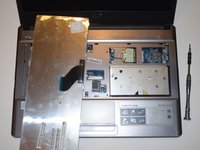
주요 콘텐츠로 건너뛰기

Acer Aspire 4810TZ-4120 Keyboard Replacement

필요한 것

  1. Acer Aspire 4810TZ-4120 Keyboard Replacement, Keyboard: 1 단계, 이미지 1/3 Acer Aspire 4810TZ-4120 Keyboard Replacement, Keyboard: 1 단계, 이미지 2/3 Acer Aspire 4810TZ-4120 Keyboard Replacement, Keyboard: 1 단계, 이미지 3/3
    • Locate the five (5) tabs at the top of the keyboard that are holding it in place

    • The 2nd and 3rd pictures are close ups of the tabs

  2. Acer Aspire 4810TZ-4120 Keyboard Replacement: 2 단계, 이미지 1/2 Acer Aspire 4810TZ-4120 Keyboard Replacement: 2 단계, 이미지 2/2
    • The first picture shows the notches in the keyboard that the tabs to into to hold it in place. You cannot see these until the keyboard is removed

    • Insert the flat part of the Spudger tool into one of the holes in front of the tab

    • Push the tab back so it is no longer holding the keyboard.

    • Repeat this step for all of the tabs

  3. Acer Aspire 4810TZ-4120 Keyboard Replacement: 3 단계, 이미지 1/2 Acer Aspire 4810TZ-4120 Keyboard Replacement: 3 단계, 이미지 2/2
    • Lay the keyboard upside down

    • Remove any tape that is on the connector with tweezers

    • Gently remove the connector that is on the ribbon cable from the back of the keyboard

    • Your keyboard is now ready to be replaced with a new one

결론

To reassemble your device, follow these instructions in reverse order.

Maria Saavedra

회원 가입일: 09/20/17

257 평판

안내서 2개 작성하였습니다

댓글 0개

댓글 쓰기

조회 통계:

24 시간 전: 0

7일 전: 2

30일 전: 11

전체 시간: 507