주요 콘텐츠로 건너뛰기

Acer Aspire 5 A515-46-R3UB Screen Replacement Replacement

필요한 것

  1. Acer Aspire 5 A515-46-R3UB Screen Replacement Replacement, Screen: 1 단계, 이미지 1/2 Acer Aspire 5 A515-46-R3UB Screen Replacement Replacement, Screen: 1 단계, 이미지 2/2
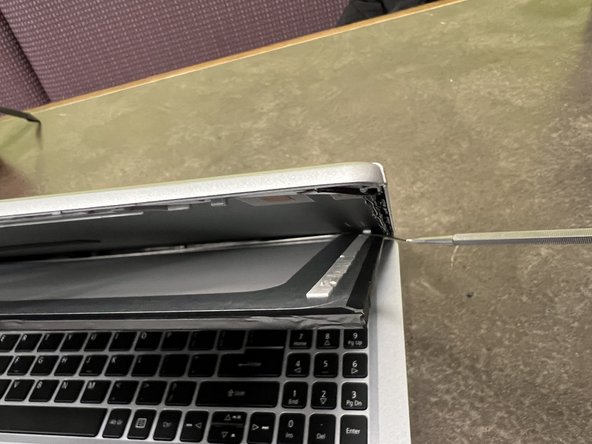
    • Slide the opening pick in between the silver cover and the black plastic bezel surrounding the screen.

    • If you find it challenging to remove the bezel from the bottom part of the screen, use the metal spudger but be very gentle to avoid cracking the bezel or screen.

  2. Acer Aspire 5 A515-46-R3UB Screen Replacement Replacement: 2 단계, 이미지 1/1
    • Use an opening tool to lift the top right corner of the screen.

    • Pry the other side of the screen up with the opening tool as well.

  3. Acer Aspire 5 A515-46-R3UB Screen Replacement Replacement: 3 단계, 이미지 1/3 Acer Aspire 5 A515-46-R3UB Screen Replacement Replacement: 3 단계, 이미지 2/3 Acer Aspire 5 A515-46-R3UB Screen Replacement Replacement: 3 단계, 이미지 3/3
    • Use a spudger to pry the LCD from the grey plastic backing.

    • The LCD is attached to the grey plastic backing with white adhesive strips. These are on each side of the screen.

    • Remove the LCD, then place the assembly on the keyboard.

  4. Acer Aspire 5 A515-46-R3UB Screen Replacement Replacement: 4 단계, 이미지 1/3 Acer Aspire 5 A515-46-R3UB Screen Replacement Replacement: 4 단계, 이미지 2/3 Acer Aspire 5 A515-46-R3UB Screen Replacement Replacement: 4 단계, 이미지 3/3
    • Remove the clear tape from the connector.

    • Use a spudger or opening tool, and flip up the small silver/brown locking flap.

    • Be sure to pry up on the hinged flap, not the connector socket.

    • Safely pull the display cable out of the connector.

    • Remove the screen.

결론

To reassemble your device, follow these instructions in reverse order.

Becca Campbell

회원 가입일: 09/13/23

370 평판

안내서 4개 작성하였습니다

댓글 0개

댓글 쓰기

조회 통계:

24 시간 전: 0

7일 전: 10

30일 전: 36

전체 시간: 209