주요 콘텐츠로 건너뛰기

Acer Aspire 5 A515-56-347N Battery Replacement

필요한 것

  1. Acer Aspire 5 A515-56-347N Battery Replacement, Bottom Cover: 1 단계, 이미지 1/2 Acer Aspire 5 A515-56-347N Battery Replacement, Bottom Cover: 1 단계, 이미지 2/2
    • Turn the laptop off, and disconnect the power cable.

    • Flip the laptop upside down.

    • Remove the eleven 6.6 mm Phillips #0 screws from the bottom cover.

  2. Acer Aspire 5 A515-56-347N Battery Replacement: 2 단계, 이미지 1/3 Acer Aspire 5 A515-56-347N Battery Replacement: 2 단계, 이미지 2/3 Acer Aspire 5 A515-56-347N Battery Replacement: 2 단계, 이미지 3/3
    • Insert a plastic opening tool into a gap between the case and the bottom cover.

    • Insert blue plastic picks into the gap between the case and the bottom cover, working around the seam.

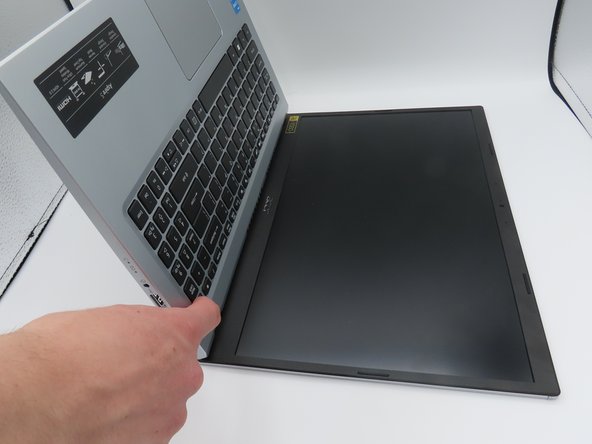
    • The bottom cover is now loose. Pull it upwards, away from the laptop, and set it aside.

  3. Acer Aspire 5 A515-56-347N Battery Replacement, Disconnecting the Battery: 3 단계, 이미지 1/3 Acer Aspire 5 A515-56-347N Battery Replacement, Disconnecting the Battery: 3 단계, 이미지 2/3 Acer Aspire 5 A515-56-347N Battery Replacement, Disconnecting the Battery: 3 단계, 이미지 3/3
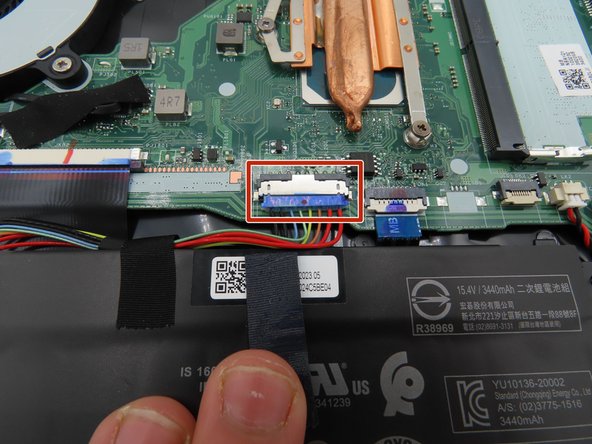
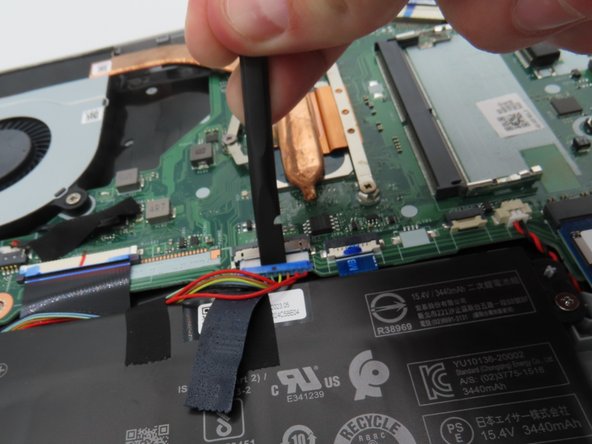
    • Use a plastic spudger to loosen the black tape around the large battery connector on the motherboard.

    • Once loosened, pull back on the tape to remove it from the connector.

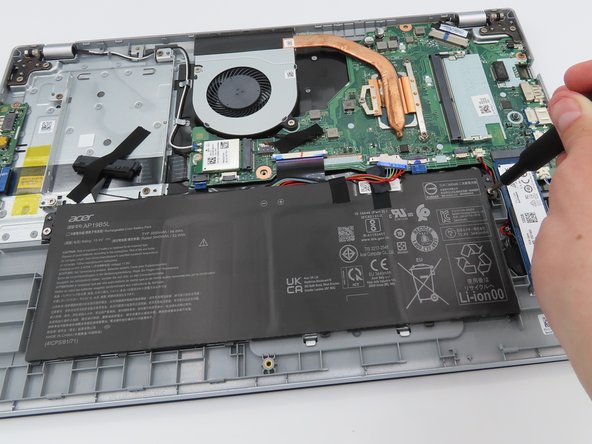
    • Use a plastic spudger to pull the battery connector away from the motherboard.

    • Leave the battery unplugged for the following steps.

  4. Acer Aspire 5 A515-56-347N Battery Replacement: 4 단계, 이미지 1/2 Acer Aspire 5 A515-56-347N Battery Replacement: 4 단계, 이미지 2/2
    • Press and hold the laptop's power button for about five seconds to discharge any remaining power in the system.

    • Do not touch any exposed components while carrying out this step or put them in contact with conductive materials.

    • Leave the battery connector unplugged and out of the way for the rest of the time the laptop is open.

  5. Acer Aspire 5 A515-56-347N Battery Replacement, Battery: 5 단계, 이미지 1/2 Acer Aspire 5 A515-56-347N Battery Replacement, Battery: 5 단계, 이미지 2/2
    • Remove the two 4.7 mm Phillips #0 screws from each side of the battery.

  6. Acer Aspire 5 A515-56-347N Battery Replacement: 6 단계, 이미지 1/1
    • The battery is now fully loosened. Gently lift it out of the laptop and set it aside.

결론

To reassemble your device, follow these instructions in reverse order.

Ethan Griffin

회원 가입일: 02/21/24

193 평판

안내서 2개 작성하였습니다

University of Kentucky, Team 1-1, Martin Spring 2024 University of Kentucky, Team 1-1, Martin Spring 2024 회원

UKY-MARTIN-S24S1G1

4 회원들

안내서 6개 작성하였습니다

댓글 0개

댓글 쓰기

조회 통계:

24 시간 전: 0

7일 전: 19

30일 전: 51

전체 시간: 131