주요 콘텐츠로 건너뛰기

Acer Aspire 5 A515-56-347N PCIe SSD Replacement

필요한 것

  1. Acer Aspire 5 A515-56-347N PCIe SSD Replacement, Bottom Cover: 1 단계, 이미지 1/2 Acer Aspire 5 A515-56-347N PCIe SSD Replacement, Bottom Cover: 1 단계, 이미지 2/2
    • Turn the laptop off, and disconnect the power cable.

    • Flip the laptop upside down.

    • Remove the eleven 6.6 mm Phillips #0 screws from the bottom cover.

  2. Acer Aspire 5 A515-56-347N PCIe SSD Replacement: 2 단계, 이미지 1/3 Acer Aspire 5 A515-56-347N PCIe SSD Replacement: 2 단계, 이미지 2/3 Acer Aspire 5 A515-56-347N PCIe SSD Replacement: 2 단계, 이미지 3/3
    • Insert a plastic opening tool into a gap between the case and the bottom cover.

    • Insert blue plastic picks into the gap between the case and the bottom cover, working around the seam.

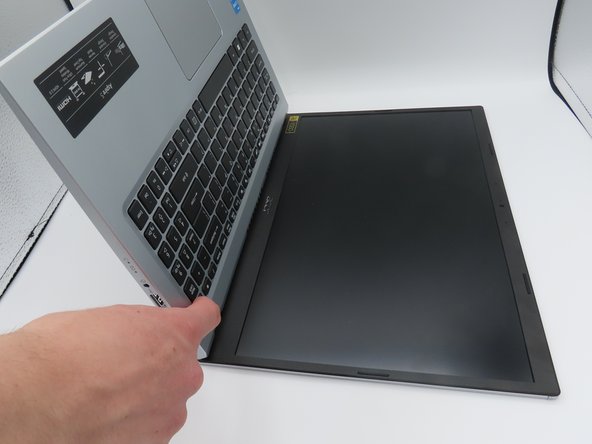
    • The bottom cover is now loose. Pull it upwards, away from the laptop, and set it aside.

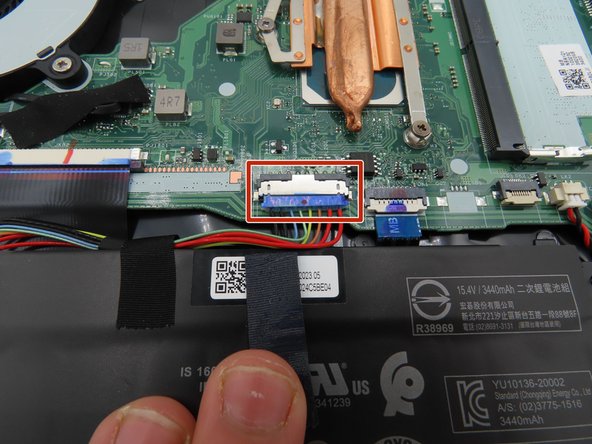
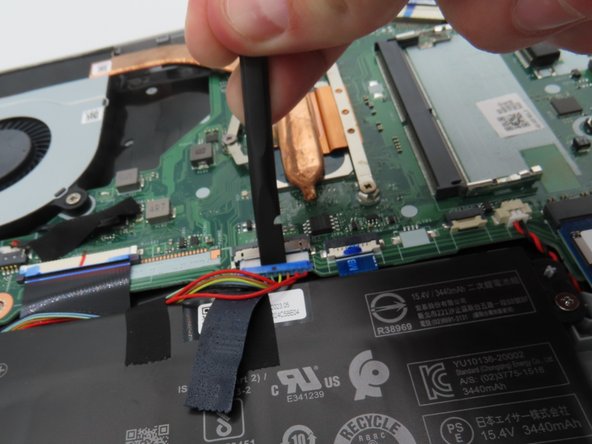
  3. Acer Aspire 5 A515-56-347N PCIe SSD Replacement, Disconnecting the Battery: 3 단계, 이미지 1/3 Acer Aspire 5 A515-56-347N PCIe SSD Replacement, Disconnecting the Battery: 3 단계, 이미지 2/3 Acer Aspire 5 A515-56-347N PCIe SSD Replacement, Disconnecting the Battery: 3 단계, 이미지 3/3
    • Use a plastic spudger to loosen the black tape around the large battery connector on the motherboard.

    • Once loosened, pull back on the tape to remove it from the connector.

    • Use a plastic spudger to pull the battery connector away from the motherboard.

    • Leave the battery unplugged for the following steps.

  4. Acer Aspire 5 A515-56-347N PCIe SSD Replacement: 4 단계, 이미지 1/2 Acer Aspire 5 A515-56-347N PCIe SSD Replacement: 4 단계, 이미지 2/2
    • Press and hold the laptop's power button for about five seconds to discharge any remaining power in the system.

    • Do not touch any exposed components while carrying out this step or put them in contact with conductive materials.

    • Leave the battery connector unplugged and out of the way for the rest of the time the laptop is open.

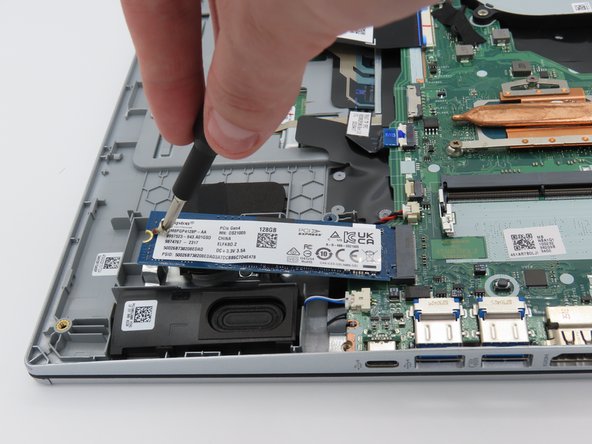
  5. Acer Aspire 5 A515-56-347N PCIe SSD Replacement, PCIe SSD: 5 단계, 이미지 1/2 Acer Aspire 5 A515-56-347N PCIe SSD Replacement, PCIe SSD: 5 단계, 이미지 2/2
    • Using a Phillips #0 screwdriver, remove the small 4.5 mm screw securing the SSD to the laptop chassis.

    • The SSD is now loose and can be removed.

  6. Acer Aspire 5 A515-56-347N PCIe SSD Replacement: 6 단계, 이미지 1/2 Acer Aspire 5 A515-56-347N PCIe SSD Replacement: 6 단계, 이미지 2/2
    • Using your fingers, gently pull the SSD away from the slot and out of the laptop.

    • When installing the new SSD, be sure to gently push it in until you hear a click.

    • When installing the new SSD, remember to screw it down.

결론

To reassemble your device, follow these instructions in reverse order.

Henry Bryant

회원 가입일: 02/16/24

325 평판

안내서 4개 작성하였습니다

University of Kentucky, Team 1-1, Martin Spring 2024 University of Kentucky, Team 1-1, Martin Spring 2024 회원

UKY-MARTIN-S24S1G1

4 회원들

안내서 6개 작성하였습니다

댓글 0개

댓글 쓰기

조회 통계:

24 시간 전: 1

7일 전: 6

30일 전: 23

전체 시간: 84