주요 콘텐츠로 건너뛰기

Acer Aspire 5334-2581 Screen Replacement

필요한 것

  1. Acer Aspire 5334-2581 Screen Replacement, Battery: 1 단계, 이미지 1/1
    • Please make sure your device is unplugged . Turn it over slowly, and place it on a flat surface.

  2. Acer Aspire 5334-2581 Screen Replacement: 2 단계, 이미지 1/1
    • This latch holds your battery in place, it should always be locked. Make sure to unlock this piece.

    • Do not break this latch, otherwise your battery will not hold in place.

  3. Acer Aspire 5334-2581 Screen Replacement: 3 단계, 이미지 1/1
    • Locate the eject latch and push it so the battery can come out.

    • The battery will lift up once you have pushed the latch.

    • You DO NOT need to adjust the latch when replacing the new battery, because it just snaps in place.

  4. Acer Aspire 5334-2581 Screen Replacement: 4 단계, 이미지 1/1
    • Lift the battery up, and it should just come right off. You should see the label with the part number.

  5. Acer Aspire 5334-2581 Screen Replacement, Screen: 5 단계, 이미지 1/1
    • Remove the 4 rubber supports from the screen. Then remove the screws underneath.

  6. Acer Aspire 5334-2581 Screen Replacement: 6 단계, 이미지 1/1
    • With a spudger, release the clips that hold the plastic frame to the back cover.

    • Be careful while handling the bottom, there are cable connections, and you don't want to damage them

  7. Acer Aspire 5334-2581 Screen Replacement: 7 단계, 이미지 1/1
    • With caution disconnect the camera cable.

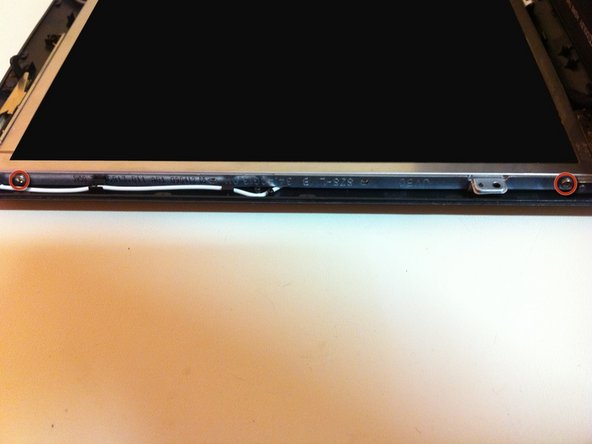
  8. Acer Aspire 5334-2581 Screen Replacement: 8 단계, 이미지 1/2 Acer Aspire 5334-2581 Screen Replacement: 8 단계, 이미지 2/2
    • Remove the 4 screws in the side of the LCD. Screen should be able to come of the frame

  9. Acer Aspire 5334-2581 Screen Replacement: 9 단계, 이미지 1/1
    • Take the screen and flip on top of the keyboard.

    • Unplug the cable connected to the video card.

    • Don't use too much force, you don't want to damage this component.

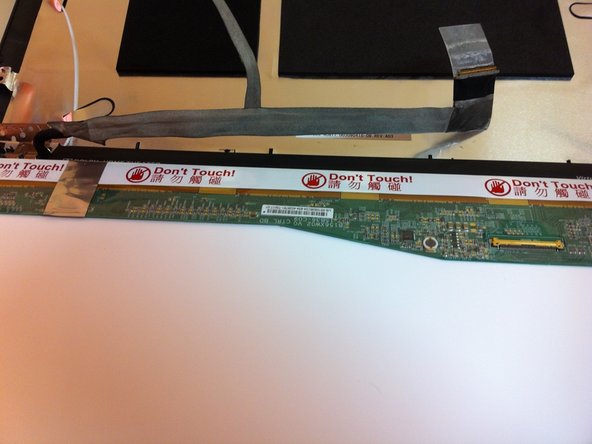
  10. Acer Aspire 5334-2581 Screen Replacement: 10 단계, 이미지 1/2 Acer Aspire 5334-2581 Screen Replacement: 10 단계, 이미지 2/2
    • Remove the tape, and unplug the display cable.

    • Unstick the cable from the back of the LCD, and now the LCD is free to come off. You are ready to install a new one

    • Try not to damage this cable, otherwise replacing it would be so much pain.

결론

To reassemble your device, follow these instructions in reverse order.

다른 2명이 해당 안내서를 완성하였습니다.

gilson teixeira

회원 가입일: 10/20/16

334 평판

안내서 5개 작성하였습니다

UMass Dartmouth, Team 1-2, Catania Fall 2016 UMass Dartmouth, Team 1-2, Catania Fall 2016 회원

UMASSD-CATANIA-F16S1G2

3 회원들

안내서 5개 작성하였습니다

댓글 0개

댓글 쓰기

조회 통계:

24 시간 전: 0

7일 전: 0

30일 전: 4

전체 시간: 360