주요 콘텐츠로 건너뛰기

Acer Aspire 5742G Memory stick Replacement

필요한 것

동영상 개요

click here for video

  1. Acer Aspire 5742G Memory stick Replacement, Memory stick: 1 단계, 이미지 1/1
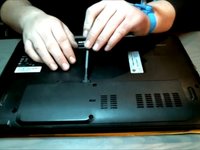
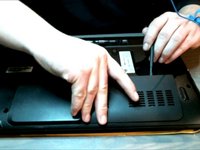
    • Make sure your computer is off and remove the battery with the security tabs shown in the picture

  2. Acer Aspire 5742G Memory stick Replacement: 2 단계, 이미지 1/1
    • Remove these philips screws, only two :)

  3. Acer Aspire 5742G Memory stick Replacement: 3 단계, 이미지 1/2 Acer Aspire 5742G Memory stick Replacement: 3 단계, 이미지 2/2
    • Then from the dented tab, either your finger, card or spudger will work, and start prying GENTLY!

    • Easily work your way around.

    • WARNING! PLASTIC TABS! be careful not to break them!

  4. Acer Aspire 5742G Memory stick Replacement: 4 단계, 이미지 1/1
    • Now you've removed the cover, you will get access to your Antenna, HDD, and RAM

    • Please remove both tabs with the memory stick at the same time

  5. Acer Aspire 5742G Memory stick Replacement: 5 단계, 이미지 1/1
    • Now put the new memory stick in!

    • When it is in, then gently push it downwards to lock it in place!

    • Be aware you have to line up the stick with a pin in the socket!!

결론

To reassemble your device, follow these instructions in reverse order.

다른 2명이 해당 안내서를 완성하였습니다.

Petter Berget

회원 가입일: 05/12/15

740 평판

안내서 3개 작성하였습니다

Kid fixers Kid fixers 회원

Community

153 회원들

안내서 291개 작성하였습니다

댓글 0개

댓글 쓰기

조회 통계:

24 시간 전: 0

7일 전: 0

30일 전: 7

전체 시간: 754