소개
The goal of this guide is to help replace the hard drive of your Acer Aspire 5750-6677. People replace their hard drives in order to have a new one with better capacity and performance capabilities. Hard drives need to be replaced in three to four years in order to prevent them from failing. The hard drive’s purpose is to store any data, pictures, music, videos and any files created or downloaded. This replacement process is considered to be easy and will only take around eight minutes. There are no special skills required and the only tool you will need is a Phillips #0 screwdriver.
필요한 것
-
-
-
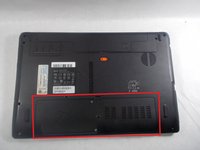
Flip the device over so the backside is facing up.
-
Remove the two screws with the Phillips #0 screwdriver.
-


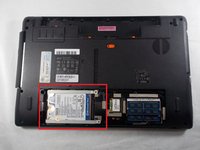


To reassemble your device, follow these instructions in reverse order.
다른 2명이 해당 안내서를 완성하였습니다.
팀

UMass Dartmouth, Team S1-G3, Valliere Fall 2019 UMass Dartmouth, Team S1-G3, Valliere Fall 2019 회원
UMASSD-VALLIERE-F19S1G3
4 회원들
안내서 3개를 작성함