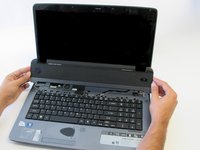
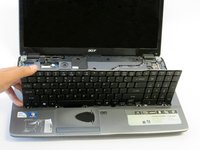
주요 콘텐츠로 건너뛰기

Acer Aspire 7736Z-4809 LCD Module Replacement

필요한 것

  1. Acer Aspire 7736Z-4809 LCD Module Replacement, Acer Aspire 7736Z-4809 Repair Preparation: 1 단계, 이미지 1/1
    • Unplug and power off the laptop.

    • If the battery is still connected to the laptop, remove the battery.

  2. Acer Aspire 7736Z-4809 LCD Module Replacement: 2 단계, 이미지 1/1
    • Flip over the laptop so that the back panel of the laptop is facing up.

  3. Acer Aspire 7736Z-4809 LCD Module Replacement, Back Panel: 3 단계, 이미지 1/2 Acer Aspire 7736Z-4809 LCD Module Replacement, Back Panel: 3 단계, 이미지 2/2
    • Use the Phillips #1 screwdriver to remove the eight 6.5 mm Phillips #1 screws.

    • Only the four screws in the center are removable, the four along the edges are held in by rivets but can be loosened.

  4. Acer Aspire 7736Z-4809 LCD Module Replacement: 4 단계, 이미지 1/3 Acer Aspire 7736Z-4809 LCD Module Replacement: 4 단계, 이미지 2/3 Acer Aspire 7736Z-4809 LCD Module Replacement: 4 단계, 이미지 3/3
    • Remove the back panel of the laptop.

  5. Acer Aspire 7736Z-4809 LCD Module Replacement: 5 단계, 이미지 1/1
    • Connect a grounding cord to a metal interface on the laptop.

    • Ground the laptop to prevent static electricity from damaging the electrical components inside the laptop.

  6. Acer Aspire 7736Z-4809 LCD Module Replacement, Wireless Module: 6 단계, 이미지 1/3 Acer Aspire 7736Z-4809 LCD Module Replacement, Wireless Module: 6 단계, 이미지 2/3 Acer Aspire 7736Z-4809 LCD Module Replacement, Wireless Module: 6 단계, 이미지 3/3
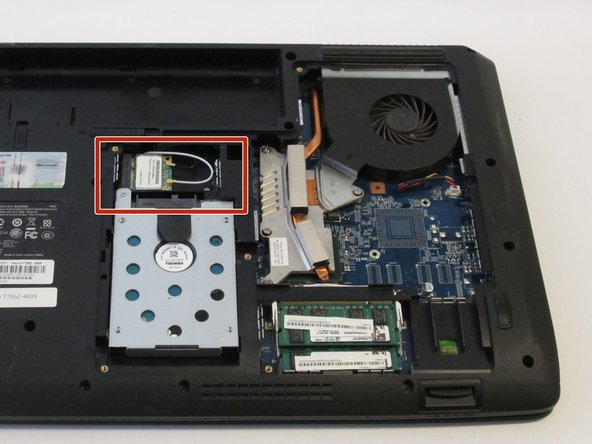
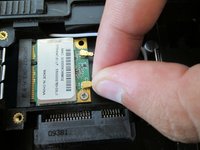
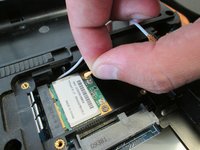
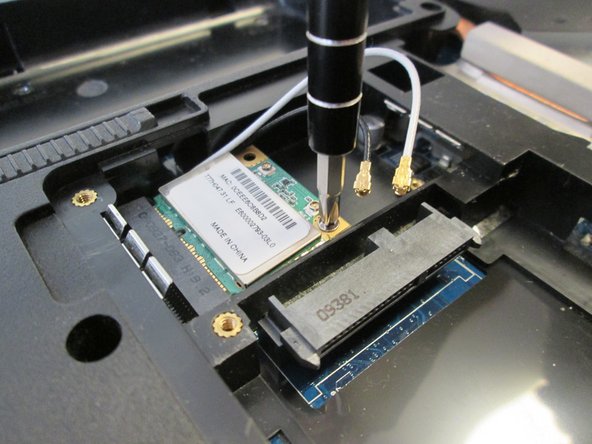
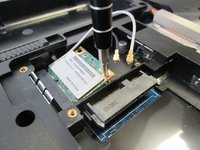
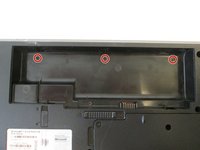
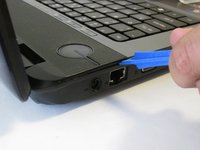
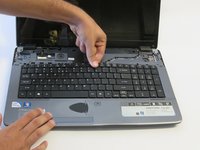
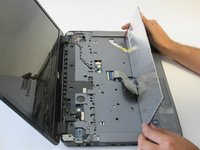
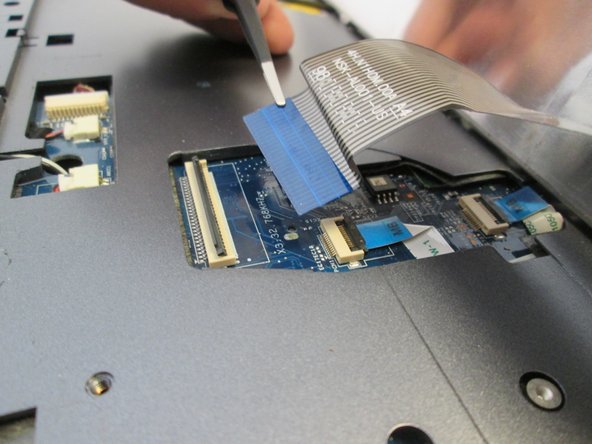
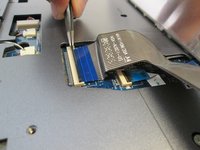
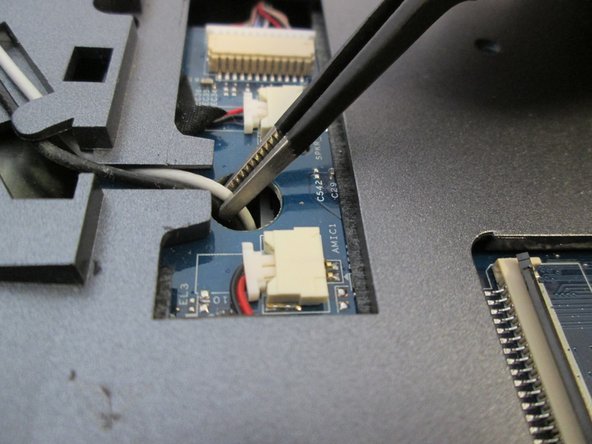
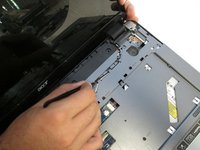
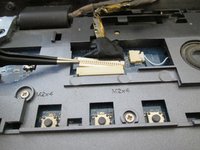
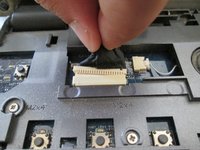
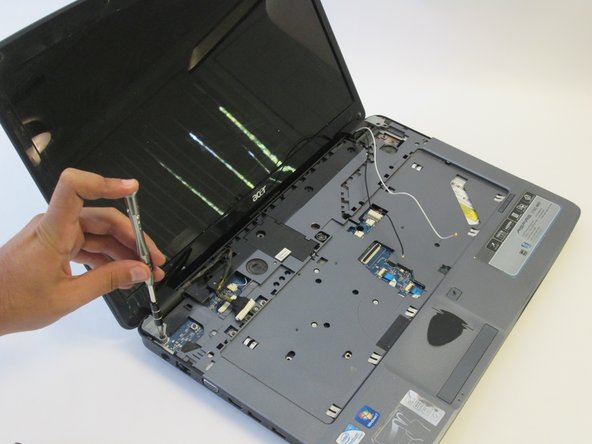
    • Remove the white antenna of the wireless module.

    • Use tweezers if you do not prefer using hands.

  7. Acer Aspire 7736Z-4809 LCD Module Replacement: 7 단계, 이미지 1/2 Acer Aspire 7736Z-4809 LCD Module Replacement: 7 단계, 이미지 2/2
    • Remove the black antenna of the wireless module.

    • Use tweezers if you do not prefer using hands.

  8. Acer Aspire 7736Z-4809 LCD Module Replacement: 8 단계, 이미지 1/3 Acer Aspire 7736Z-4809 LCD Module Replacement: 8 단계, 이미지 2/3 Acer Aspire 7736Z-4809 LCD Module Replacement: 8 단계, 이미지 3/3
    • Use the Phillips #1 screwdriver to remove the two 4.8mm Phillips #1 screws.

  9. Acer Aspire 7736Z-4809 LCD Module Replacement: 9 단계, 이미지 1/2 Acer Aspire 7736Z-4809 LCD Module Replacement: 9 단계, 이미지 2/2
    • Remove the wireless module from the laptop.

  10. Acer Aspire 7736Z-4809 LCD Module Replacement, LCD  Module: 10 단계, 이미지 1/1
    • Use the Phillips #1 screwdriver to remove the two 6.5mm Phillips #1 screws.

  11. Acer Aspire 7736Z-4809 LCD Module Replacement, Keyboard: 11 단계, 이미지 1/2 Acer Aspire 7736Z-4809 LCD Module Replacement, Keyboard: 11 단계, 이미지 2/2
    • Use the Phillips #1 screwdriver to remove the three 4.5mm Phillips #1 screws.

  12. Acer Aspire 7736Z-4809 LCD Module Replacement: 12 단계, 이미지 1/3 Acer Aspire 7736Z-4809 LCD Module Replacement: 12 단계, 이미지 2/3 Acer Aspire 7736Z-4809 LCD Module Replacement: 12 단계, 이미지 3/3
    • Orient the laptop so that the hinges between the LCD module and the laptop's bottom base are visible.

    • Use the plastic opening tools to separate the speaker panel from the laptop.

  13. Acer Aspire 7736Z-4809 LCD Module Replacement: 13 단계, 이미지 1/2 Acer Aspire 7736Z-4809 LCD Module Replacement: 13 단계, 이미지 2/2
    • Flip over the LCD module of the laptop.

    • Use the plastic opening tools to separate the speaker panel from the laptop.

    • Insert the opening tool into the crack between the panel and the frame at either end. Slide the opening tool across the line. Reinsert the opening tool into the crack and apply leverage until the frame releases.

    • Repeat this step with the other side of the laptop.

  14. Acer Aspire 7736Z-4809 LCD Module Replacement: 14 단계, 이미지 1/3 Acer Aspire 7736Z-4809 LCD Module Replacement: 14 단계, 이미지 2/3 Acer Aspire 7736Z-4809 LCD Module Replacement: 14 단계, 이미지 3/3
    • Gently hold the speaker panel by the sides and pull upwards to release the panel.

  15. Acer Aspire 7736Z-4809 LCD Module Replacement: 15 단계, 이미지 1/1
    • Use the flat end of the medium sized metal spudger tool to release the two tabs at the top of the keyboard.

    • Do not remove the keyboard yet.

  16. Acer Aspire 7736Z-4809 LCD Module Replacement: 16 단계, 이미지 1/3 Acer Aspire 7736Z-4809 LCD Module Replacement: 16 단계, 이미지 2/3 Acer Aspire 7736Z-4809 LCD Module Replacement: 16 단계, 이미지 3/3
    • Insert a finger into the opening above the F11 key and pry the keyboard until it is released from the casing.

  17. Acer Aspire 7736Z-4809 LCD Module Replacement: 17 단계, 이미지 1/3 Acer Aspire 7736Z-4809 LCD Module Replacement: 17 단계, 이미지 2/3 Acer Aspire 7736Z-4809 LCD Module Replacement: 17 단계, 이미지 3/3
    • Gently raise the keyboard with your hands.

  18. Acer Aspire 7736Z-4809 LCD Module Replacement: 18 단계, 이미지 1/3 Acer Aspire 7736Z-4809 LCD Module Replacement: 18 단계, 이미지 2/3 Acer Aspire 7736Z-4809 LCD Module Replacement: 18 단계, 이미지 3/3
    • Lift the black latch upwards to release the ZIF connector.

  19. Acer Aspire 7736Z-4809 LCD Module Replacement: 19 단계, 이미지 1/1
    • Remove the keyboard from the keyboard slot.

  20. Acer Aspire 7736Z-4809 LCD Module Replacement, LCD Module: 20 단계, 이미지 1/3 Acer Aspire 7736Z-4809 LCD Module Replacement, LCD Module: 20 단계, 이미지 2/3 Acer Aspire 7736Z-4809 LCD Module Replacement, LCD Module: 20 단계, 이미지 3/3
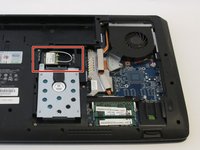
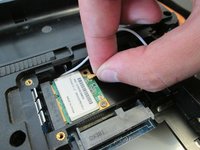
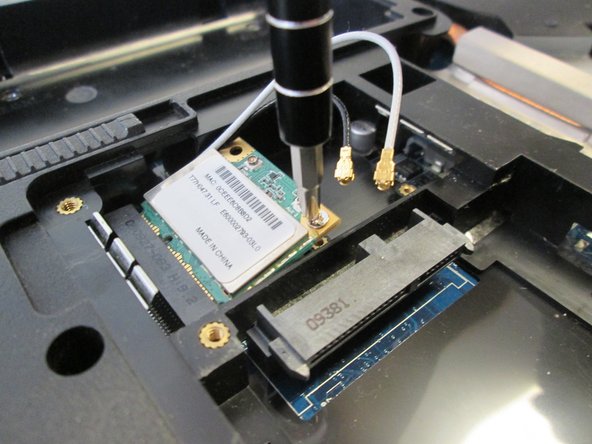
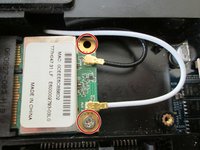
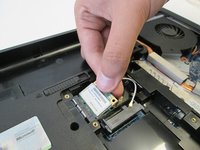
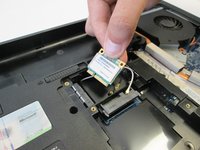
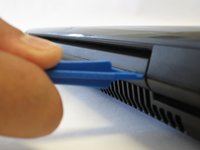
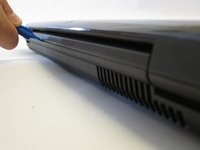
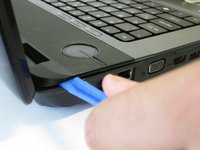
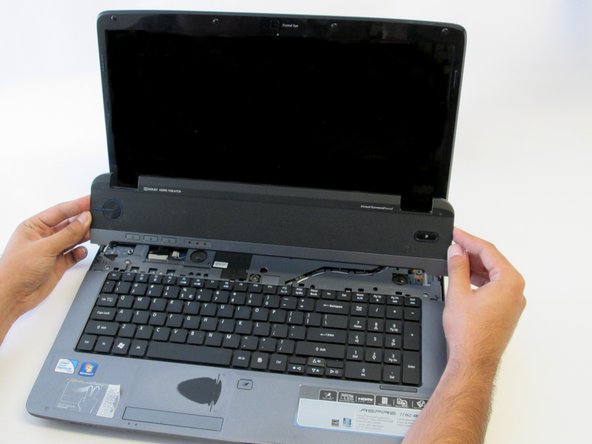
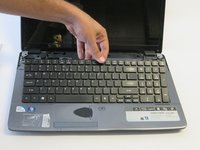
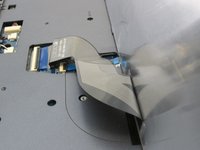
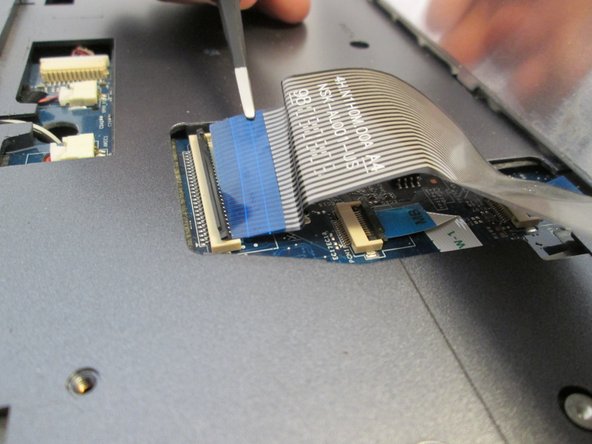
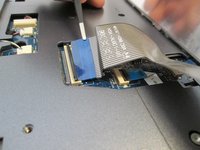
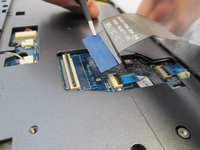
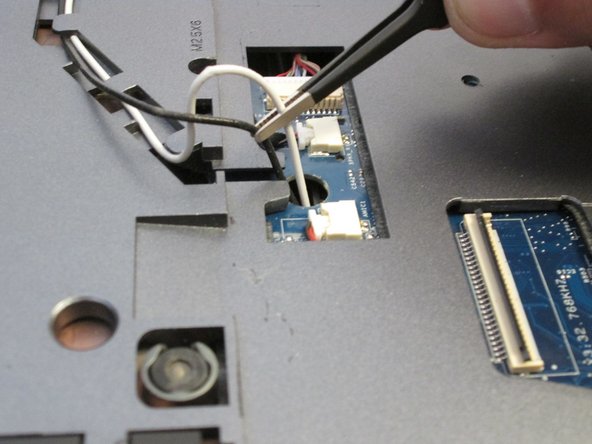
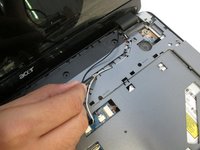
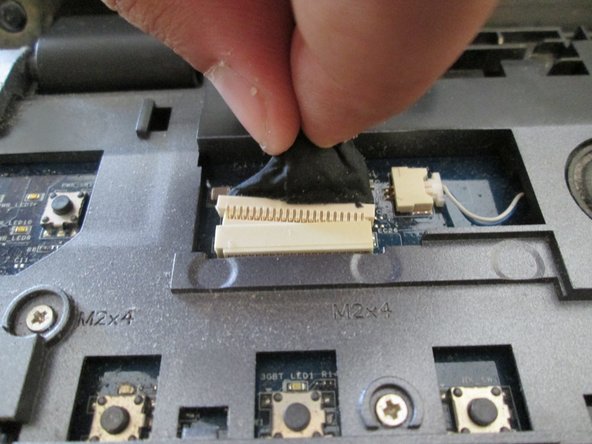
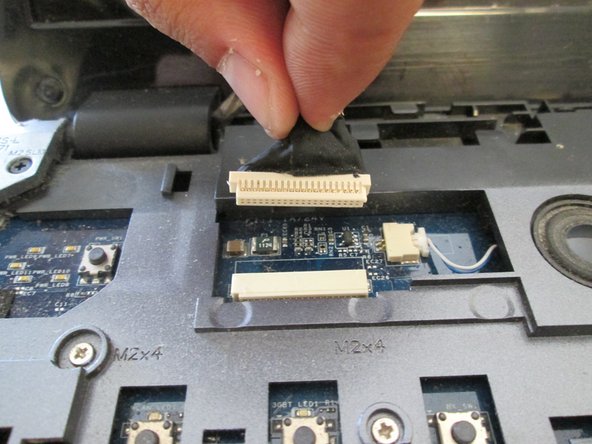
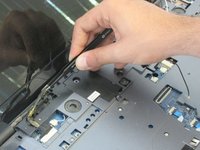
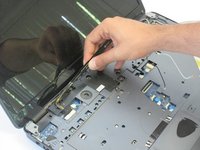
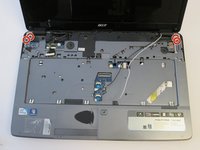
    • Use tweezers to pull the black and white antennas out of the hole.

    • Handle this step with care.

    • These are the same antennas of the wireless module.

  21. Acer Aspire 7736Z-4809 LCD Module Replacement: 21 단계, 이미지 1/3 Acer Aspire 7736Z-4809 LCD Module Replacement: 21 단계, 이미지 2/3 Acer Aspire 7736Z-4809 LCD Module Replacement: 21 단계, 이미지 3/3
    • Remove the antennas from underneath the tabs that hold them in place.

    • Do this until they are no longer underneath any tabs.

    • Be careful when handling with the antennas since they are sensitive.

  22. Acer Aspire 7736Z-4809 LCD Module Replacement: 22 단계, 이미지 1/3 Acer Aspire 7736Z-4809 LCD Module Replacement: 22 단계, 이미지 2/3 Acer Aspire 7736Z-4809 LCD Module Replacement: 22 단계, 이미지 3/3
    • Use tweezers to push the cable out of the port.

    • The cable is located on the left side of the open laptop.

    • Be careful when handling the cable.

  23. Acer Aspire 7736Z-4809 LCD Module Replacement: 23 단계, 이미지 1/2 Acer Aspire 7736Z-4809 LCD Module Replacement: 23 단계, 이미지 2/2
    • Release the cable from the tabs holding it in place.

  24. Acer Aspire 7736Z-4809 LCD Module Replacement: 24 단계, 이미지 1/2 Acer Aspire 7736Z-4809 LCD Module Replacement: 24 단계, 이미지 2/2
    • Use the Phillips #1 screwdriver to remove the four 11mm Phillips #1 screws.

  25. Acer Aspire 7736Z-4809 LCD Module Replacement: 25 단계, 이미지 1/2 Acer Aspire 7736Z-4809 LCD Module Replacement: 25 단계, 이미지 2/2
    • Grab the display assembly from the base and lift it up and off the base.

결론

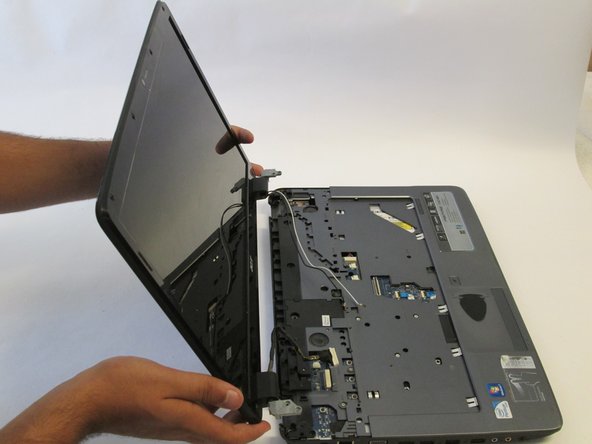
To reassemble your device, follow these instructions in reverse order.

다른 한 분이 해당 안내서를 완성하였습니다.

Pnithan Jantarakolica

회원 가입일: 09/22/16

1,153 평판

안내서 10개 작성하였습니다

UC Davis, Team 2-4, Oliver Fall 2016 UC Davis, Team 2-4, Oliver Fall 2016 회원

UCD-OLIVER-F16S2G4

5 회원들

안내서 10개 작성하였습니다

댓글 0개

댓글 쓰기

조회 통계:

24 시간 전: 1

7일 전: 1

30일 전: 5

전체 시간: 912