주요 콘텐츠로 건너뛰기

Acer Aspire 7741Z-4643 Hard Drive Replacement

필요한 것

  1. Acer Aspire 7741Z-4643 Hard Drive Replacement, Hard Drive: 1 단계, 이미지 1/3 Acer Aspire 7741Z-4643 Hard Drive Replacement, Hard Drive: 1 단계, 이미지 2/3 Acer Aspire 7741Z-4643 Hard Drive Replacement, Hard Drive: 1 단계, 이미지 3/3
    • Begin by unscrewing the four Phillips #0 7.5mm screws holding the bottom panel.

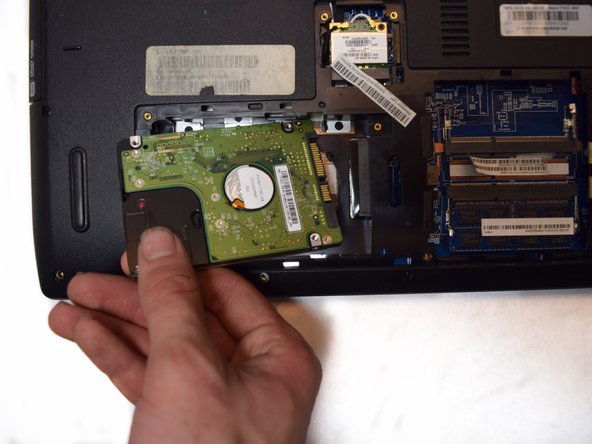
    • Then lift the panel off the laptop by the tab on its top.

  2. Acer Aspire 7741Z-4643 Hard Drive Replacement: 2 단계, 이미지 1/3 Acer Aspire 7741Z-4643 Hard Drive Replacement: 2 단계, 이미지 2/3 Acer Aspire 7741Z-4643 Hard Drive Replacement: 2 단계, 이미지 3/3
    • Unscrew all the Phillips #0 6.0mm screws holding the hard drive tray to the laptop.

    • Remove the hard drive tray.

  3. Acer Aspire 7741Z-4643 Hard Drive Replacement: 3 단계, 이미지 1/2 Acer Aspire 7741Z-4643 Hard Drive Replacement: 3 단계, 이미지 2/2
    • Use the handle embedded into the hard drive to remove it from the laptop.

결론

To reassemble your device, follow these instructions in reverse order.

다른 한 분이 해당 안내서를 완성하였습니다.

Greg Graham

회원 가입일: 10/22/18

251 평판

안내서 2개 작성하였습니다

UC Davis, Team S11-G4, Lore Fall 2018 UC Davis, Team S11-G4, Lore Fall 2018 회원

UCD-LORE-F18S11G4

4 회원들

안내서 4개 작성하였습니다

댓글 0개

댓글 쓰기

조회 통계:

24 시간 전: 0

7일 전: 1

30일 전: 8

전체 시간: 1,284