주요 콘텐츠로 건너뛰기

Acer Aspire A515-51G Lower Case Replacement

필요한 것

  1. Acer Aspire A515-51G Lower Case Replacement, Unfasten the HDD hatch: 1 단계, 이미지 1/2 Acer Aspire A515-51G Lower Case Replacement, Unfasten the HDD hatch: 1 단계, 이미지 2/2
    • Use a Phillips screwdriver to remove the screw securing the HDD hatch on the bottom left of the lower case.

  2. Acer Aspire A515-51G Lower Case Replacement, Remove the HDD hatch: 2 단계, 이미지 1/3 Acer Aspire A515-51G Lower Case Replacement, Remove the HDD hatch: 2 단계, 이미지 2/3 Acer Aspire A515-51G Lower Case Replacement, Remove the HDD hatch: 2 단계, 이미지 3/3
    • Insert the flat end of a spudger under the cutout on the top right corner of the HDD hatch and pry it up.

    • Remove the HDD hatch.

  3. Acer Aspire A515-51G Lower Case Replacement, Unfasten the HDD assembly: 3 단계, 이미지 1/2 Acer Aspire A515-51G Lower Case Replacement, Unfasten the HDD assembly: 3 단계, 이미지 2/2
    • Your HDD assembly may be secured to the lower case with screws. If it's not, skip this step.

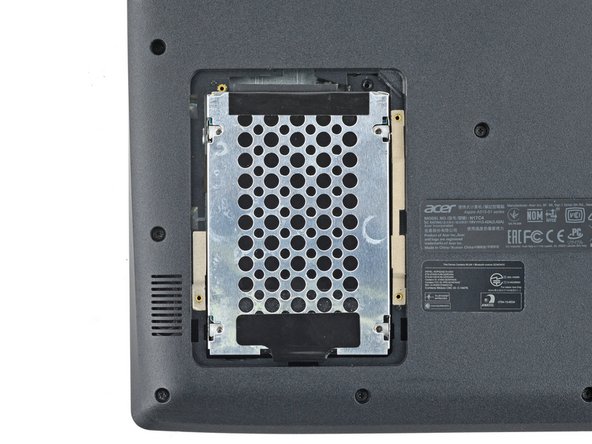
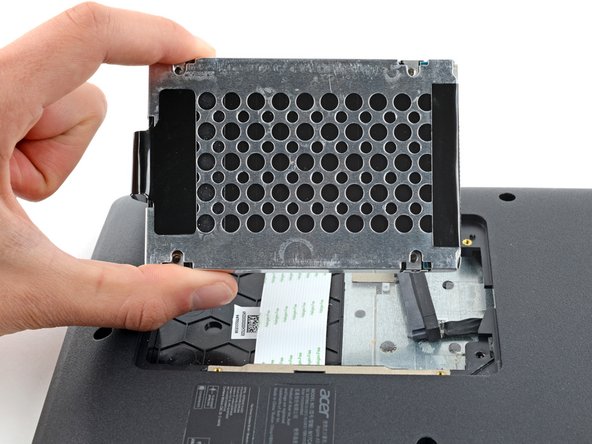
    • Use a Phillips screwdriver to remove the four screws securing the HDD assembly.

  4. Acer Aspire A515-51G Lower Case Replacement: 4 단계, 이미지 1/3 Acer Aspire A515-51G Lower Case Replacement: 4 단계, 이미지 2/3 Acer Aspire A515-51G Lower Case Replacement: 4 단계, 이미지 3/3
    • Firmly grip the HDD assembly and HDD cable connector head.

    • Pull the HDD cable connector out of its socket.

    • Remove the HDD assembly.

  5. Acer Aspire A515-51G Lower Case Replacement, Unfasten the lower case: 5 단계, 이미지 1/2 Acer Aspire A515-51G Lower Case Replacement, Unfasten the lower case: 5 단계, 이미지 2/2
    • Use a Phillips screwdriver to remove the eighteen 6.6 mm screws securing the case.

  6. Acer Aspire A515-51G Lower Case Replacement, Insert an opening pick: 6 단계, 이미지 1/2 Acer Aspire A515-51G Lower Case Replacement, Insert an opening pick: 6 단계, 이미지 2/2
    • Insert an opening pick between the lower case and the chassis on the front right edge.

  7. Acer Aspire A515-51G Lower Case Replacement, Release the case's front clips: 7 단계, 이미지 1/3 Acer Aspire A515-51G Lower Case Replacement, Release the case's front clips: 7 단계, 이미지 2/3 Acer Aspire A515-51G Lower Case Replacement, Release the case's front clips: 7 단계, 이미지 3/3
    • Slide the pick along the front edge to release the clips securing the lower case.

  8. Acer Aspire A515-51G Lower Case Replacement, Release the remaining clips: 8 단계, 이미지 1/2 Acer Aspire A515-51G Lower Case Replacement, Release the remaining clips: 8 단계, 이미지 2/2
    • Continue sliding the opening pick along the perimeter of the lower case to release the remaining clips.

  9. Acer Aspire A515-51G Lower Case Replacement: 9 단계, 이미지 1/3 Acer Aspire A515-51G Lower Case Replacement: 9 단계, 이미지 2/3 Acer Aspire A515-51G Lower Case Replacement: 9 단계, 이미지 3/3
    • Lift the lower case from the chassis and remove it.

    • During reassembly, this is a good point to power on your laptop and test all functions before sealing it up. Be sure to power your laptop back down before you continue working.

결론

To reassemble your device, follow these instructions in reverse order.

Take your e-waste to an R2 or e-stewards certified recycler.

Repair didn't go as planned? Try some basic troubleshooting, or ask our Acer Aspire answers community for help.

다른 한 분이 해당 안내서를 완성하였습니다.

Spencer Day

회원 가입일: 09/14/22

53,748 평판

안내서 394개 작성하였습니다

iFixit iFixit 회원

Staff

135 회원들

안내서 17,207개 작성하였습니다

댓글 0개

댓글 쓰기

조회 통계:

24 시간 전: 1

7일 전: 10

30일 전: 34

전체 시간: 1,163