소개
If your system overheating you must to clean the Heatsink system and/or change the thermal paste compound.
You must be very careful when you working with the motherboard. There are small components that can easily pulled down.
필요한 것
동영상 개요
-
-
Switch-off the laptop.
-
Remove the battery and the DVD drive.
-
-
-
Remove the SATA HDD, RAM meory module and WiFi mini PCI card
-
More detailed information for this step you can found in this manual: Acer Aspire E1-571 - HDD / RAM Memory / WiFi card Replacement
-
.
RAM doesn't need to come out for mainboard removal, although it takes half a second to remove it.
Steve Rand - 답글
The black antenna cable needs to be picked out of the groove so that it can pass through the hole of the chassis later for mainboard removal.
Steve Rand - 답글
-
-
-
The Keyboard is held by 6x locking clips at up and 2x at both sides.
-
Use plastic tool to unlock 6x upper clips.
-
Disconnect the keyboard flex cable and you are ready to install the new keyboard.
-
More detailed information for this step you can found in this manual: Acer Aspire E1-571 - Keyboard Replacement
-
-
-
-
Remove the 2x screws and disconnect 5x flex cable connectors:
-
2x Loudspeakers cable connectors
-
LCD Display cable connector
-
Microphone cable connector
-
USB board flex cable connector
-
Don't forget to remove the Card Reader Blanking Plate.
-
To take out the Motherboard, pick-up it first from the right side (near to the DVD drive connector).
At this point, the black antenna cable can be pulled through the hole in the mainboard. It is also held to the mainboard with tape on the left hand side (the grey path in the picture, from the hole in the mainboard up across the heatsink/radiator and over the top-left mainboard screw.
Steve Rand - 답글
-
-
-
Clean the radiator by using soft brush.
An aircompressor or a can of compressed air from a hobby or electronics shop will blast the dust out of the fins more effectively. On models with a secondary graphics chip (chip would be in the blank spot at the top-left of the second picture), the heatpipe comes down and turns and then travels across the CPU next to the CPU heatpipe and then joins to a much larger radiator with longer fins and is much harder to clean.
Steve Rand - 답글
-
-
-
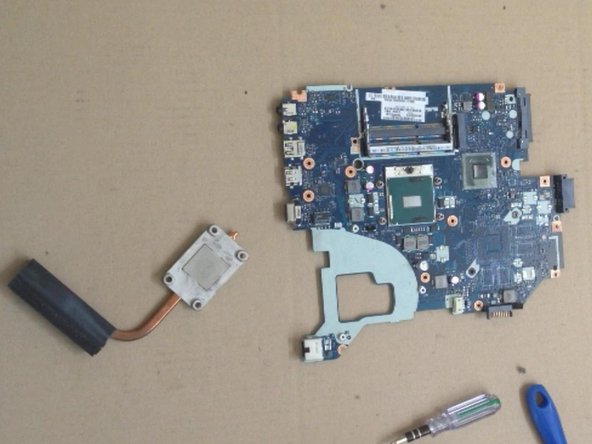
Remove the heat sink system.
-
Careful remove the old thermal patse from the Processor and from the Head-sync system.
What did you use to remove the old thermal paste? Did you use Arctic Silver ArctiClean?
leolinolam - 답글
Models with secondary graphics cards have two more screws to release the GPU heatsink. The heatpipe for the GPU and CPU are bonded together and go to a larger radiator.
Steve Rand - 답글
-
-
-
Put a new thermal paste. Cover the entire surface of the CPU crystal.
-
Install the Heat-sync system and screw the screws at a few steps.
Cleaning the factory paste off is usually easy due to it going brittle and no longer sticking well. I use a soft facial tissue to scrape the CPU and GPU clean and then apply Arctic Silver 5 paste to my finger tip and paint it onto the chip fairly evenly.
Steve Rand - 답글
Place the heatsink on the chip and give it a little jiggle around to spread the paste a tiny bit, locate all four screws and do them up very loosely, then tighten one finger-tight, then diagonally across, then back to the first side, then the last screw. Repeat again but doing them up until they stop. This evenly-tightened method will help the heatsink sit flush with the chip and help spread the heatpaste evenly.
Steve Rand - 답글
-


To reassemble your device, follow these instructions in reverse order.
To reassemble your device, follow these instructions in reverse order.
다른 7명이 해당 안내서를 완성하였습니다.

팀

댓글 4개
Sir acer e1 571 me cpu kon sa hota hy matlb uska no kya hota hy core i5 kaa hmko confrm karna hy kyu ki maine apna lapie dukan pe diya tha aur mujhe dr hy ki wo nera cpu to nhi change kardiya
This video was a lifesaver. It helped me take apart My E1 in order to replace the thermalpaste and cleanup he cooling. Big Thanks!
Thank You, this worked great on an Acer V3-571, totally removed cooling/fan issues, Thank You.
My laptop wont turn on after doing this, please help me!