주요 콘텐츠로 건너뛰기

Acer Aspire E5-571P-55TL CPU Fan Replacement

필요한 것

  1. Acer Aspire E5-571P-55TL CPU Fan Replacement, Battery: 1 단계, 이미지 1/1
    • Make sure that laptop is turned off.

    • Turn the laptop upside down with the battery facing you.

  2. Acer Aspire E5-571P-55TL CPU Fan Replacement: 2 단계, 이미지 1/1
    • Place the Spudger into the battery lock and slide it to the left until you hear the battery unlock.

  3. Acer Aspire E5-571P-55TL CPU Fan Replacement: 3 단계, 이미지 1/2 Acer Aspire E5-571P-55TL CPU Fan Replacement: 3 단계, 이미지 2/2
    • Pull the battery towards you to remove it from the laptop.

  4. Acer Aspire E5-571P-55TL CPU Fan Replacement, Keyboard: 4 단계, 이미지 1/2 Acer Aspire E5-571P-55TL CPU Fan Replacement, Keyboard: 4 단계, 이미지 2/2
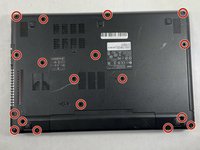
    • Using a Phillips #0 screwdriver, remove each of the eighteen 8 mm screws from the bottom of the laptop.

  5. Acer Aspire E5-571P-55TL CPU Fan Replacement: 5 단계, 이미지 1/3 Acer Aspire E5-571P-55TL CPU Fan Replacement: 5 단계, 이미지 2/3 Acer Aspire E5-571P-55TL CPU Fan Replacement: 5 단계, 이미지 3/3
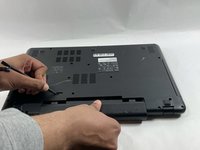
    • Carefully place your fingers underneath the top of the keyboard just below the screen.

    • Pull upwards until you can hear the keyboard click out of place.

    • Continue around the entire laptop, carefully pulling the keyboard and palm rest assembly slightly from the frame to reveal the ribbon connectors.

    • Don't pull the keyboard off the frame yet because it's attached by ribbon connectors.

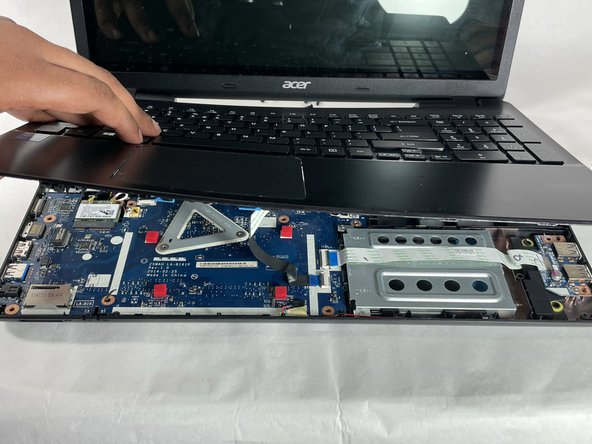
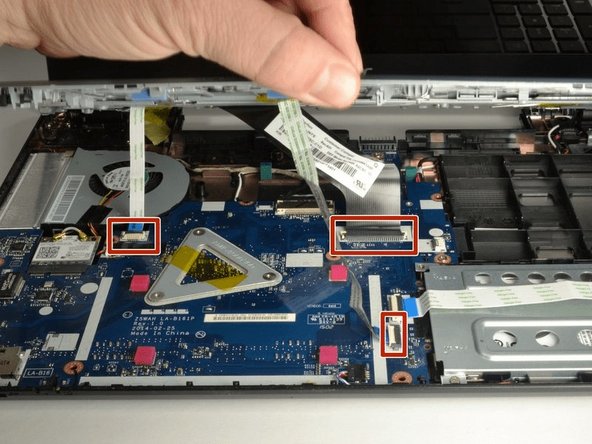
    • After the keyboard is detached, unplug each of the three ribbon cables and remove the keyboard and palm rest assembly.

  6. Acer Aspire E5-571P-55TL CPU Fan Replacement, CPU Fan: 6 단계, 이미지 1/2 Acer Aspire E5-571P-55TL CPU Fan Replacement, CPU Fan: 6 단계, 이미지 2/2
    • Before replacing the CPU fan, you'll have to remove the network card found below the fan.

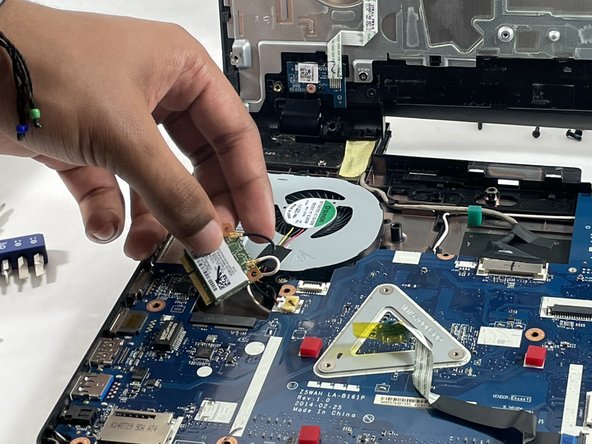
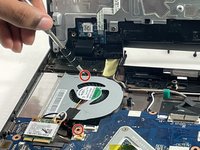
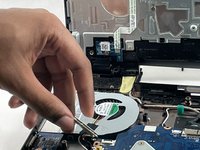
    • Using a Philips #0 screwdriver, remove the two 3 mm screws from the corners of the Wi-Fi card.

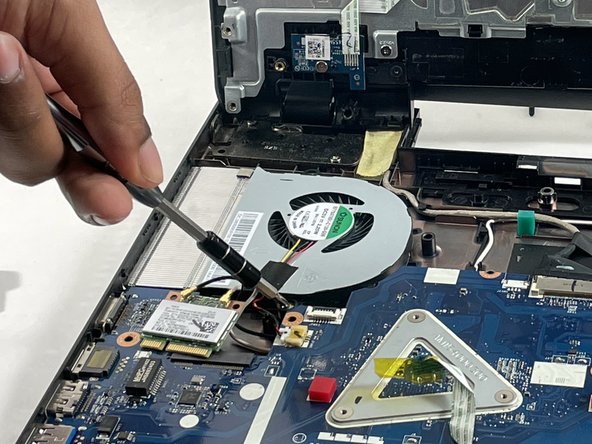
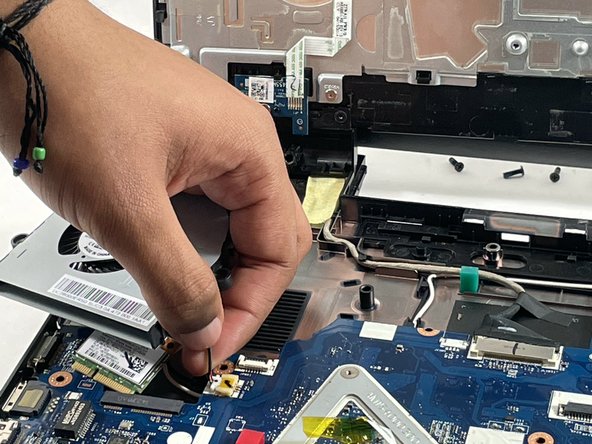
    • Carefully lift the network card from it's slot, and disconnect the two coaxial cables.

  7. Acer Aspire E5-571P-55TL CPU Fan Replacement: 7 단계, 이미지 1/2 Acer Aspire E5-571P-55TL CPU Fan Replacement: 7 단계, 이미지 2/2
    • The CPU fan can be found in the upper left corner of the laptop.

    • Using a Phillips #0 screwdriver, remove the two 4.5 mm screws from the fan.

  8. Acer Aspire E5-571P-55TL CPU Fan Replacement: 8 단계, 이미지 1/2 Acer Aspire E5-571P-55TL CPU Fan Replacement: 8 단계, 이미지 2/2
    • Use tweezers to safely remove the fan plug from the motherboard. To remove the plug, gently push left.

  9. Acer Aspire E5-571P-55TL CPU Fan Replacement: 9 단계, 이미지 1/1
    • Make sure that all fan wires are disconnected from the board.

    • Lift the curved end of the fan, and safely remove it.

결론

To reassemble your device, follow these instructions in reverse order.

Max Piekos

회원 가입일: 03/23/22

459 평판

안내서 4개 작성하였습니다

UMass Dartmouth, Team B-1, Gurgel Spring 2022 UMass Dartmouth, Team B-1, Gurgel Spring 2022 회원

UMASSD-GURGEL-S22SBG1

4 회원들

안내서 6개 작성하였습니다

댓글 0개

댓글 쓰기

조회 통계:

24 시간 전: 0

7일 전: 1

30일 전: 4

전체 시간: 131