주요 콘텐츠로 건너뛰기

Acer Aspire ES1-111M-C7DE Battery Replacement

필요한 것

  1. Acer Aspire ES1-111M-C7DE Battery Replacement, Back Cover: 1 단계, 이미지 2개 중 1개 Acer Aspire ES1-111M-C7DE Battery Replacement, Back Cover: 1 단계, 이미지 2개 중 2개
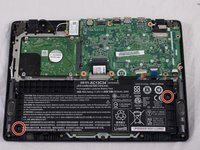
    • Unscrew the 13 6.2mm screws located on the bottom of the laptop using the JIS #0 screwdriver.

  2. Acer Aspire ES1-111M-C7DE Battery Replacement: 2 단계, 이미지 3개 중 1개 Acer Aspire ES1-111M-C7DE Battery Replacement: 2 단계, 이미지 3개 중 2개 Acer Aspire ES1-111M-C7DE Battery Replacement: 2 단계, 이미지 3개 중 3개
    • Using a plastic opening tool, gently pry the lower case off. Place aside.

  3. Acer Aspire ES1-111M-C7DE Battery Replacement, Battery: 3 단계, 이미지 2개 중 1개 Acer Aspire ES1-111M-C7DE Battery Replacement, Battery: 3 단계, 이미지 2개 중 2개
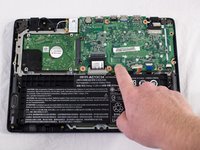
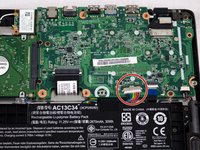
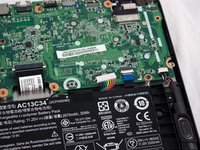
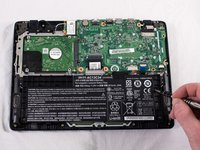
    • Locate the small black button surrounded by a white circle near the battery on the motherboard.

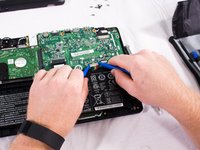
    • Press and hold the button for five seconds.

  4. Acer Aspire ES1-111M-C7DE Battery Replacement: 4 단계, 이미지 3개 중 1개 Acer Aspire ES1-111M-C7DE Battery Replacement: 4 단계, 이미지 3개 중 2개 Acer Aspire ES1-111M-C7DE Battery Replacement: 4 단계, 이미지 3개 중 3개
    • Using your fingers or the small plastic opening tools, disconnect the battery connection from the motherboard by pinching and pulling back on both sides of the connector.

  5. Acer Aspire ES1-111M-C7DE Battery Replacement: 5 단계, 이미지 3개 중 1개 Acer Aspire ES1-111M-C7DE Battery Replacement: 5 단계, 이미지 3개 중 2개 Acer Aspire ES1-111M-C7DE Battery Replacement: 5 단계, 이미지 3개 중 3개
    • Locate the two 6.2mm black screws holding the battery in place and unscrew them.

    • Gently lift and remove the battery.

결론

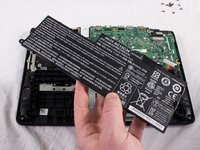
To reassemble your device, follow these instructions in reverse order.

작성자

3다른 기여자 명과 함께

Reid Becker

회원 가입일: 09/25/17

103 평판

안내서 1개를 작성함

USF Tampa, Team S3-G1, Cannon Fall 2017 USF Tampa, Team S3-G1, Cannon Fall 2017 회원

USFT-CANNON-F17S3G1

4 회원들

안내서 6개를 작성함

댓글 0개

댓글 쓰기

조회 통계:

지난 24시간: 0

지난 7일: 1

지난 30일: 12

전체 시간: 1,842