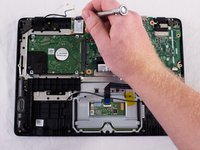
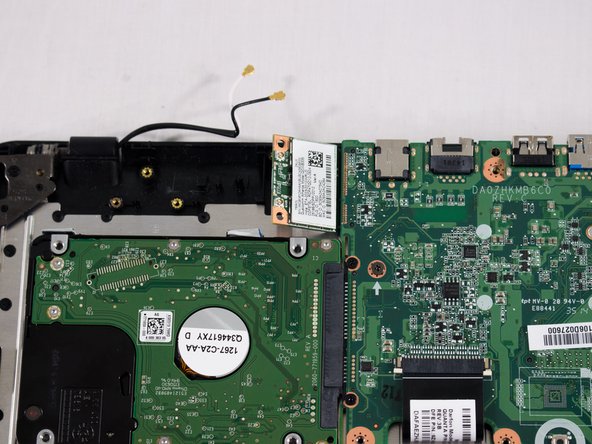
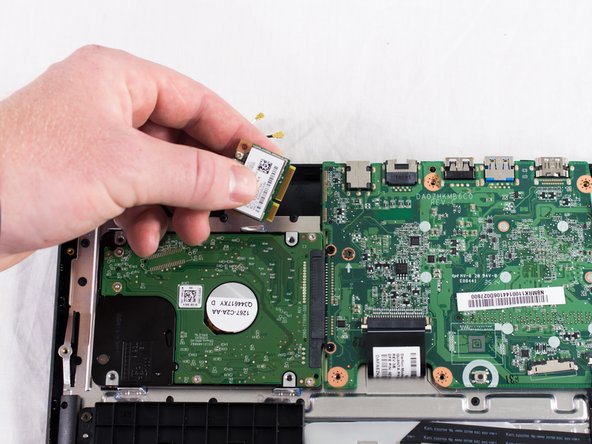
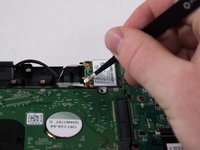
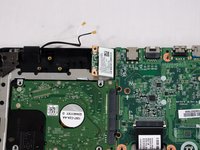
주요 콘텐츠로 건너뛰기

Acer Aspire ES1-111M-C7DE Network Card Replacement

필요한 것

  1. Acer Aspire ES1-111M-C7DE Network Card Replacement, Back Cover: 1 단계, 이미지 2개 중 1개 Acer Aspire ES1-111M-C7DE Network Card Replacement, Back Cover: 1 단계, 이미지 2개 중 2개
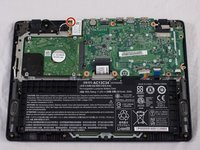
    • Unscrew the 13 6.2mm screws located on the bottom of the laptop using the JIS #0 screwdriver.

  2. Acer Aspire ES1-111M-C7DE Network Card Replacement: 2 단계, 이미지 3개 중 1개 Acer Aspire ES1-111M-C7DE Network Card Replacement: 2 단계, 이미지 3개 중 2개 Acer Aspire ES1-111M-C7DE Network Card Replacement: 2 단계, 이미지 3개 중 3개
    • Using a plastic opening tool, gently pry the lower case off. Place aside.

  3. Acer Aspire ES1-111M-C7DE Network Card Replacement, Network Card: 3 단계, 이미지 2개 중 1개 Acer Aspire ES1-111M-C7DE Network Card Replacement, Network Card: 3 단계, 이미지 2개 중 2개
    • You will see a white rectangular piece next to the upper left-hand corner of the motherboard that is connected with a black cord and a white cord; this is the network card.

    • Unscrew the one 6.2mm screw in the upper left-hand corner of the network card.

  4. Acer Aspire ES1-111M-C7DE Network Card Replacement: 4 단계, 이미지 3개 중 1개 Acer Aspire ES1-111M-C7DE Network Card Replacement: 4 단계, 이미지 3개 중 2개 Acer Aspire ES1-111M-C7DE Network Card Replacement: 4 단계, 이미지 3개 중 3개
    • Remove the black and the white cords from the network card.

    • Slide the card out of the motherboard and replace it with the new one.

결론

To reassemble your device, follow these instructions in reverse order.

작성자

3다른 기여자 명과 함께

Payton Stewart

회원 가입일: 09/25/17

101 평판

안내서 1개를 작성함

USF Tampa, Team S3-G1, Cannon Fall 2017 USF Tampa, Team S3-G1, Cannon Fall 2017 회원

USFT-CANNON-F17S3G1

4 회원들

안내서 6개를 작성함

댓글 0개

댓글 쓰기

조회 통계:

지난 24시간: 0

지난 7일: 0

지난 30일: 2

전체 시간: 296