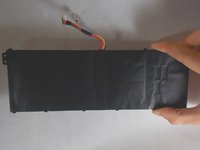
주요 콘텐츠로 건너뛰기

Acer Aspire ES1-512-C80E Battery Replacement

필요한 것

  1. Acer Aspire ES1-512-C80E Battery Replacement, Back Cover: 1 단계, 이미지 1개 중 1개
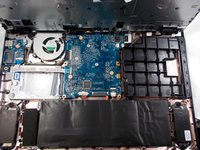
    • Place the device upside down on a flat surface.

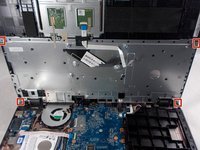
    • Using a Phillips #00 screwdriver, remove all nineteen 1.2mm screws that secure the bottom cover of the device.

  2. Acer Aspire ES1-512-C80E Battery Replacement: 2 단계, 이미지 3개 중 1개 Acer Aspire ES1-512-C80E Battery Replacement: 2 단계, 이미지 3개 중 2개 Acer Aspire ES1-512-C80E Battery Replacement: 2 단계, 이미지 3개 중 3개
    • Pry around the edges with a spudger to remove the back cover.

    • The two hinges on the back require additional force to be popped open.

  3. Acer Aspire ES1-512-C80E Battery Replacement, Keyboard: 3 단계, 이미지 3개 중 1개 Acer Aspire ES1-512-C80E Battery Replacement, Keyboard: 3 단계, 이미지 3개 중 2개 Acer Aspire ES1-512-C80E Battery Replacement, Keyboard: 3 단계, 이미지 3개 중 3개
    • The keyboard is the silver piece located by itself on the upper half of the laptop.

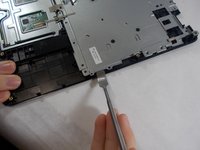
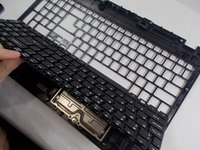
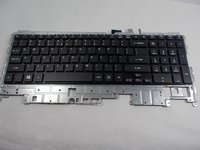
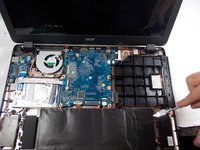
    • Using a Phillips #00 screwdriver, remove the four 1.2mm screws from the keyboard.

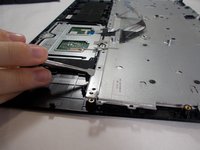
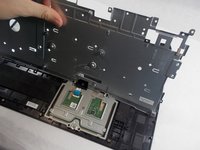
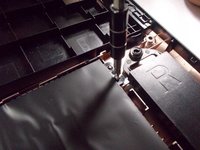
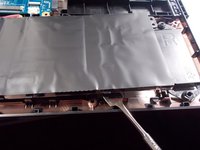
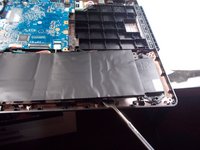
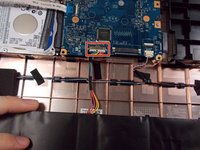
    • Using a spudger, go around the edges and pry off the keyboard.

    • All black clips will have to be removed before the keyboard can be removed.

  4. Acer Aspire ES1-512-C80E Battery Replacement: 4 단계, 이미지 3개 중 1개 Acer Aspire ES1-512-C80E Battery Replacement: 4 단계, 이미지 3개 중 2개 Acer Aspire ES1-512-C80E Battery Replacement: 4 단계, 이미지 3개 중 3개
    • Remove the ribbon cable connection from the keyboard.

    • Peel back the two pieces of tape to separate the keyboard.

    • Remove the keyboard from under the plastic covering.

    • Remove the silver plate back cover of the keyboard from the bottom base.

  5. Acer Aspire ES1-512-C80E Battery Replacement: 5 단계, 이미지 2개 중 1개 Acer Aspire ES1-512-C80E Battery Replacement: 5 단계, 이미지 2개 중 2개
    • Remove the large silver plate from the keyboard.

    • You can not remove the silver backing with the attached wire from the back of the keyboard.

  6. Acer Aspire ES1-512-C80E Battery Replacement: 6 단계, 이미지 1개 중 1개
    • The keyboard is removed and ready to be replaced.

  7. Acer Aspire ES1-512-C80E Battery Replacement, Battery: 7 단계, 이미지 3개 중 1개 Acer Aspire ES1-512-C80E Battery Replacement, Battery: 7 단계, 이미지 3개 중 2개 Acer Aspire ES1-512-C80E Battery Replacement, Battery: 7 단계, 이미지 3개 중 3개
    • Remove the two 1.2mm Phillips #00 screws securing the battery.

  8. Acer Aspire ES1-512-C80E Battery Replacement: 8 단계, 이미지 3개 중 1개 Acer Aspire ES1-512-C80E Battery Replacement: 8 단계, 이미지 3개 중 2개 Acer Aspire ES1-512-C80E Battery Replacement: 8 단계, 이미지 3개 중 3개
    • Use a nylon spudger to remove the battery from the clips that hold it down.

  9. Acer Aspire ES1-512-C80E Battery Replacement: 9 단계, 이미지 3개 중 1개 Acer Aspire ES1-512-C80E Battery Replacement: 9 단계, 이미지 3개 중 2개 Acer Aspire ES1-512-C80E Battery Replacement: 9 단계, 이미지 3개 중 3개
    • Remove the wired connection to the laptop by pulling the plug out of the motherboard.

    • Remove the battery from the laptop.

결론

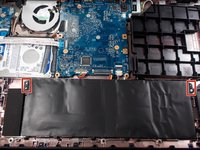
To reassemble your device, follow these instructions in reverse order.

다른 2명이 해당 안내서를 완성하였습니다.

작성자

3다른 기여자 명과 함께

Robert Creighton

회원 가입일: 10/31/19

692 평판

안내서 6개를 작성함

UMass Dartmouth, Team S2-G8, Barthe Fall 2019 UMass Dartmouth, Team S2-G8, Barthe Fall 2019 회원

UMASSD-BARTHE-F19S2G8

3 회원들

안내서 7개를 작성함

0가이드 댓글

댓글 쓰기

조회 통계:

지난 24시간: 0

지난 7일: 3

지난 30일: 16

전체 시간: 2,325