소개
You may need to replace the battery in your Acer Aspire ES1-512-C96S if you experience problems regarding the device’s power. To access the battery, the back cover of the device will need to be removed. The process of replacing the battery should take between 10-20 minutes.
필요한 것
-
-
Place the device upside down on a flat, soft surface.
-
Using a Phillips #0 screwdriver, remove all 18 screws that secure the bottom cover of the device.
-
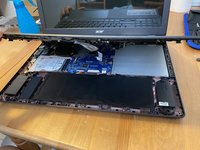
Once all screws are removed, flip laptop back over and open it.
-
Begin prying in the corners and use a spluger to pry around the edge. Hearing popping noises from the plastic is normal.
-
-
-
Lift Slowly, once you have popped all the plastic off the bottom case. Do not lift off completely
-
-
-
-
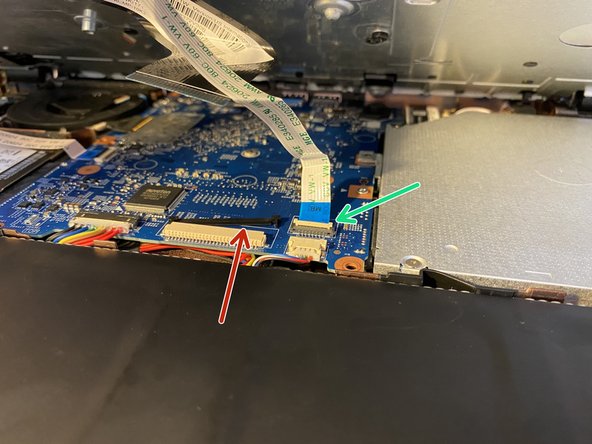
Locate the lock for the larger Ribbon cable on the sides of the cable. Slide them back, Gently, until they release the cable. The lock may fall off, that's okay. It will reattach.
-
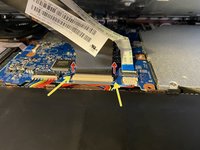
Notice the lock bar is off of the connector.
-
The smaller ribbon cable has a latch, that is pulled upward, gently, until it disengages.
-
Now the Keyboard should remove completely.
-
-
-
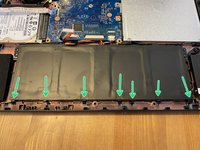
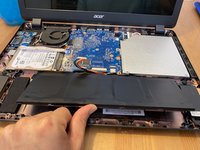
Disconnect the Battery from the Motherboard and there is 1 screw, PH0, that is holding the battery in place.
-
There are also several tabs that are holding the battery in place. Bend the tabs down slightly, just enough to disengage them.
-
Once all locking tabs have been moved, lift from bottom and pull out.
-


To reassemble your device, follow these instructions in reverse order.
