주요 콘텐츠로 건너뛰기

Acer Aspire One 751h-1948 Fan Replacement

필요한 것

  1. Acer Aspire One 751h-1948 Fan Replacement, Battery: 1 단계, 이미지 1/1
    • Close the laptop and flip it over to view the back of the laptop.

  2. Acer Aspire One 751h-1948 Fan Replacement: 2 단계, 이미지 1/3 Acer Aspire One 751h-1948 Fan Replacement: 2 단계, 이미지 2/3 Acer Aspire One 751h-1948 Fan Replacement: 2 단계, 이미지 3/3
    • Unlock the right side of the battery by sliding the battery lock to the right. Then slide the left lock to the left and remove the battery.

  3. Acer Aspire One 751h-1948 Fan Replacement, Network Card: 3 단계, 이미지 1/2 Acer Aspire One 751h-1948 Fan Replacement, Network Card: 3 단계, 이미지 2/2
    • Unscrew the two Phillips #0 (M2-L2.5 mm) holding down the network card panel.

    • These screws don't come all the way out.

  4. Acer Aspire One 751h-1948 Fan Replacement: 4 단계, 이미지 1/3 Acer Aspire One 751h-1948 Fan Replacement: 4 단계, 이미지 2/3 Acer Aspire One 751h-1948 Fan Replacement: 4 단계, 이미지 3/3
    • Unplug the two connecting cables by lifting them up. They should unclip easily.

  5. Acer Aspire One 751h-1948 Fan Replacement: 5 단계, 이미지 1/3 Acer Aspire One 751h-1948 Fan Replacement: 5 단계, 이미지 2/3 Acer Aspire One 751h-1948 Fan Replacement: 5 단계, 이미지 3/3
    • Remove the screw Phillips #0 (M2-L3 mm) holding down the network card. Pull out the card.

  6. Acer Aspire One 751h-1948 Fan Replacement, Hard Drive: 6 단계, 이미지 1/1
    • Unscrew the Phillips 0# (M2 L2.5 mm) screw and remove the cover panel.

    • These screws will not come out all the way.

  7. Acer Aspire One 751h-1948 Fan Replacement: 7 단계, 이미지 1/3 Acer Aspire One 751h-1948 Fan Replacement: 7 단계, 이미지 2/3 Acer Aspire One 751h-1948 Fan Replacement: 7 단계, 이미지 3/3
    • Remove the hard drive by sliding it to the left and pull it out.

  8. Acer Aspire One 751h-1948 Fan Replacement: 8 단계, 이미지 1/2 Acer Aspire One 751h-1948 Fan Replacement: 8 단계, 이미지 2/2
    • Unscrew the Phillips #0 (M2-L2.5 mm) screws.

  9. Acer Aspire One 751h-1948 Fan Replacement, Keyboard: 9 단계, 이미지 1/3 Acer Aspire One 751h-1948 Fan Replacement, Keyboard: 9 단계, 이미지 2/3 Acer Aspire One 751h-1948 Fan Replacement, Keyboard: 9 단계, 이미지 3/3
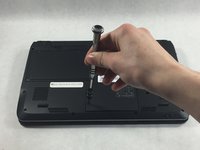
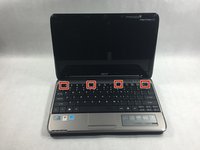
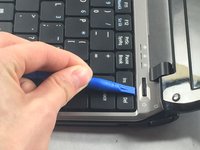
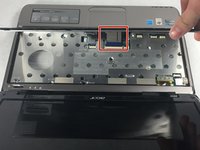
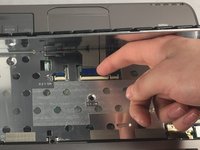
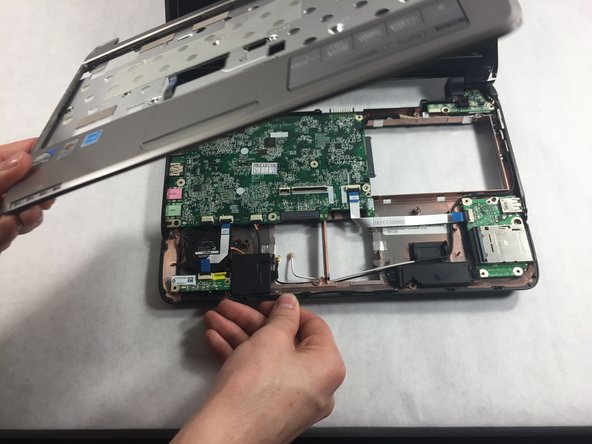
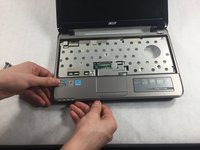
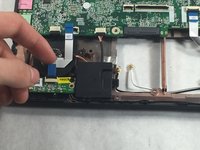
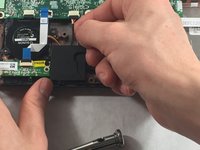
    • Use the plastic opening tool to push in each of the four clips and carefully lift the keyboard.

    • Don't lift the keyboard completely so that you don't damage the ribbon cable underneath.

  10. Acer Aspire One 751h-1948 Fan Replacement: 10 단계, 이미지 1/2 Acer Aspire One 751h-1948 Fan Replacement: 10 단계, 이미지 2/2
    • When you remove the keyboard, be careful not to damage the ribbon cable that attaches it to the motherboard.

    • Unplug the ribbon cable by gently lifting the black tab up. Then remove the cable.

  11. Acer Aspire One 751h-1948 Fan Replacement, Front Panel: 11 단계, 이미지 1/1
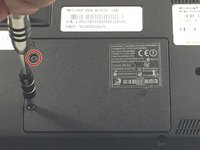
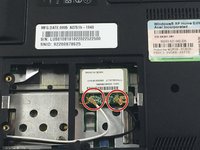
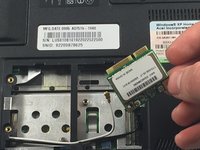
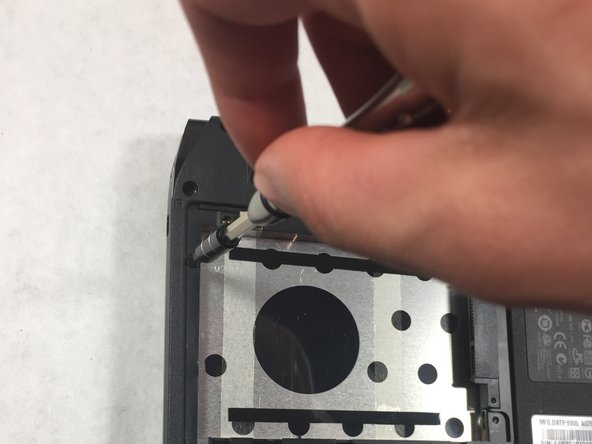
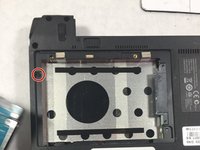
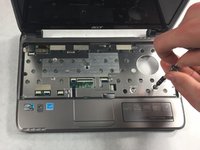
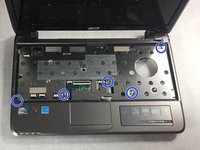
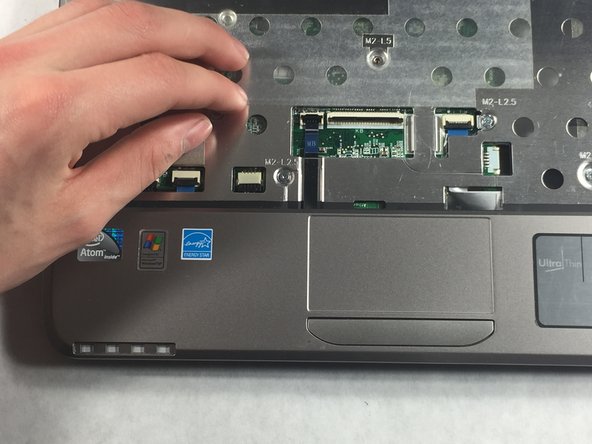
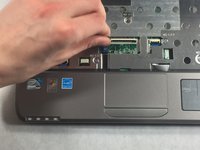
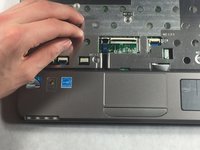
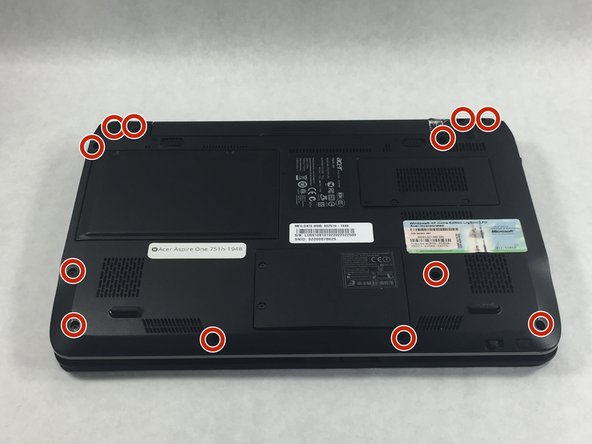
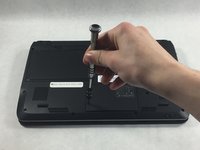
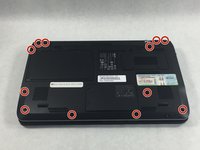
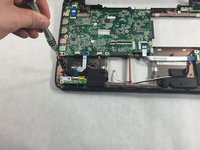
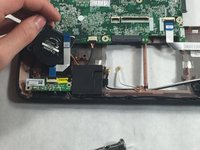
    • Use the screwdriver to remove all the Phillips #00 (M2-L2.5 mm) screws shown here.
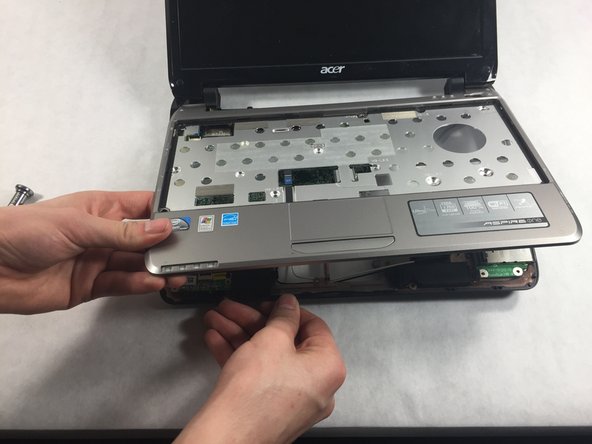
  12. Acer Aspire One 751h-1948 Fan Replacement: 12 단계, 이미지 1/3 Acer Aspire One 751h-1948 Fan Replacement: 12 단계, 이미지 2/3 Acer Aspire One 751h-1948 Fan Replacement: 12 단계, 이미지 3/3
    • Flip the laptop over and remove all the Phillips #0 (M2-L5 mm) screws under the keyboard.

    • Remove all the Phillips #0 (M2-L2.5 mm) screws

  13. Acer Aspire One 751h-1948 Fan Replacement: 13 단계, 이미지 1/2 Acer Aspire One 751h-1948 Fan Replacement: 13 단계, 이미지 2/2
    • Lift the small black clip and remove the ribbon cable before proceeding.

  14. Acer Aspire One 751h-1948 Fan Replacement: 14 단계, 이미지 1/3 Acer Aspire One 751h-1948 Fan Replacement: 14 단계, 이미지 2/3 Acer Aspire One 751h-1948 Fan Replacement: 14 단계, 이미지 3/3
    • Separate the front panel from the back panel, by sliding your thumb nail between them.

  15. Acer Aspire One 751h-1948 Fan Replacement, Fan: 15 단계, 이미지 1/2 Acer Aspire One 751h-1948 Fan Replacement, Fan: 15 단계, 이미지 2/2
    • Use the screwdriver to remove Phillips #0 (M2-L5 mm) screws

  16. Acer Aspire One 751h-1948 Fan Replacement: 16 단계, 이미지 1/2 Acer Aspire One 751h-1948 Fan Replacement: 16 단계, 이미지 2/2
    • Remove the ribbon cable that sits on top of the fan by lifting the small black clip and pulling the blue tab.

    • Use the same technique to remove the ribbon cable from the motherboard.

  17. Acer Aspire One 751h-1948 Fan Replacement: 17 단계, 이미지 1/2 Acer Aspire One 751h-1948 Fan Replacement: 17 단계, 이미지 2/2
    • Unscrew the Phillips #0 (M2-L2.5 mm) screw from the fan, and remove the fan.

결론

To reassemble your device, follow these instructions in reverse order.

Chris Bolton

회원 가입일: 03/22/17

434 평판

안내서 4개 작성하였습니다

UMass Dartmouth, Team S8-G2, Catania Spring 2017 UMass Dartmouth, Team S8-G2, Catania Spring 2017 회원

UMASSD-CATANIA-S17S8G2

3 회원들

안내서 8개 작성하였습니다

댓글 0개

댓글 쓰기

조회 통계:

24 시간 전: 0

7일 전: 2

30일 전: 3

전체 시간: 343