이 버전에는 잘못된 편집 사항이 있을 수 있습니다. 최신 확인된 스냅샷으로 전환하십시오.
필요한 것
-
이 단계는 번역되지 않았습니다. 번역을 도와주십시오
-
Orient the ACER Aspire One to where the bottom of the laptop is facing upward as shown in the picture.
-
-
이 단계는 번역되지 않았습니다. 번역을 도와주십시오
-
Locate the circular slot positioned at the bottom right of the battery.
-
-
이 단계는 번역되지 않았습니다. 번역을 도와주십시오
-
Insert a spudger and slide the tab to the right.
-
Hold the tab in the right-hand position and firmly push or pull the battery upward to remove it from the laptop.
-
-
-
이 단계는 번역되지 않았습니다. 번역을 도와주십시오
-
Locate the single 6 mm Phillips screw in the lower middle of the back plate.
-
Remove the screw using a Phillips #0 Screwdriver.
-
-
이 단계는 번역되지 않았습니다. 번역을 도와주십시오
-
Locate the eighteen 6 mm Phillips screws that are required to remove the keyboard.
-
Remove all screws using a Phillips #0 screwdriver.
-
-
이 단계는 번역되지 않았습니다. 번역을 도와주십시오
-
Orient the laptop to where the open screen is facing towards you.
-
Slide the spuldger into the indicated crease.
-
Firmly slide spudger all the way around the laptop to pry the keyboard away from the bottom of the laptop.
-
-
이 단계는 번역되지 않았습니다. 번역을 도와주십시오
-
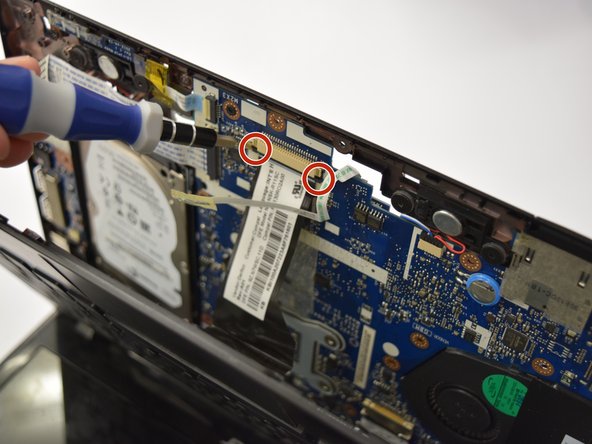
Remove the green dotted ribbon cable by sliding it straight out of the clamp holding it in using a plastic spudger.
-
Locate the two tabs that are holding the larger black ribbon cable in place.
-
Remove the larger black ribbon cable by pressing in the tabs and sliding it straight out of the clamp holding it in using a plastic spudger.
-
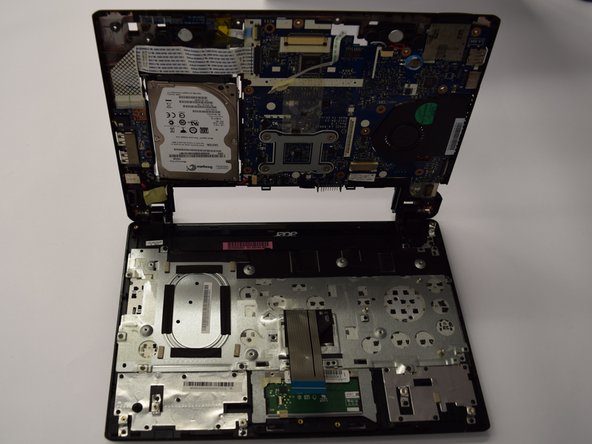
To remove the keyboard, lift the keyboard straight away from the rest of the laptop.
-
-
이 단계는 번역되지 않았습니다. 번역을 도와주십시오
-
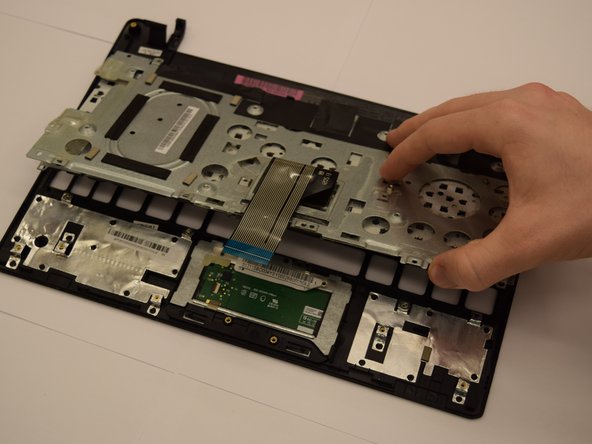
Locate the ten 6 mm Phillips screws that connect the keyboard to the rest of the laptop and remove them with a Phillips #0 Screwdriver.
-
Locate the four 6 mm Phillips screws hidden beneath black tape by lifting up the black tape and remove them with a Phillips #0 Screwdriver.
-
To remove keyboard from the rest of the laptop, pull keyboard straight up.
-


다른 한 분이 해당 안내서를 완성하였습니다.
팀

Clemson, Team 7-1, Benson Spring 2016 Clemson, Team 7-1, Benson Spring 2016 회원
CLEM-BENSON-S16S7G1
4 회원들
안내서 14개 작성하였습니다