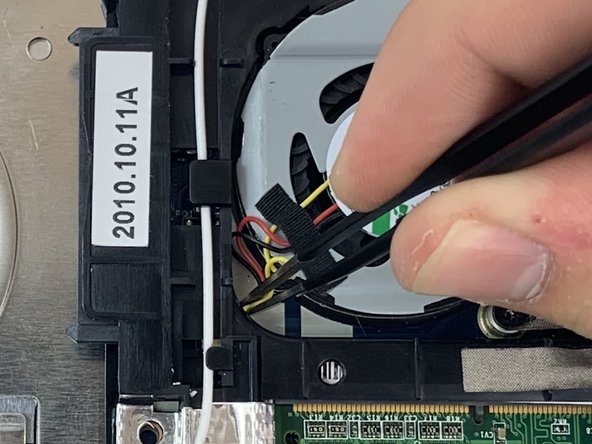
주요 콘텐츠로 건너뛰기

Acer Aspire One D255-1625 Fan Replacement

필요한 것

  1. Acer Aspire One D255-1625 Fan Replacement, Battery: 1 단계, 이미지 1/3 Acer Aspire One D255-1625 Fan Replacement, Battery: 1 단계, 이미지 2/3 Acer Aspire One D255-1625 Fan Replacement, Battery: 1 단계, 이미지 3/3
    • Before you replace the battery, ensure that the device is unplugged and powered off.

    • Pull the upper left switch on the back of the laptop to the left into the unlock position.

    • Pull the upper right switch to the left and hold it in place.

  2. Acer Aspire One D255-1625 Fan Replacement: 2 단계, 이미지 1/1
    • Pull the battery straight out.

    • To properly dispose of battery, locate your nearest recycling plant to dispose of it there.

  3. Acer Aspire One D255-1625 Fan Replacement, Fan: 3 단계, 이미지 1/2 Acer Aspire One D255-1625 Fan Replacement, Fan: 3 단계, 이미지 2/2
    • Use iFixit’s Jimmy tool to remove bottom panel of device.

    • Wedge the tool into the top middle of the panel until the back gently pops off.

  4. Acer Aspire One D255-1625 Fan Replacement: 4 단계, 이미지 1/3 Acer Aspire One D255-1625 Fan Replacement: 4 단계, 이미지 2/3 Acer Aspire One D255-1625 Fan Replacement: 4 단계, 이미지 3/3
    • Use the tweezers to disconnect the fan's wires from laptop.

    • Use the Phillips #1 screwdriver to remove the three 4mm screws that hold the fan in place.

    • The 3rd screw on the bottom right is extremely difficult to remove as it requires you to bend the motherboard slightly in order to reach it.

  5. Acer Aspire One D255-1625 Fan Replacement: 5 단계, 이미지 1/1
    • Pull the fan out of the housing unit.

    • You may need to use the iFixit Jimmy tool to help pull the fan out.

결론

To reassemble your device, follow these instructions in reverse order.

Zahria Martin

회원 가입일: 01/30/20

196 평판

안내서 2개 작성하였습니다

댓글 0개

댓글 쓰기

조회 통계:

24 시간 전: 2

7일 전: 4

30일 전: 9

전체 시간: 374