주요 콘텐츠로 건너뛰기

Acer Aspire One P1VE6 Hard Drive Replacement

필요한 것

  1. Acer Aspire One P1VE6 Hard Drive Replacement, Back Panel: 1 단계, 이미지 1/1
    • Close the netbook and turn it over so the back panel faces you.

  2. Acer Aspire One P1VE6 Hard Drive Replacement: 2 단계, 이미지 1/1
    • Locate the 4 mm Phillips #1 screw at the bottom of the back panel. Using the Phillips head screwdriver, remove the screw. Place the screw somewhere it will not be lost. Then remove the back panel by gently sliding it towards the front.

  3. Acer Aspire One P1VE6 Hard Drive Replacement, Hard Drive: 3 단계, 이미지 1/1
    • After removing the back panel, locate the hard drive.

  4. Acer Aspire One P1VE6 Hard Drive Replacement: 4 단계, 이미지 1/1
    • Carefully lift up the hard drive.

  5. Acer Aspire One P1VE6 Hard Drive Replacement: 5 단계, 이미지 1/2 Acer Aspire One P1VE6 Hard Drive Replacement: 5 단계, 이미지 2/2
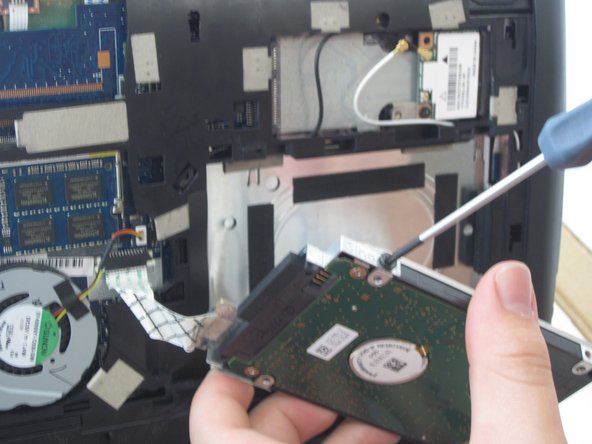
    • Locate the two 4 mm Philips #1 screws holding the hard drive into its bracket.

    • Remove the two screws and place them somewhere they will not be lost.

  6. Acer Aspire One P1VE6 Hard Drive Replacement: 6 단계, 이미지 1/2 Acer Aspire One P1VE6 Hard Drive Replacement: 6 단계, 이미지 2/2
    • Unplug the hard drive from the bracket.

결론

To reassemble your device, follow these instructions in reverse order.

Wade Vierheller

회원 가입일: 01/30/15

557 평판

안내서 5개 작성하였습니다

댓글 2개

tiene 4 ram hasta cuanto soporta gracias...

elteto77 - 답글

Was reviewing this to see if it was possible to reattach the drive connector if removed. (dealing with this in this model of laptop)

Shirley Hicks - 답글

댓글 쓰기

조회 통계:

24 시간 전: 0

7일 전: 11

30일 전: 23

전체 시간: 2,776