주요 콘텐츠로 건너뛰기
수리 커뮤니티 가입 - 계정 만들기
Acer Aspire One ZG5 Fan Replacement

필요한 것

    1. Acer Aspire One ZG5 Fan Replacement, Battery: 1 단계, 이미지 1개 중 1개
      • Turn the netbook upside down with the battery at the top, facing away from you.

      댓글 쓰기

    2. Acer Aspire One ZG5 Fan Replacement: 2 단계, 이미지 1개 중 1개
      • Unlock the battery by sliding the switch located near the left hinge to the left "unlocked" position.

      댓글 쓰기

    3. Acer Aspire One ZG5 Fan Replacement: 3 단계, 이미지 1개 중 1개
      • Slide the latch located on the opposite hinge from the lock while pushing the battery up.

      댓글 쓰기

    1. Acer Aspire One ZG5 Fan Replacement, Wireless Card: 4 단계, 이미지 1개 중 1개
      • Gently loosen the two Phillips #0 screws in the small panel that covers the wireless card.

      • These screws are built into the panel and aren't meant to be completely removed.

      댓글 쓰기

    2. Acer Aspire One ZG5 Fan Replacement: 5 단계, 이미지 1개 중 1개
      • Lift up the panel and remove it from the case.

      댓글 쓰기

    3. Acer Aspire One ZG5 Fan Replacement: 6 단계, 이미지 1개 중 1개
      • Disconnect the two antenna cables from the left side of the wireless card.

      댓글 쓰기

    4. Acer Aspire One ZG5 Fan Replacement: 7 단계, 이미지 1개 중 1개
      • Remove the single 3.9 mm Phillips #1 screw from the bottom left of the wireless card.

      댓글 쓰기

    5. Acer Aspire One ZG5 Fan Replacement: 8 단계, 이미지 1개 중 1개
      • Gently lift up the left side of the wireless card and slide the card out of its socket.

      댓글 쓰기

    1. Acer Aspire One ZG5 Fan Replacement, Keyboard: 9 단계, 이미지 1개 중 1개
      • Turn the netbook over and open the display so that the keyboard is facing you.

      댓글 쓰기

    2. Acer Aspire One ZG5 Fan Replacement: 10 단계, 이미지 3개 중 1개 Acer Aspire One ZG5 Fan Replacement: 10 단계, 이미지 3개 중 2개 Acer Aspire One ZG5 Fan Replacement: 10 단계, 이미지 3개 중 3개
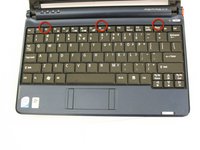
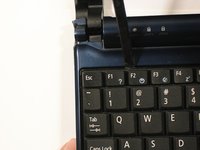
      • There are three tabs located on the top of the keyboard.

      • Start with the spudger pointing towards the display and pry up to push each tab off the keyboard.

      • As you move to the next tab, ensure the previous tab doesn't reset itself.

      댓글 쓰기

    3. Acer Aspire One ZG5 Fan Replacement: 11 단계, 이미지 2개 중 1개 Acer Aspire One ZG5 Fan Replacement: 11 단계, 이미지 2개 중 2개
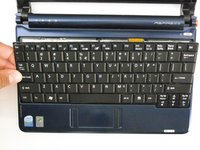
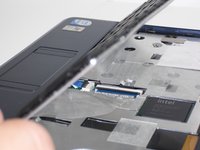
      • Lift top of keyboard up. If it doesn't lift easily, there may be tabs on the sides - use the tool to ease them aside and/or shift the keyboard from side to side.
      • There is a short ribbon cable connecting the keyboard to the netbook.

      댓글 쓰기

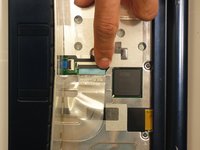
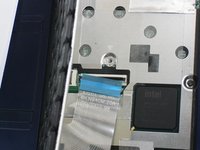
    4. Acer Aspire One ZG5 Fan Replacement: 12 단계, 이미지 2개 중 1개 Acer Aspire One ZG5 Fan Replacement: 12 단계, 이미지 2개 중 2개
      • Disconnect the ribbon by lifting the black plastic hinge and removing the clear blue cable.

      댓글 쓰기

    1. Acer Aspire One ZG5 Fan Replacement, Top Case: 13 단계, 이미지 1개 중 1개
      • Close the display and turn the ZG5 over so that the battery compartment faces away from you.

      댓글 쓰기

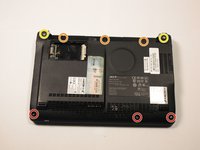
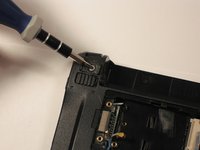
    2. Acer Aspire One ZG5 Fan Replacement: 14 단계, 이미지 2개 중 1개 Acer Aspire One ZG5 Fan Replacement: 14 단계, 이미지 2개 중 2개
      • Remove three 5.8 mm Phillips #0 screws from the bottom of the case

      • Remove three 3.9 mm Phillips #1 screws from the battery compartment.

      • Remove two 5.8 mm Phillips #0 screws from underneath the feet near the hinges.

      댓글 쓰기

    3. Acer Aspire One ZG5 Fan Replacement: 15 단계, 이미지 1개 중 1개
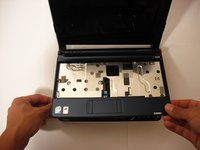
      • Turn the netbook back over and open the display with the keyboard cavity facing you.

      댓글 쓰기

    4. Acer Aspire One ZG5 Fan Replacement: 16 단계, 이미지 3개 중 1개 Acer Aspire One ZG5 Fan Replacement: 16 단계, 이미지 3개 중 2개 Acer Aspire One ZG5 Fan Replacement: 16 단계, 이미지 3개 중 3개
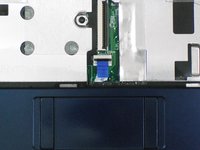
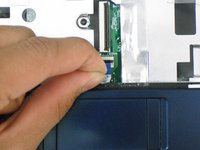
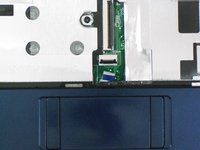
      • Flip up the retaining flap on the trackpad ribbon cable ZIF connector.

      • Using the blue tab, pull the trackpad ribbon cable from its socket on the motherboard.

      댓글 쓰기

    5. Acer Aspire One ZG5 Fan Replacement: 17 단계, 이미지 2개 중 1개 Acer Aspire One ZG5 Fan Replacement: 17 단계, 이미지 2개 중 2개
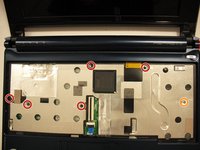
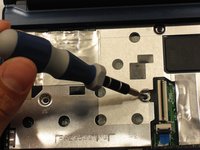
      • Remove the five black 4.7 mm Phillips #0 screws from the metal casing.

      • Remove the single silver 4.3 mm Phillips #00 screw from the right side of the metal casing.

      댓글 쓰기

    6. Acer Aspire One ZG5 Fan Replacement: 18 단계, 이미지 2개 중 1개 Acer Aspire One ZG5 Fan Replacement: 18 단계, 이미지 2개 중 2개
      • Starting at the red rings along the hinge, insert a spudger or plastic opening tool into the seam between the two halves of the case.

      • Slide the spudger toward the front of the device, releasing the small clips that hold down the top case.

      • Gently lift off the top case.

      댓글 쓰기

    1. Acer Aspire One ZG5 Fan Replacement, Internal Wireless Card: 19 단계, 이미지 1개 중 1개
      • Disconnect the two antenna cables from the right side of the wireless card.

      댓글 쓰기

    2. Acer Aspire One ZG5 Fan Replacement: 20 단계, 이미지 1개 중 1개
      • Remove the single 3.9 mm Phillips #1 screw from the wireless card.

      댓글 쓰기

    3. Acer Aspire One ZG5 Fan Replacement: 21 단계, 이미지 1개 중 1개
      • Gently pull the wireless card to the right and slide it out of its socket.

      댓글 쓰기

    1. Acer Aspire One ZG5 Fan Replacement, Motherboard: 22 단계, 이미지 1개 중 1개
      • Disconnect the display cable from the top left of the motherboard.

      댓글 쓰기

    2. Acer Aspire One ZG5 Fan Replacement: 23 단계, 이미지 2개 중 1개 Acer Aspire One ZG5 Fan Replacement: 23 단계, 이미지 2개 중 2개
      • Disconnect the speaker cable from its socket on the motherboard.

      댓글 쓰기

    3. Acer Aspire One ZG5 Fan Replacement: 24 단계, 이미지 1개 중 1개
      • Remove three 3.9 mm Phillips #1 screws from the small I/O board.

      • Remove a single 3.9 mm Phillips #0 screw from the front of the motherboard.

      • Some laptops may instead have a single 4.7 mm Phillips #0 screw.

      댓글 쓰기

    4. Acer Aspire One ZG5 Fan Replacement: 25 단계, 이미지 1개 중 1개
      • Remove the two 4.7 mm Phillips #1 screws that connect the display to the motherboard.

      댓글 쓰기

    5. Acer Aspire One ZG5 Fan Replacement: 26 단계, 이미지 1개 중 1개
      • Gently lift the I/O board up from the right side of the case.

      • The I/O board is attached to the motherboard by a short cable.

      댓글 쓰기

    6. Acer Aspire One ZG5 Fan Replacement: 27 단계, 이미지 1개 중 1개
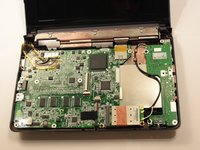
      • Lift the entire motherboard assembly out the case.

      댓글 쓰기

    1. Acer Aspire One ZG5 Fan Replacement, Fan: 28 단계, 이미지 2개 중 1개 Acer Aspire One ZG5 Fan Replacement, Fan: 28 단계, 이미지 2개 중 2개
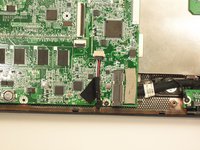
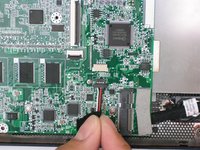
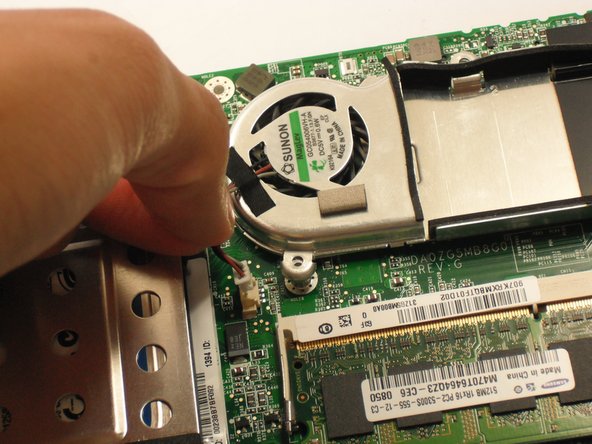
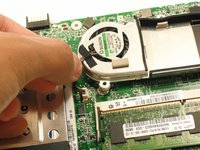
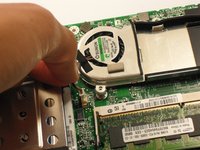
      • Disconnect the fan cable from the motherboard.

      댓글 쓰기

    2. Acer Aspire One ZG5 Fan Replacement: 29 단계, 이미지 1개 중 1개
      • Remove the three 3.9mm screws using Phillips #1 screwdriver.

      댓글 쓰기

    3. Acer Aspire One ZG5 Fan Replacement: 30 단계, 이미지 1개 중 1개
      • Lift the fan housing from the motherboard.

      댓글 쓰기

결론

To reassemble your device, follow these instructions in reverse order.

취소: 해당 안내서를 완성하지 않았습니다.

다른 10명이 해당 안내서를 완성하였습니다.

작성자

3다른 기여자 명과 함께

Doug Gallatin

회원 가입일: 10/05/10

6,385 평판

안내서 10개를 작성함

Cal Poly, Team 7-49, Amido Fall 2010 Cal Poly, Team 7-49, Amido Fall 2010 회원

CPSU-AMIDO-F10S7G49

5 회원들

안내서 120개를 작성함

4가이드 댓글

Steps 4~8 show to remove the wireless card from its access panel outside the computer, then steps 19~21 show to remove it from the inside once the case is off.

Redundant?

I drink beer - 답글 공유

There are two wireless cards -- for that exact model it looks like bluetooth and 802.11n but different models may be different

nathan - 답글 공유

I couldn't ask for it to be any easier. Great job.

Ron Price - 답글 공유

The page layout is good.well done job.thanks for providing the repairing information about Acer aspire one.it is the very interesting web page.http://djnni.com

belly william - 답글 공유

댓글 쓰기

조회 통계:

지난 24시간: 2

지난 7일: 44

지난 30일: 78

전체 시간: 28,603